Buttons are a great way to bridge the old and the new. We’re beginning to see more and more of these buttons pop onto the market including offerings by the likes of Logitech, Eve, and Fibaro. Buttons give us a fair amount of flexibility to be able to control a wide range of our HomeKit accessory power states. However, they are limited by HomeKit to a specific number of assignable actions … or are they? Today, we’ll look at how to effectively double the amount of actions your button, or in our case switch, perform allowing you to use the same action to turn your accessory on or off depending on its current state. Our objective is to use one button to both turn on and off lights, but this can be applied to any number of HomeKit accessories including outlets, locks, garage doors, etc.
If you’re interested in playing along, you’ll need:
- an Apple Home hub – Seeing as how automations require a Home hub, you’ll need an Apple TV, HomePod, or an always-on and at-home iPad.
- a HomeKit button or switch – As we mentioned there are currently buttons available from Logitech, Eve, and Fibaro, but essentially the methods outlined in this walkthrough can be used with any HomeKit-enabled button OR switch, including the Hue Tap switch which we will be using today.
- a third-party HomeKit app – As of the writing of this guide, Apple’s Home does not allow for such actions, but the HomeKit framework does and apps like Home 3, Hesperus, or the Eve for HomeKit app. I like the Eve for HomeKit app as you may already be aware so I’ll be using that one for this tutorial today.
First thing’s first, make sure you have added your button or switch to HomeKit. If it is a stand-alone accessory like the Eve Button or the Fibaro The Button, the process is the standard procedure for adding an accessory. If it is an accessory that requires a bridge or hub like the Logitech POP or, in our case, the Phillips Hue Tap switch, then you’ll want to add the device to the corresponding bridge first in order for it to be exposed in HomeKit. Something important to note in order for this to work, you’ll need to clear any assigned actions for the button selection you plan on doubling up on. For example, the Hue Tap has four buttons that are exposed in HomeKit and since in this guide we’re working with just the first button, you’ll want to make sure and clear any existing actions assigned to the first button. 1-2

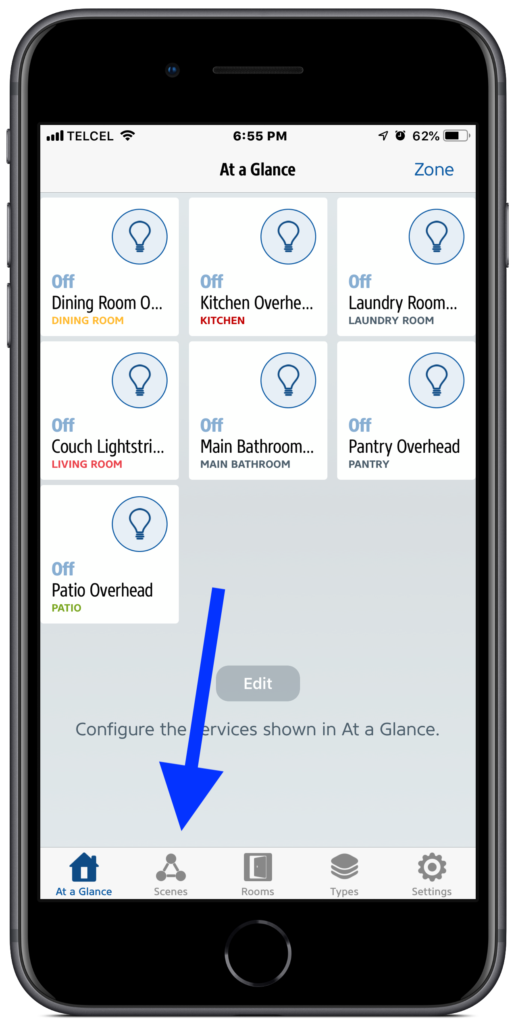
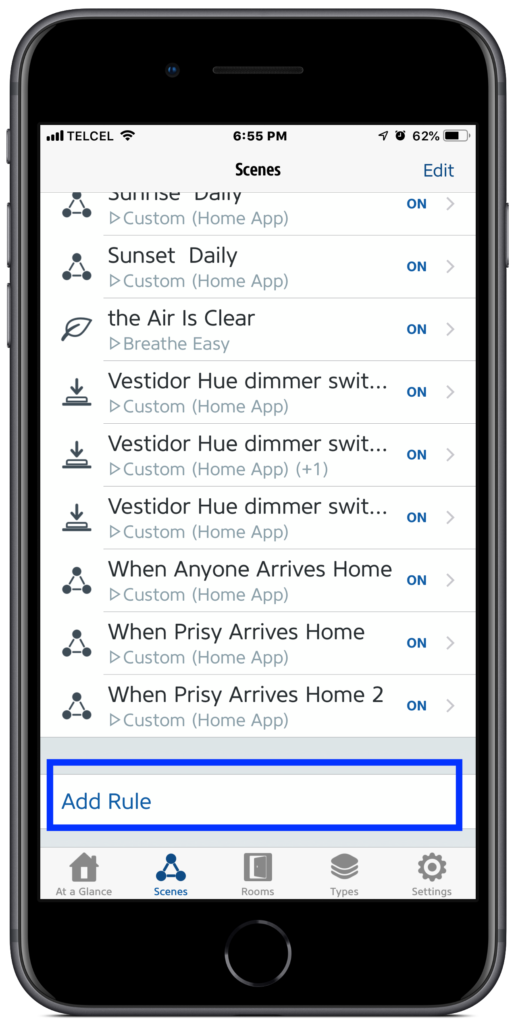
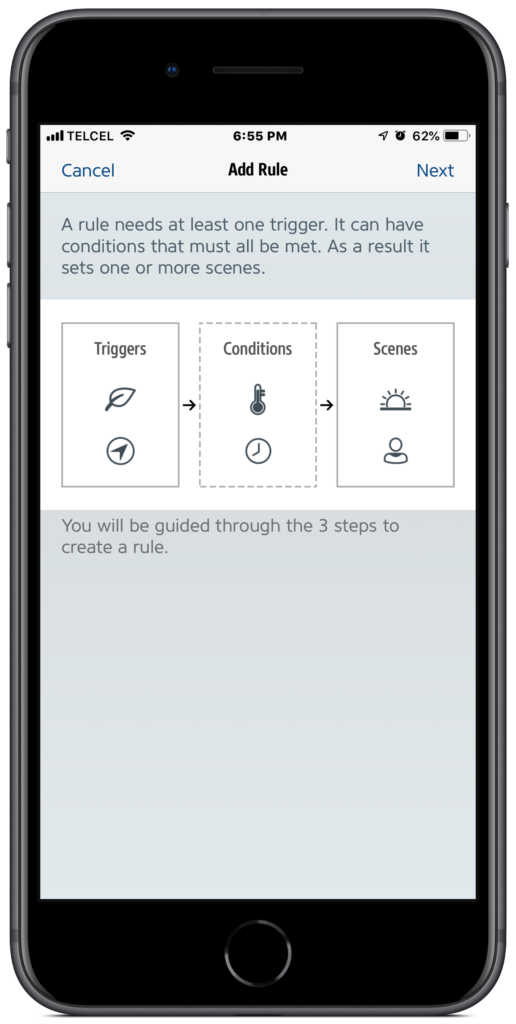
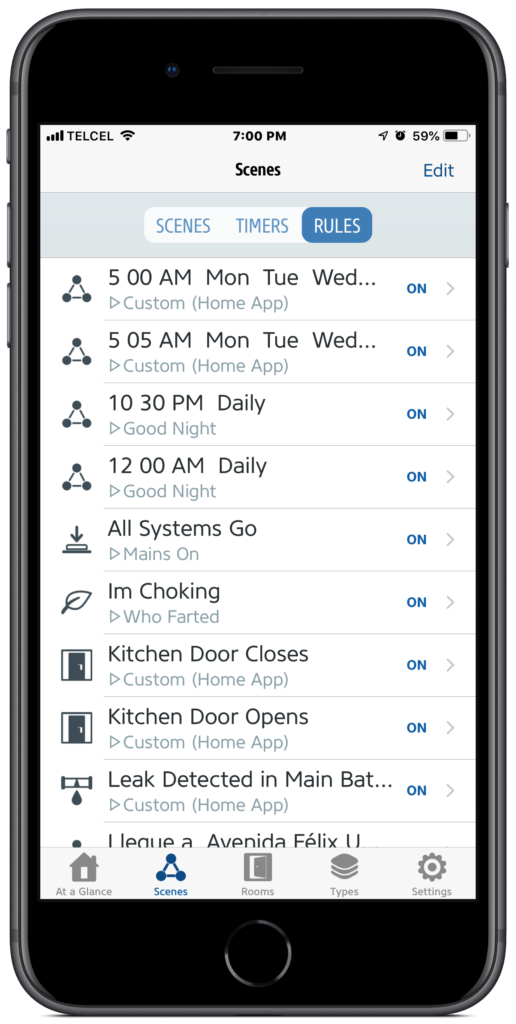
1. Once we’ve launched the Eve for HomeKit app, we’ll slide on over to our “Scenes” tab and tap on the “Rules” selection at the top. After scrolling to the bottom of our list of HomeKit automations and choosing “Add Rule…” and reviewing Eve’s handy explanation of how their rules are configured, we’ll “Add Trigger”, which is our button press.


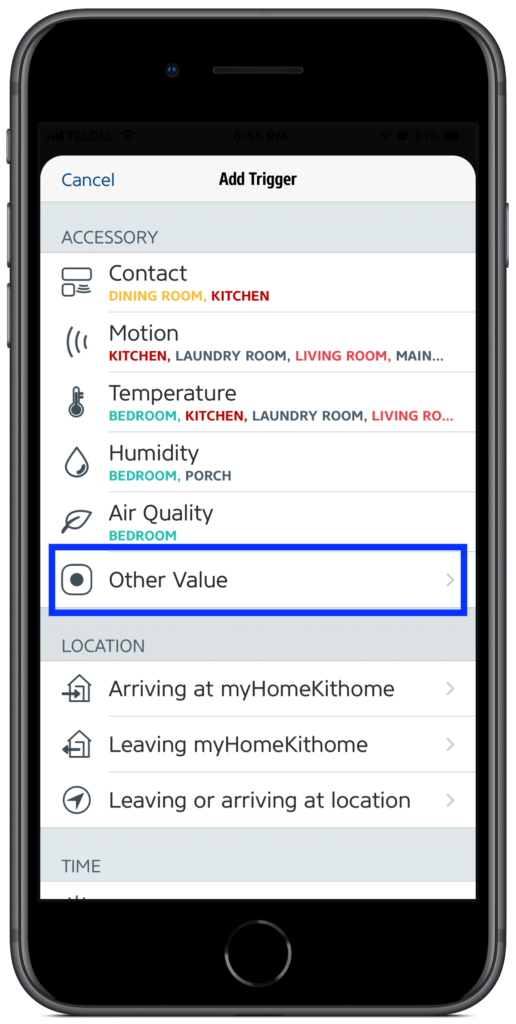
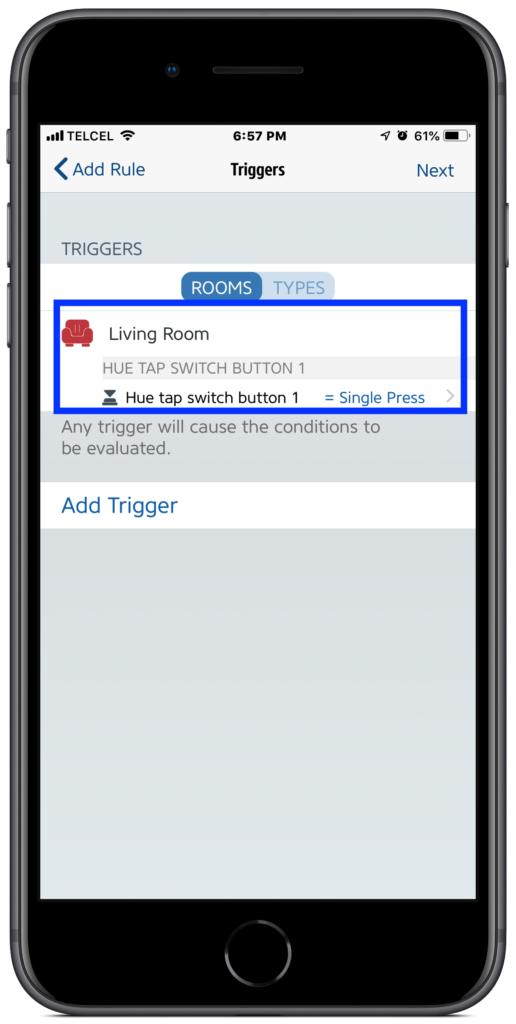
2. You’ll need to track down your button or switch in your Home. In my case, I found it by selecting “Other Value”, then going into the room the switch is in “Living Room”, and not only finding the device “Hue Tap”, but also the specific button on the Hue Tap switch. This will be different if you are using a button instead of a switch.


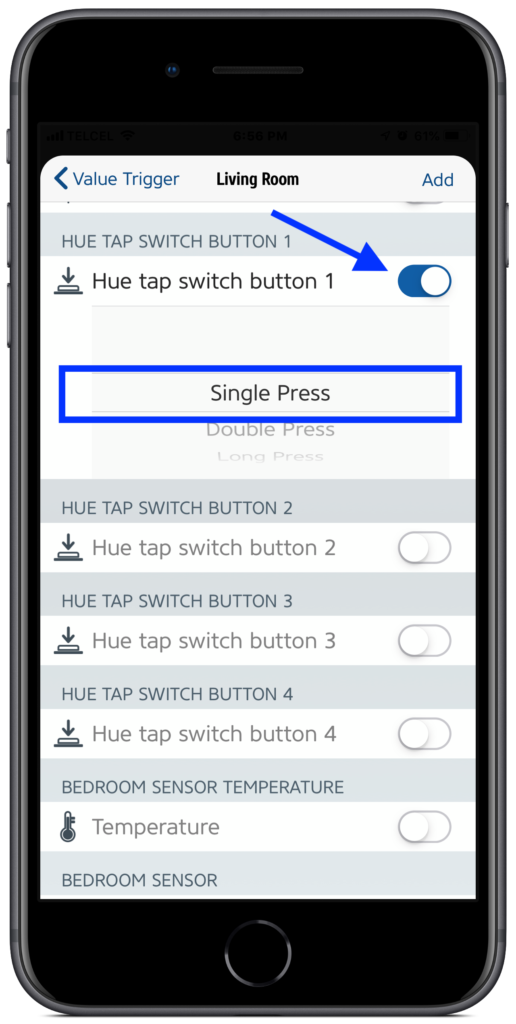
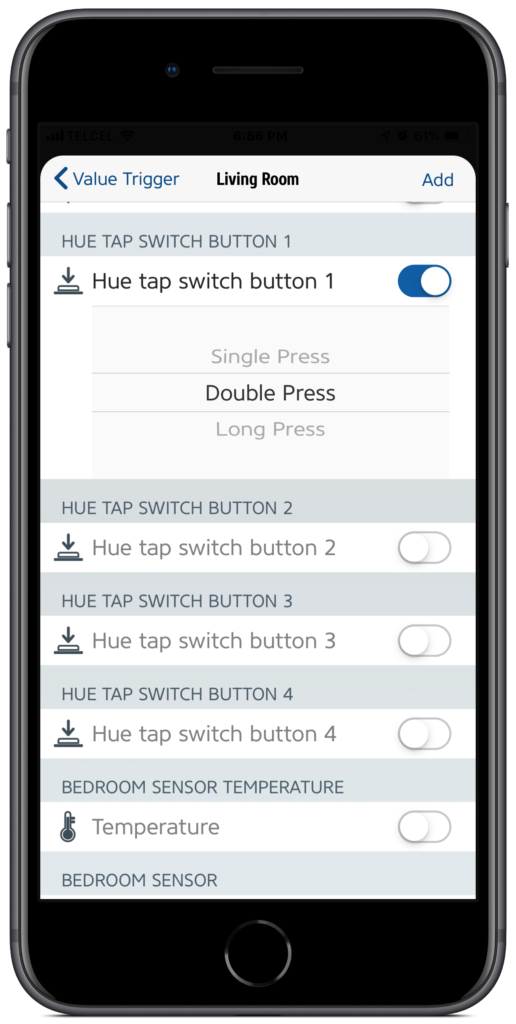

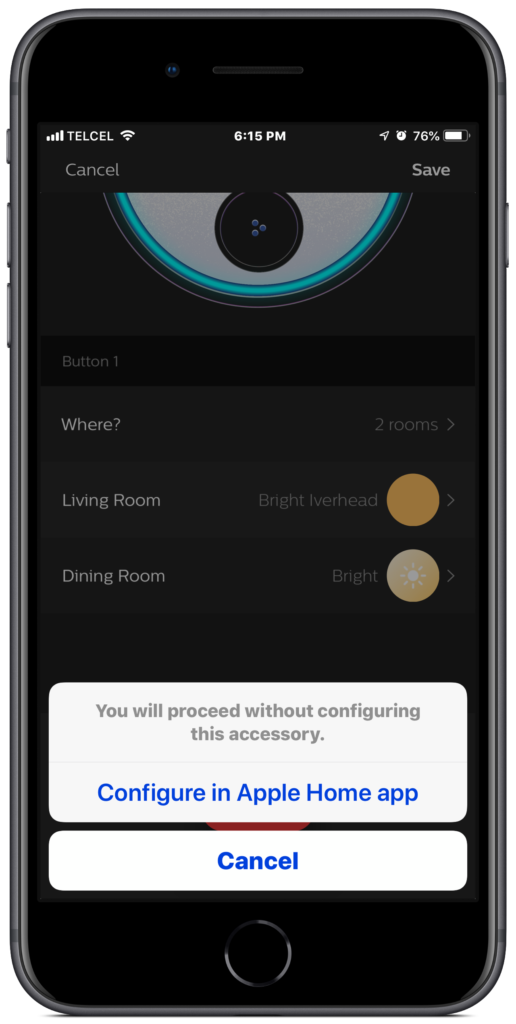
I like to save you time and frustration whenever I can and here’s a great opportunity to do so. If you are setting up this automation using a switch like the Hue Tap, a Caseta Switch, or any other multi-button switch, you’ll notice that you are given the option for a “single press”, “double press”, or “long press”, but lest you think that you’ve uncovered a hidden feature, this is not the case. You’ll go through the entire automation process only to receive this error message:
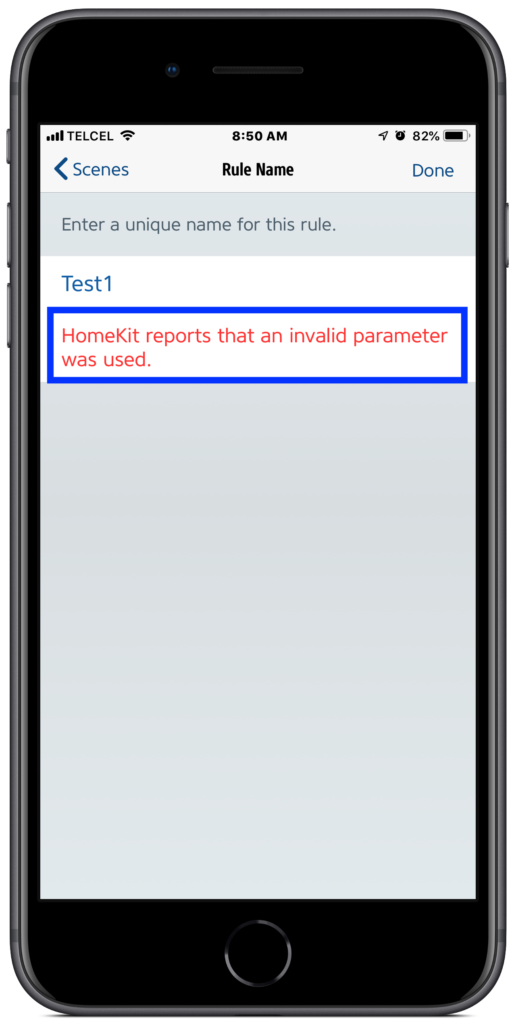
Tragic, I know. Suffice it to say, only select “single press” if you are using this guide for a switch.
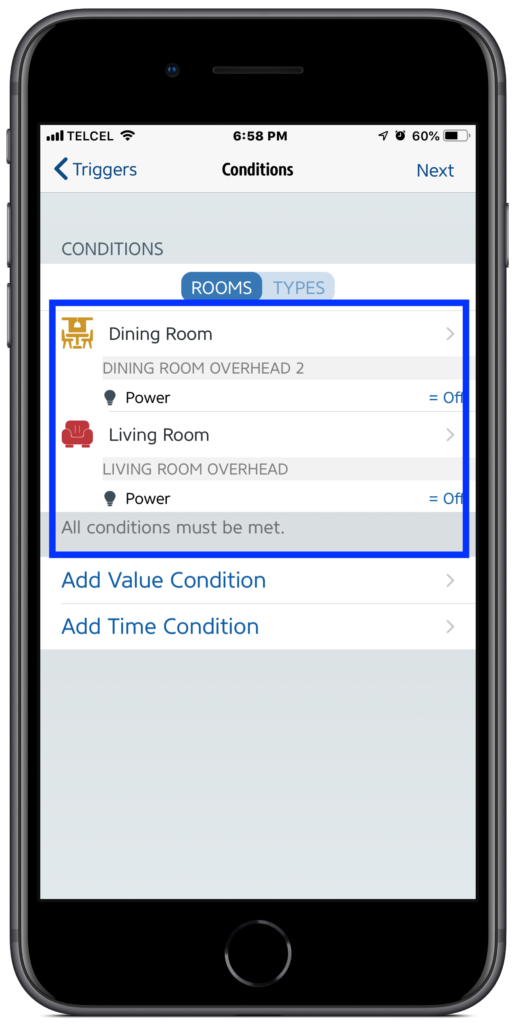
3. Now that we’ve selected our Trigger, it’s on to Conditions which are the key that makes this particular automation work. As we saw in Eve’s explanation, automations are an order of operations game. Once the trigger has been set, then conditions are analyzed to check to see if they are met. If they are BOOM! run action. If not, life isn’t so exciting. What we want to do is have the automation check if the lights are off. If they are, then the action is to turn them on. We’ll reverse this idea in a moment.
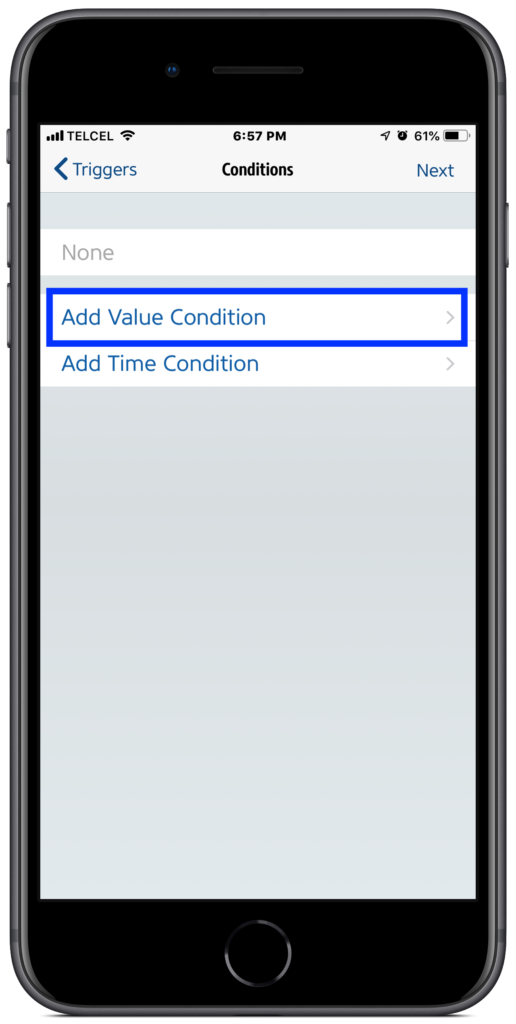
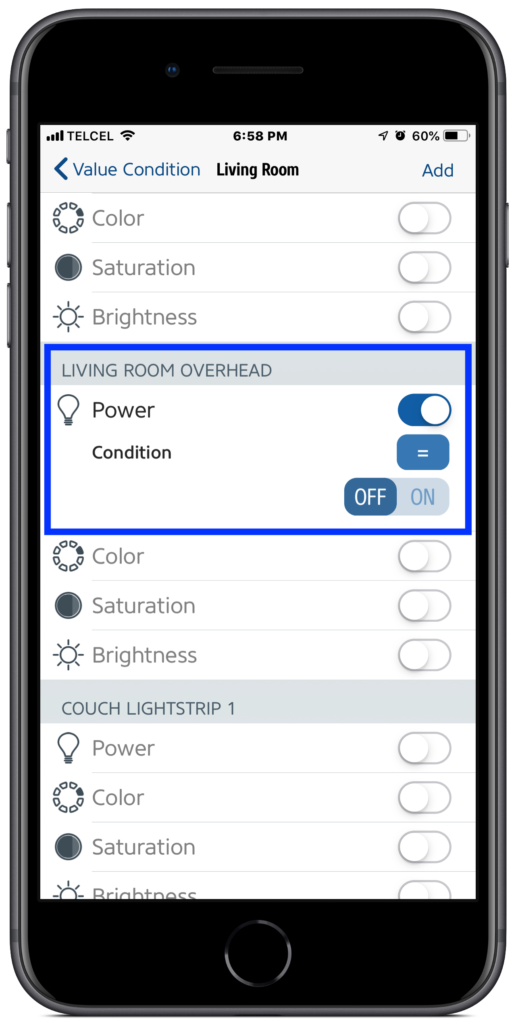

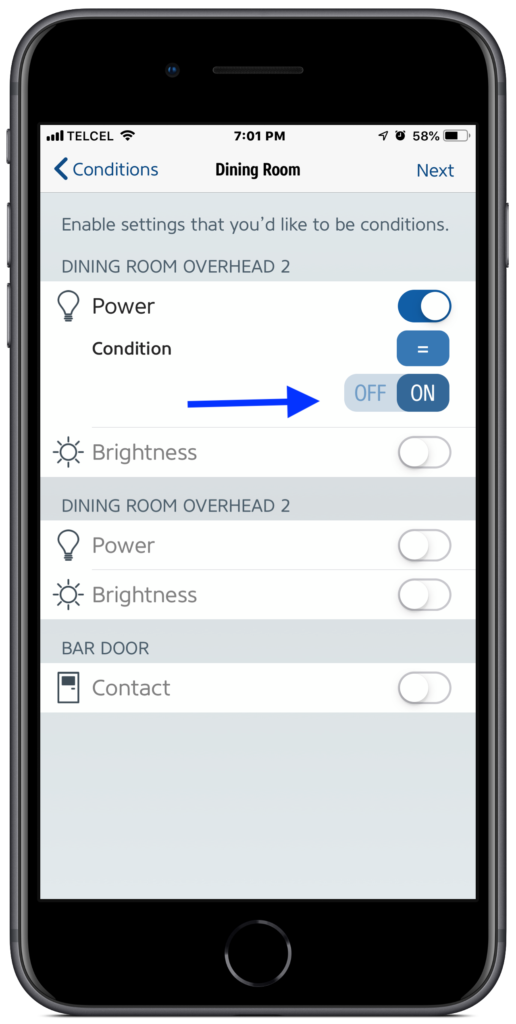
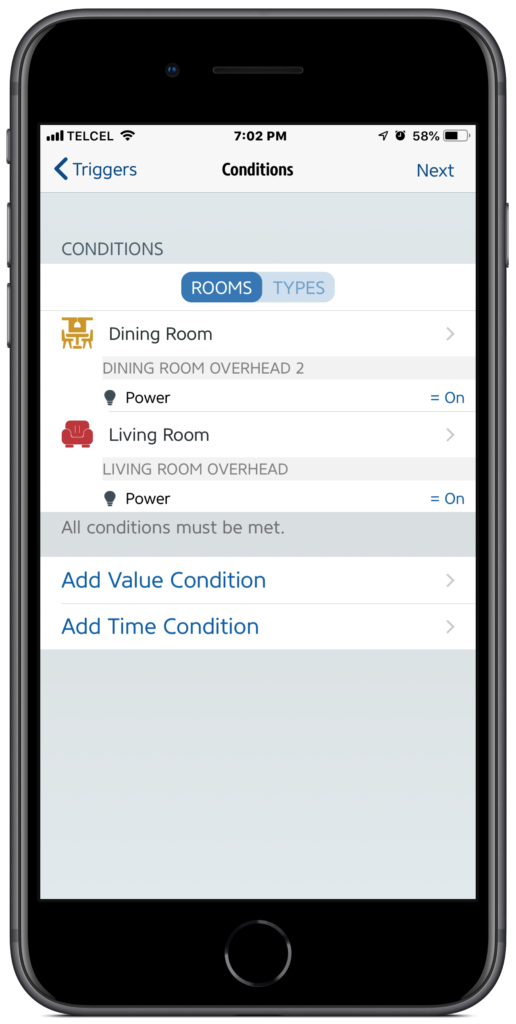
Selecting “Add Value Condition”, we’ll track down our condition lights. Since the lights that I want to turn on are in a living area called “Living Room” in HomeKit and in a dining area called “Dining Room”, I’ll find these two lights and select them making sure that their value is “=“ to “Off”. On a side note, the living area has a few different accent lighting that I’m not worried about for this automation as my intention is to be able to press the button and have a simply lit area. Also, you may notice that in the “Dining Room” I only selected one of the overhead lights. This is because these two lights are in the canopy of a ceiling fan and I have them grouped together in HomeKit so adding the second one would be a waste of time and energy. Finally, at this point, I’m really only concerned if these lights are on or off, but you can make this automation as complicated as you would like accounting for hue, saturation, brightness, etc. Automate everything! 16-19
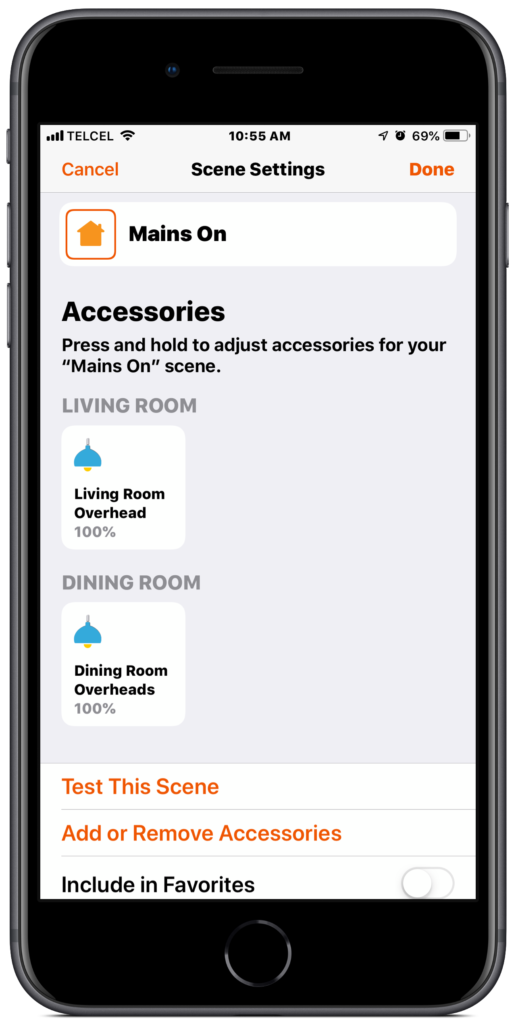
4. After finishing up our conditions and tapping “Next”, we’ll now turn our attention to what happens once we’ve triggered our automation (pressed the button once) and the conditions have been met (the lights are off), and that is our action (the lights turn on). For this demonstration, I went ahead and set up a scene that takes care of this in Apple’s Home app, but you can select “Add Scene” at the bottom of the list of scenes to address your actions. A peculiarity of the Eve for HomeKit app is that you are required to create a scene rather than simply selecting one or more accessories to control. If you’d like a tutorial on how to create a scene in Apple’s Home app, you can check out our guide here. Another requirement of the Eve app is that we need to give our rules names. I chose “All Systems Go” for this first one.


5. So that’s our first single press out of the way. The logical thing to do next would be to create the converse action having a second single press turn the lights off, but I wanted to take it a little further, but a bit of context is in order. This Hue Tap is situated in a large room that has been divided into two areas: a living area and a dining area with a sofa serving to divide the space. As the place is setup, the front door leads into the dining room and as you are entering the living area, the Hue Tap is mounted between the two areas. So the idea is that you may need a well-lit main living area, but it is likely that as you are leaving, you might want to turn off all the lights in the entire home. So what I want to do is have our second single press not only turn off the living and dining area lights, but any other lights that may be on in the house. However regardless of the action you choose the trigger and condition accessories are the same.

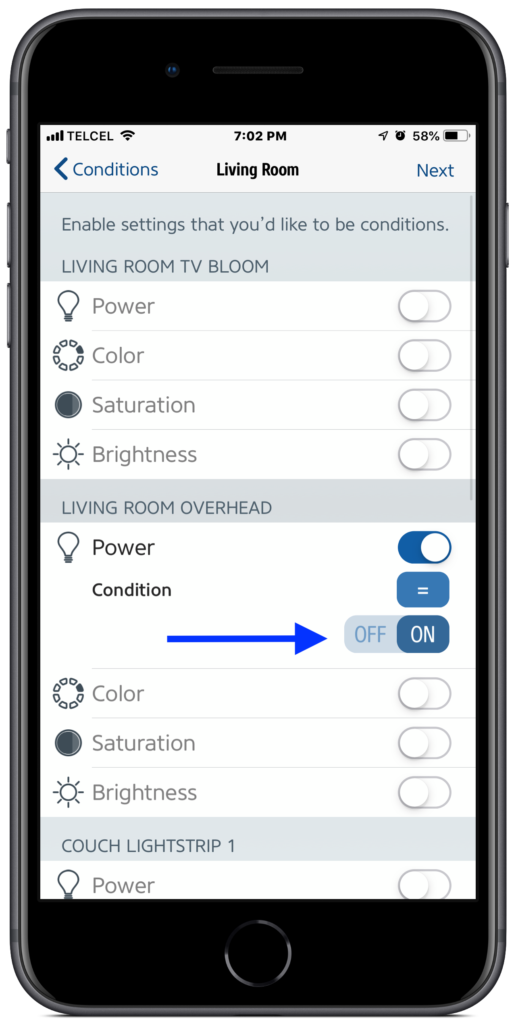
6. As we mentioned, the trigger is exactly the same as in the first automation. Don’t be tempted to select double-press! Your water heater might burst! Or you’ll receive an error message. Just don’t try it. What makes this automation work is the conditions. As with the first automation, we wanted the lights to turn on if they were off, now if they are on, we want all of the lights in the house to turn off. So we’ll choose the same lights in the dining and living areas modifying their power states to “On”.
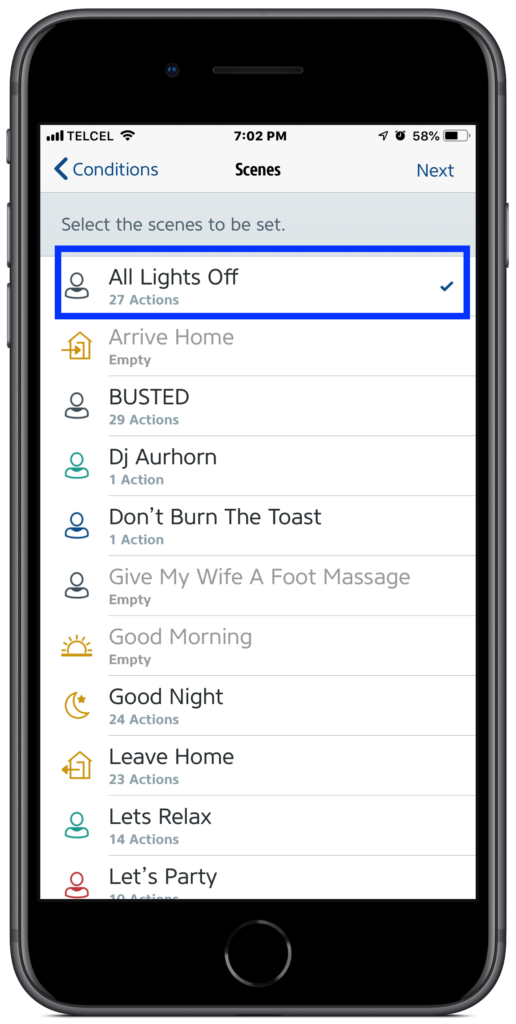
7. Again, I went ahead and set up a scene that turns off all the lights in the home so I selected that one, but you’ll want to choose your own pre-made scene or set one up. Finally, we’ll choose another clever name for our newly-minted automation.


All that’s left to do is enjoy the fruits of your labor! While not exactly flashy, it is pretty practical. Remember, we’re not just limited to lights for this type of automation. We can also have the button lock and unlock a door, open and close blinds, turn on and off a diffuser, or start and stop watering the lawn. Basically, anything that has on and off functionality in HomeKit would be great for this type of automation. Also, we can start to be creative with the conditions we set for the automations accounting for time, people, etc.
What creative uses have you found for buttons and switches in HomeKit? The comment section is hungry for your words. Don’t forget to follow us one social media for more HomeKit goodness @myhomekithome.
Links & Resources
We use income-earning affiliate links.
We may receive a small commission on purchases made using links on this page at no extra cost to you.