You’ve chosen your platform, HomeKit obviously, and you’ve decided which device you want to start with. This article will take you through what to expect upon launching the Home app for the first time. I had a blast putting this article together. I really didn’t remember what I needed to do in order to setup a Home in the Home app. It reminded me just how quick, easy, and painless HomeKit setup is. After the step-by-step instructions via screenshots, I actually did a real-time walkthrough of setting up a home and was astonished at how quickly it was up and running.
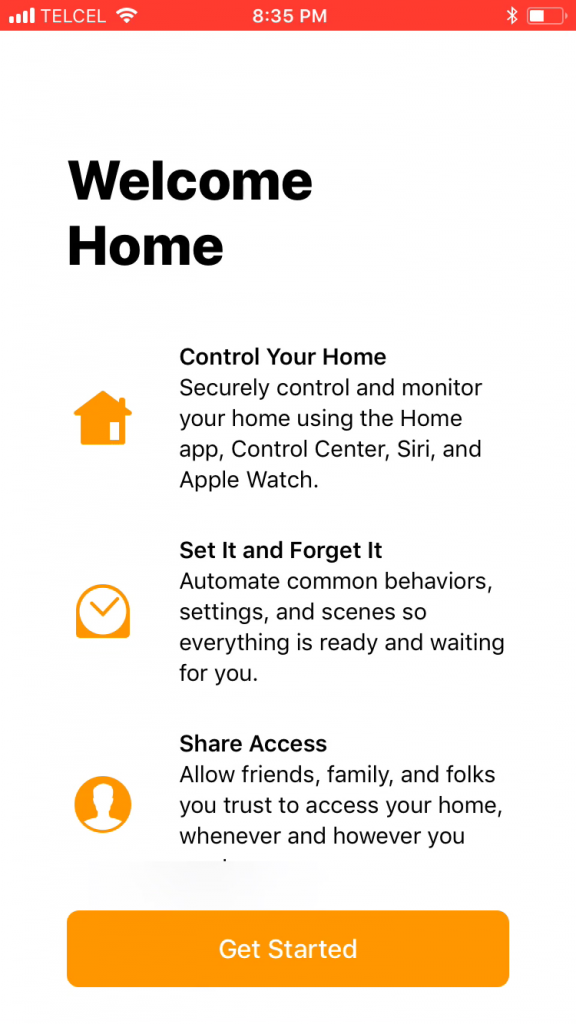
1. Upon launching Apple’s Home app, we’re greeted with a splash screen that gives us a brief overview of the app’s features.
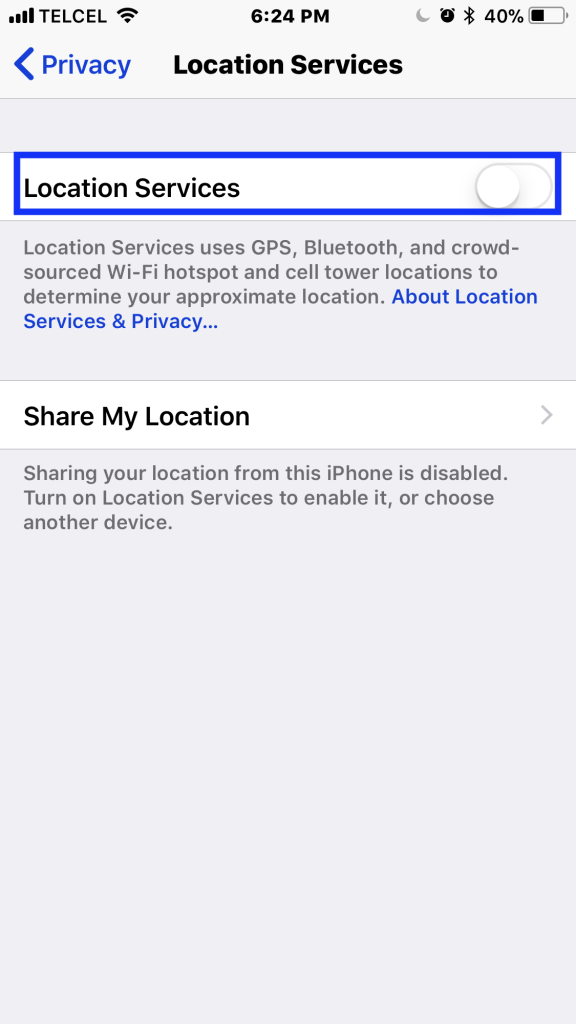
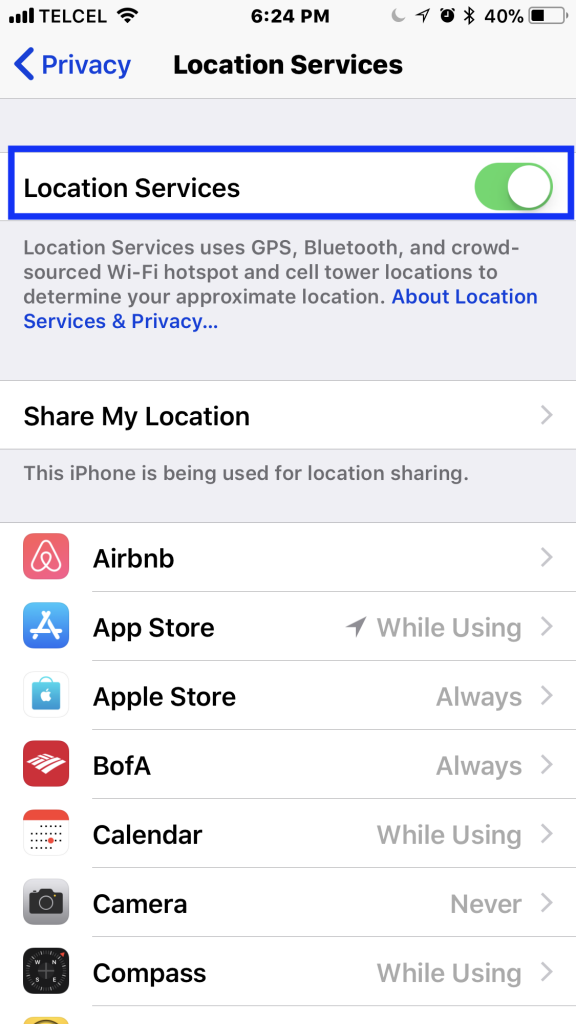
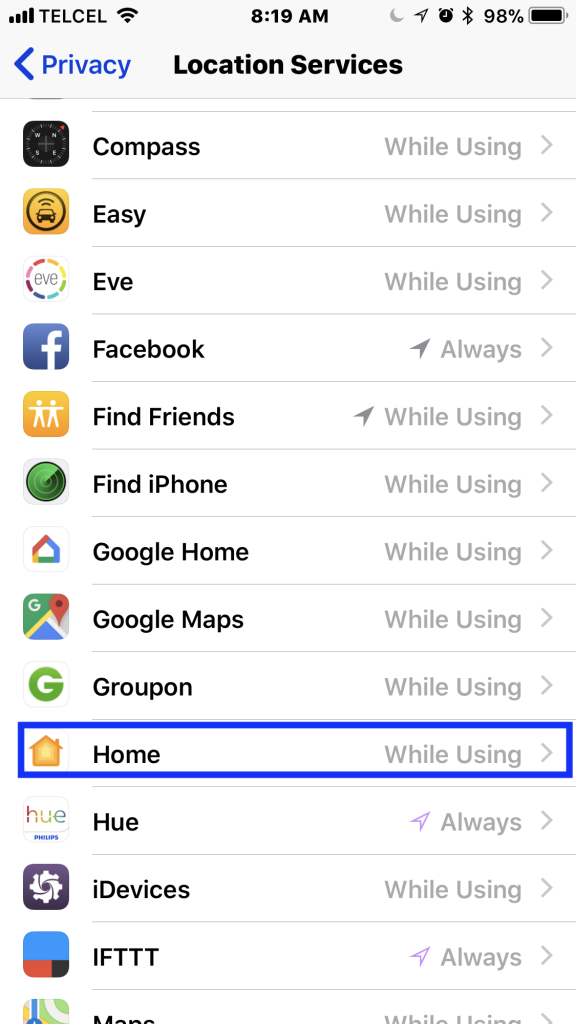
2. Once tapping ‘Get Started’, if you’ve not already allowed the Home app to use your location, you will be prompted to do so. If you have, this screen will not appear. You’ll need to enable location services for the Home app if you wish to use HomeKit’s full features. Tapping ‘Allow’ will take you to ‘Location Services’ which can be found in the ‘Privacy’ sub-menu of the Settings app.From here we need to turn on ‘Location Services’. You do not have to do this for all apps if you do not wish, but it is advisable for any HomeKit apps you use to avoid problems.
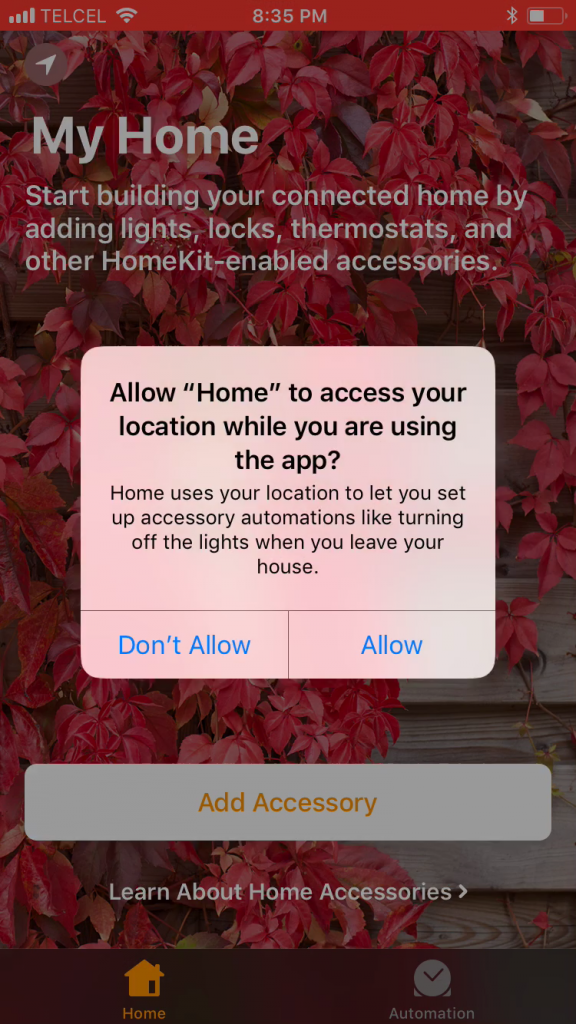


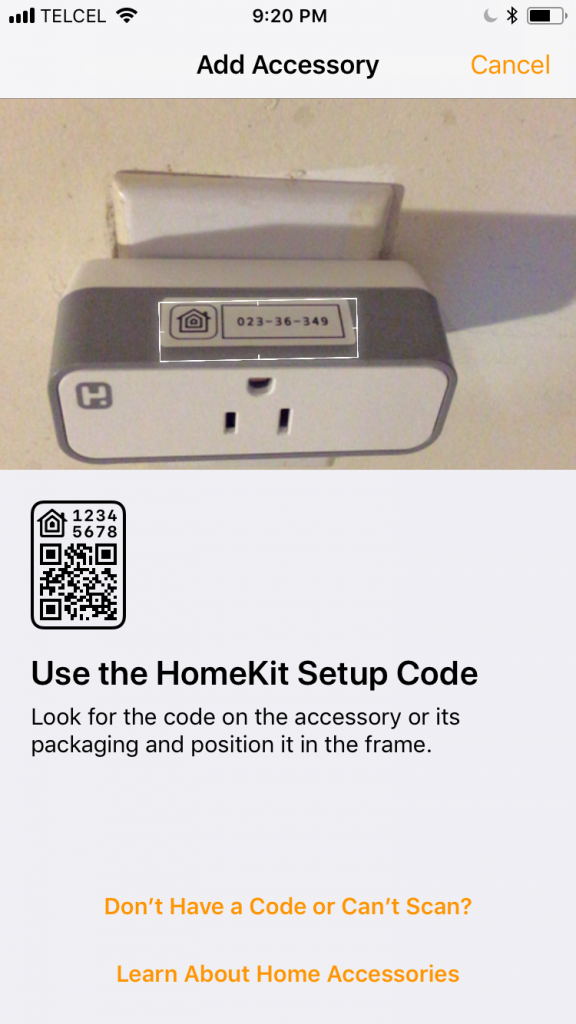
3. Once we’ve taken care of that, we’ll go back to the Home app and tap “Add Accessory” at the bottom.

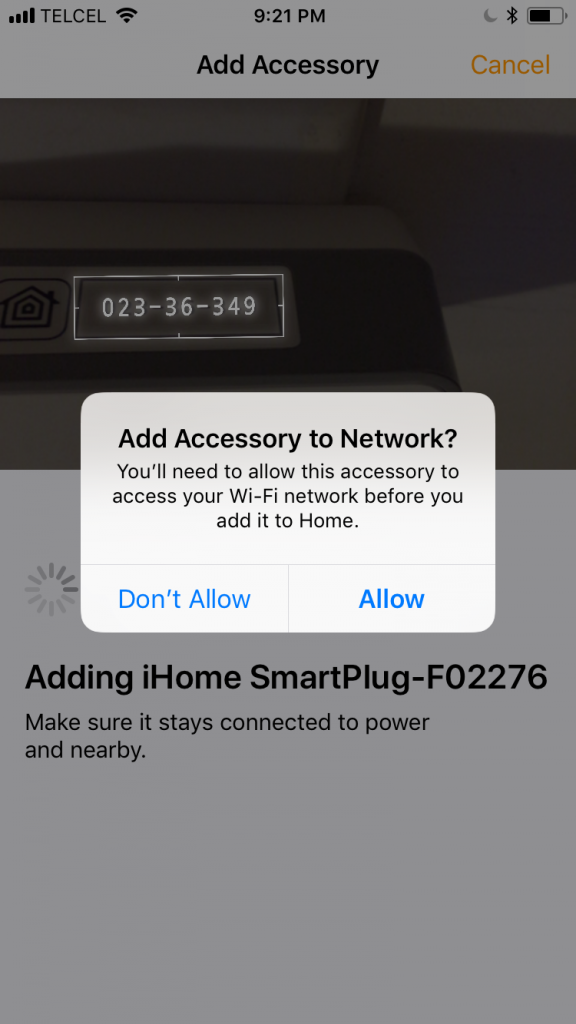
4. From here, we’ll be prompted to scan our HomeKit code,. Depending on when you are reading this and which device you are starting out with, your code may come in an 8-digit form as shown below, a QR code, or an NFC chip. Depending on the accessory, there may also be additional steps you need to take in the manufacturer’s app before setting up the accessory in HomeKit. When in doubt, consult the accessory packaging. It’s also possible that myHomeKithome has previously written up something about how to add different accessories. If all else fails, stalk the company on Facebook and/or Twitter and they’ll usually help…usually.
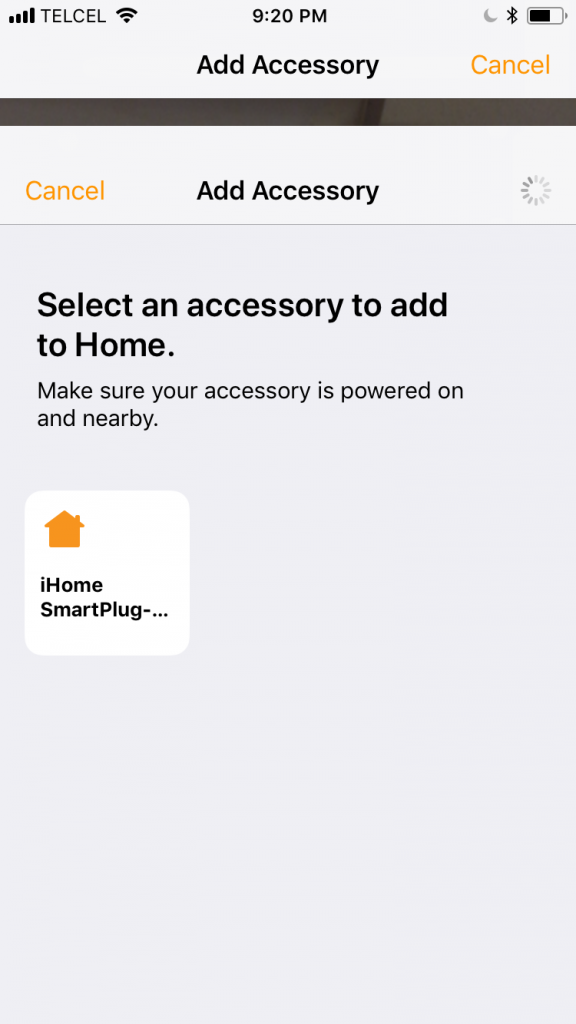
5. Now that we’ve gotten our HomeKit code entered, the setup process begins. You may or may not be prompted to allow the device to join your WiFi network, it depends on the accessory’s protocol, Bluetooth or WiFi. You don’t have to allow this permission, but if you don’t, you won’t be able to control the accessory wirelessly nor use it with HomeKit and you might as well just stop what you’re doing and continue living in the 20th century.
6. Now the magic happens. This is when HomeKit shines. The accessory is being linked to your iCloud account and configuring itself to work seamlessly with other products. This shouldn’t take more than a few minutes, if that.

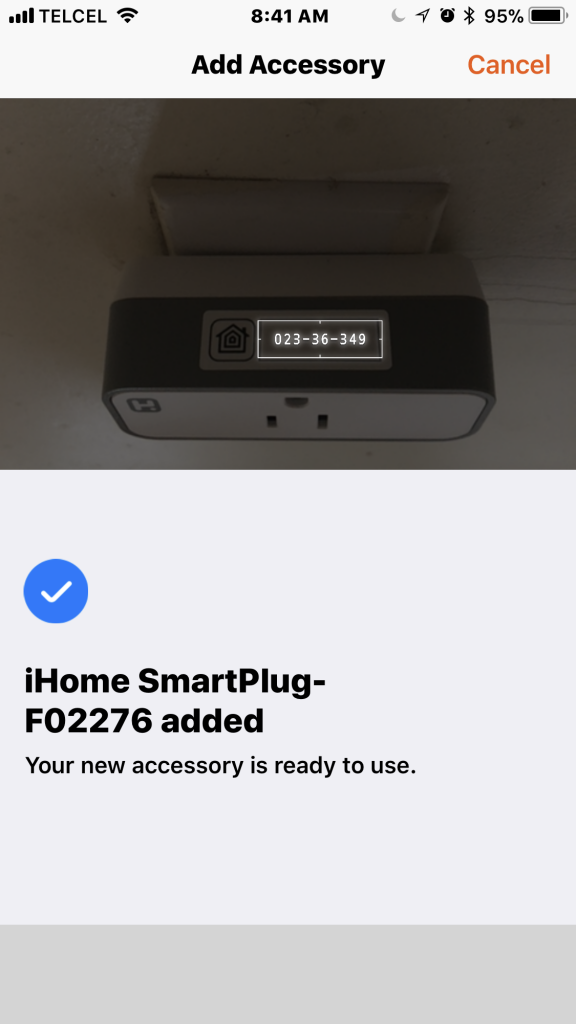
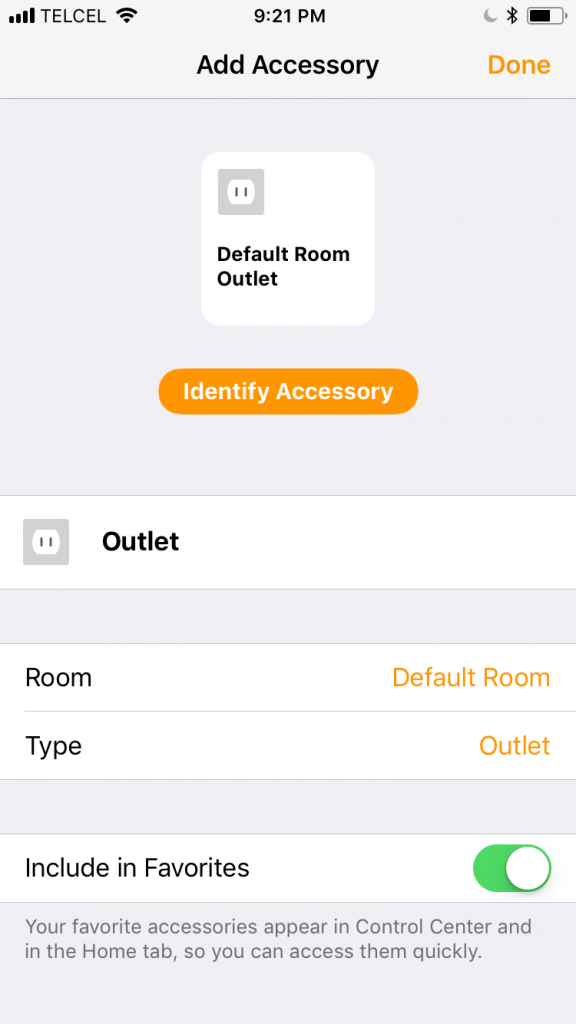
7. Dyn-o-mite! Now that the accessory has been added to your HomeKit, it’s your turn to configure it. We’ll go into this in more detail in an upcoming post. You can either leave it as is or adjust it to your liking.
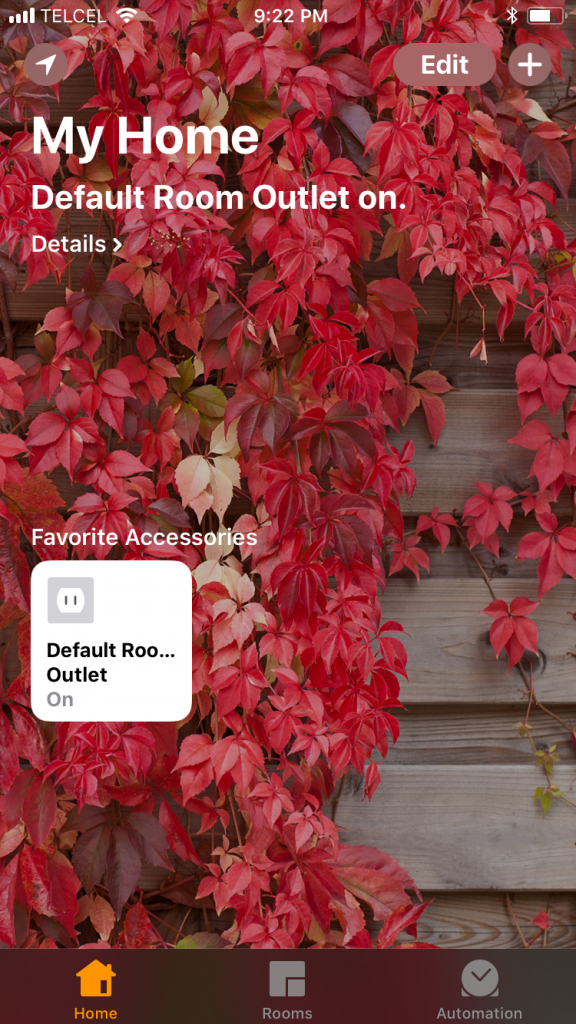
That is literally it! You can now control that accessory.
Final Thoughts
Welcome home! This is just the beginning. As you get more comfortable with HomeKit and the Home app, hopefully with some help from us, you’ll start to realize all of the different possibilities and potential of HomeKit. The brevity of this post and the accompanying video are evidence of why I am such a fan of this platform. It’s quick and easy and it’s rarely problematic.
I’ve extolled the virtues of making sure you have the manufacturer’s app in another post, but, as exemplified here, you can get straight to the point, with most accessories, using the Home app. This is to say, however, that the process of using most manufacturers’ apps should be 95% the same as this process as HomeKit apps are required to use the same framework.
This is the first step in you building and customizing your home control with HomeKit and we’ll be there to try and help along the way. If you get stuck, we’re on the Facebook and Twitters. We also recently started up the YouTube channel. I think we’ve got an Instagram too. If you just don’t care too much for social media, we can talk about it and other questions you may have below.
We use income-earning affiliate links.
We may receive a small commission on purchases made using links on this page at no extra cost to you.