
One of the greatest appeals of HomeKit and home automation when I first got started was at-home comfort. Being able to have cooling and heating automated based on ambient temperature was a game-changer for me. Set it and forget it was my objective and mission accomplished. Drawing on this, I began to consider humidity and air quality, as well. As our homes become more and more insulated and energy-efficient and we begin to use more synthetic materials in furniture and construction, we’ve seen an upward tick in environment-based allergies and the idea of the “sick home”. While there are a number of factors that contribute to this issue, HomeKit can help us address at least a couple of them. This post aims to provide a practical guide at how to set-up an environment-based automation using HomeKit. Though we’ll be approaching this idea from an air quality perspective, the steps can be transferred to heating, cooling, and humidity control also.
Before we get started, here’s what we’ll be using for this tutorial:
- a HomeKit-enabled indoor sensor that measures temperature, humidity, air quality, or CO. i.e. Netatmo’s Healthy Home Coach, Eve Room, Arlo Baby, or Kaiterra Laser Egg+.
- a device to control that addresses the change you want to affect. More on this below. We’ll be using a Honeywell 50250 Air Purifier connected to an Incipio CommandKit Smart Outlet.
- A third-party HomeKit app capable of creating environment-based automations i.e. Eve, Matthias Hochgatterer’s Home, Hesperus, .etc. (Unfortunately, at the time of the writing of this post, Apple’s Home app does not support environment-based triggers, but it’s oddly supported in the HomeKit framework). We’ll be using the Eve for HomeKit app.
- An Apple Home hub- Since this an automation, you’ll need to have an always-on iPad, Apple TV, or HomePod set up as a Home hub in HomeKit.
A quick note on action devices: At the moment, stand-alone HomeKit devices that address indoor environment conditions are few and far between. If you have central heating and A/C, you can use a HomeKit-enabled thermostat. There are also a few different thermostatic radiator valve controllers that support HomeKit. If you don’t have central heating or air conditioning, your options are significantly more limited for heating and cooling. Even more so in terms of controlling humidity and air quality.
A viable option, and the one we will be employing for this demonstration, is making a dumb device smart with the aid of a smart plug. This is by far the largest HomeKit product category and most of them do a pretty good job. The most important thing to keep in mind when shopping for the device that you will connect to your smart plug is that it must have a “hard switch”. This means that there is a physical difference between the on and off state of the device. A “soft switch” is a button that simply triggers a digital switch on a board.
A good rule of thumb to use is that if you can look at the on/off switch and visually determine if the device is on or off when it is unplugged, it has a hard switch. Another way to tell if your device has a hard switch is to power on the device then unplug it from the outlet. If when you plug it back in the device fires up, you should be able to control it with a smart plug.
Now that that’s out of the way, let’s get down to the nitty gritty. Our objective in this demo is to trigger an air purifier to switch on once a certain air quality threshold has been met and switch back off once the air purifier has done its job. For grins and giggles, we’ll also throw in an essential oil diffuser. To accomplish this, I will be using:
- Eve Room v1 air quality sensor
- Incipio CommandKit Smart Outlet with Metering
- Honeywell 50250 True HEPA Air Purifier
- VOCOlinc Flowerbud Smart Diffuser
- Eve for HomeKit app
- Apple’s Home app
This may be obvious, but you’ll want to make sure that the HomeKit devices you plan on using are setup and properly functioning in your HomeKit app of choice before setting up the automation.
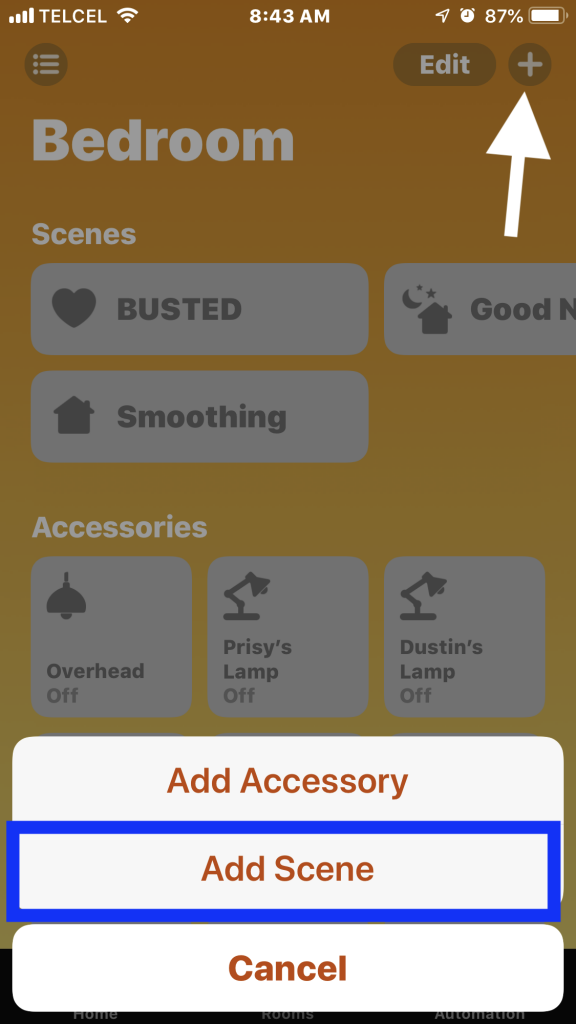
1. To make things easier on ourselves, we’ll set up a scene that includes our first action which is to turn on the air purifier and diffuser. Since I like it and this is my blog, I’m using Apple’s Home app.
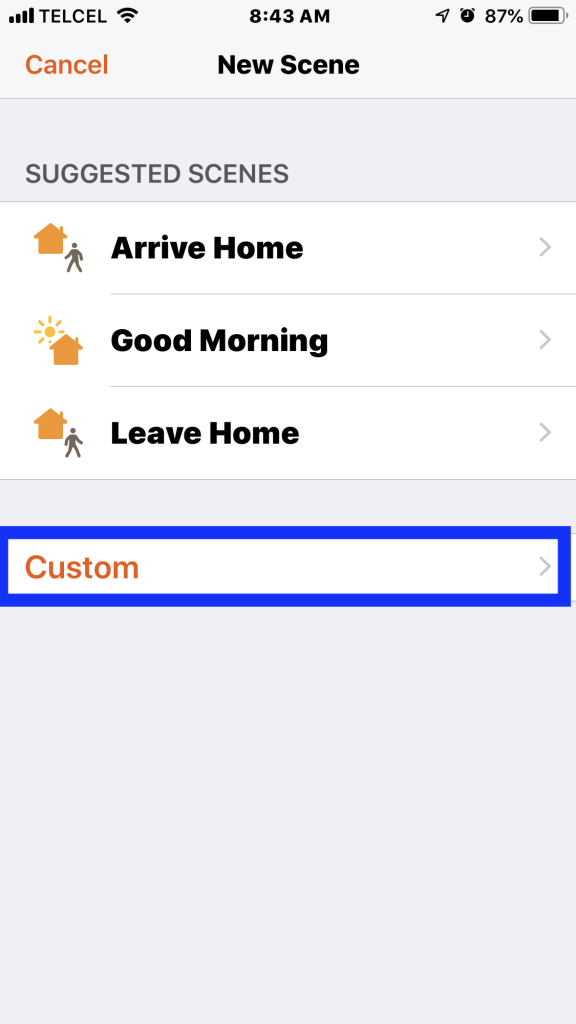
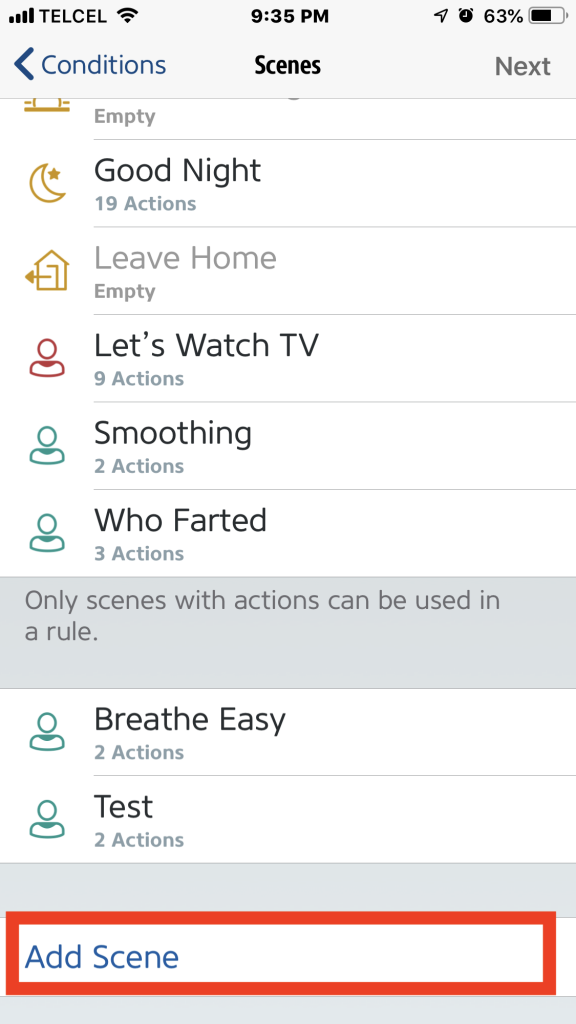
From any tab except the automations tab, tap the + button on the top right corner of the app and tap “Add Scene”. Once you’ve chosen “Custom” and given the scene a clever name, you’ll find and choose the accessories you want to control. For our purposes today, it’s the air purifier and diffuser.


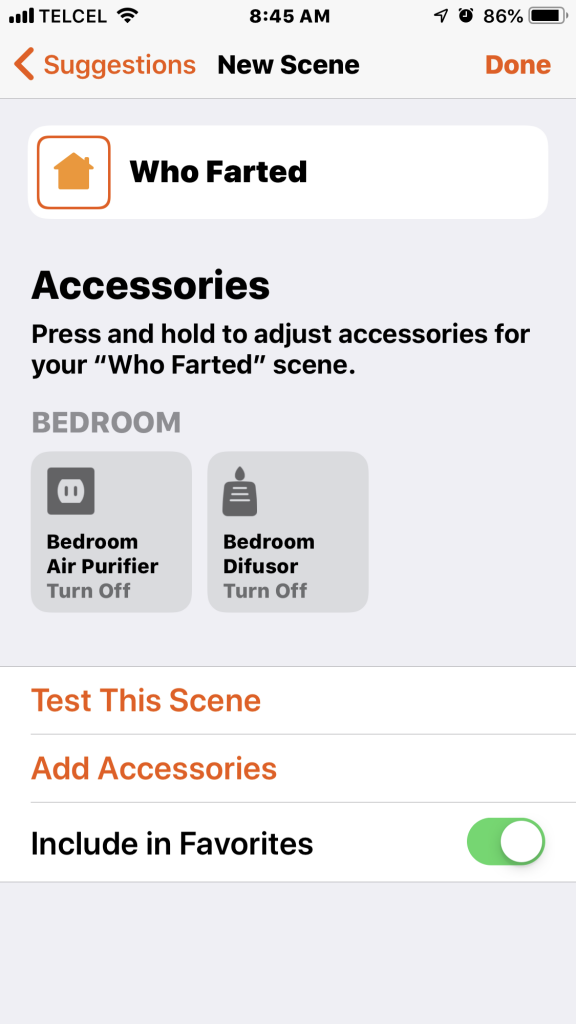
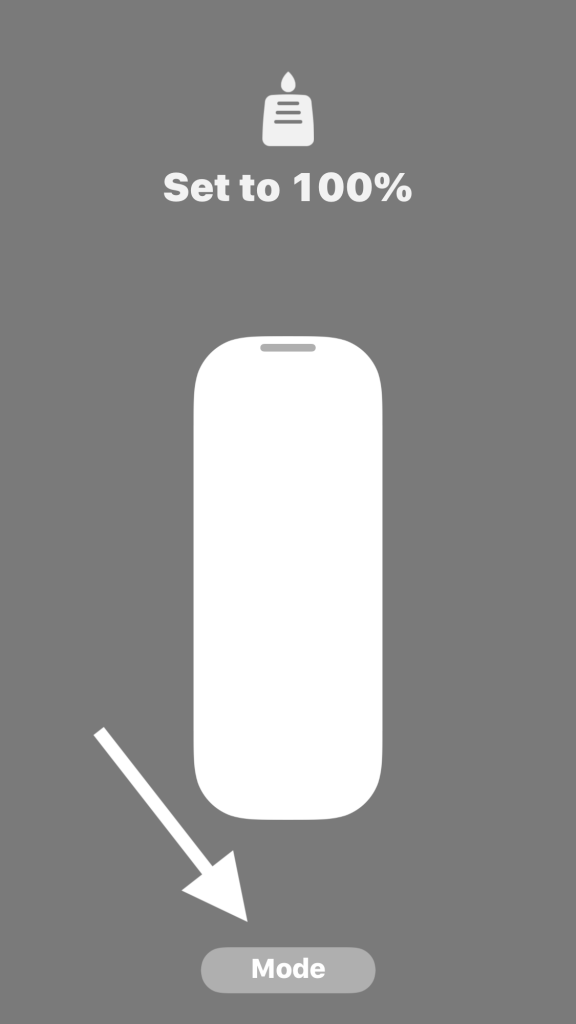
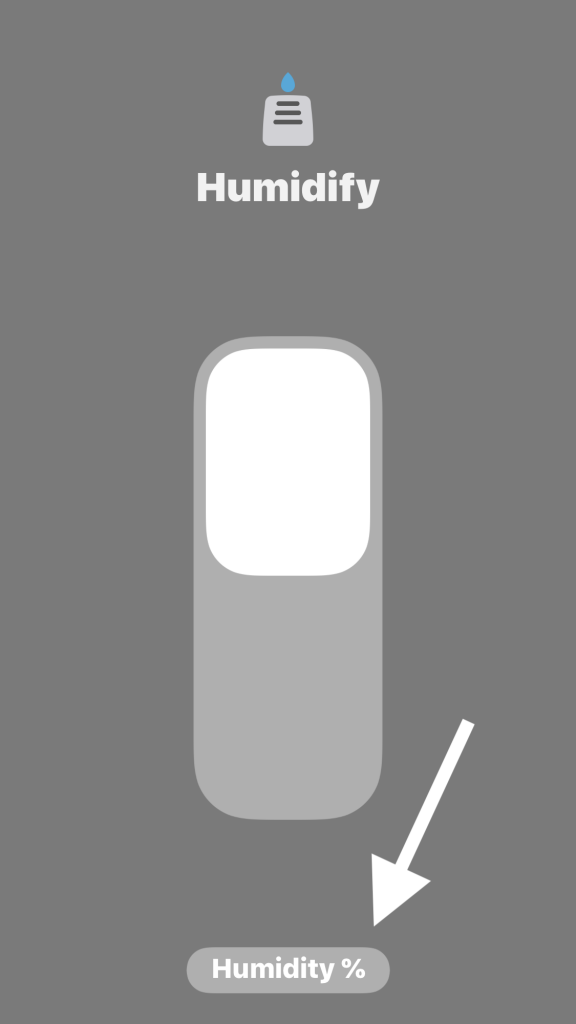
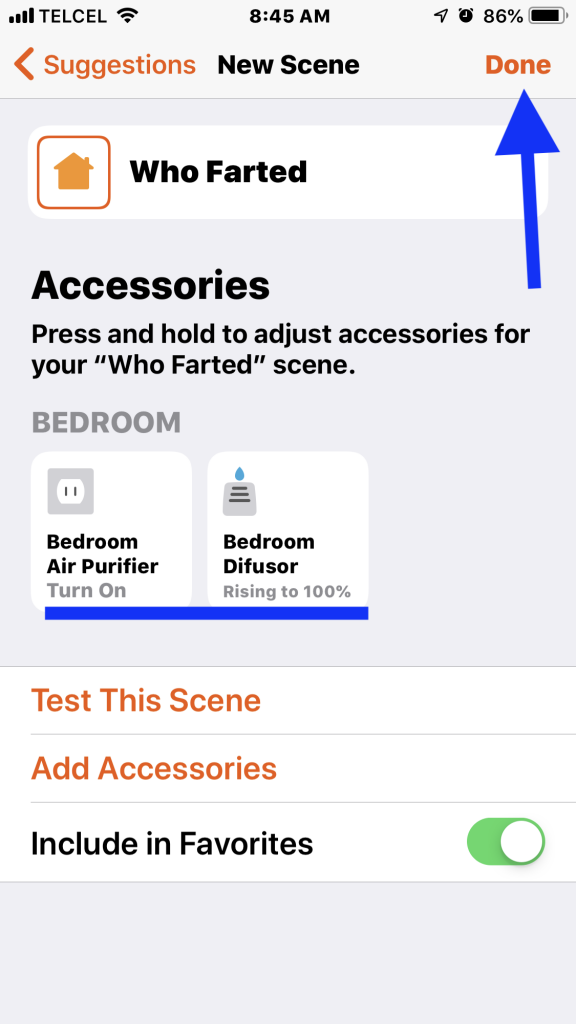
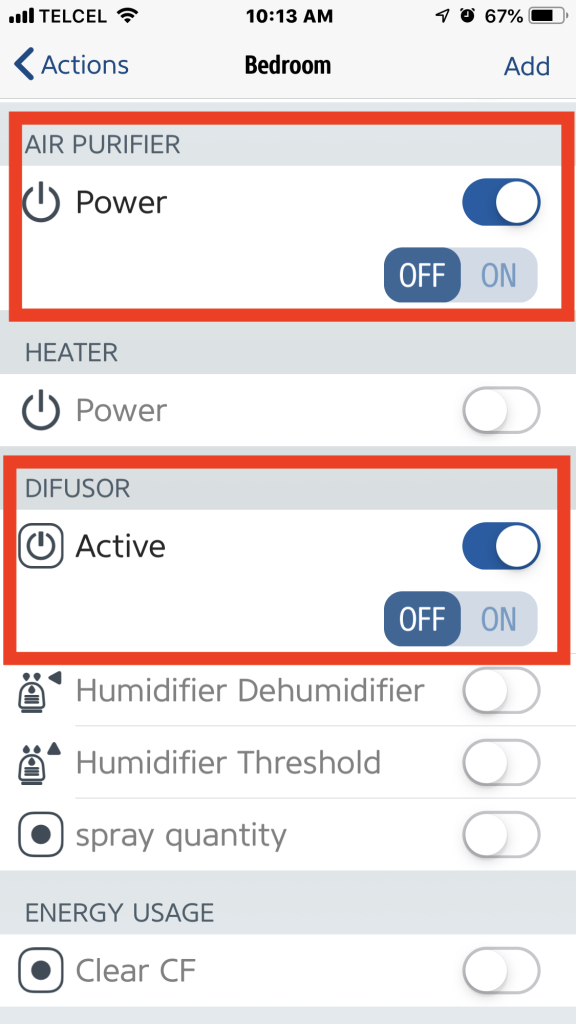
2. The next step is the most important and that’s determining what action the devices will take. Since the air purifier has basic on/off power state function, we want to make sure that it’s state is on. For the diffuser, which appears as a humidifier in HomeKit, we need to long press and make sure that humidity level is where we want it. I chose 100% as this means it won’t likely stop diffusing until the automation has stopped. We’ll also want to make sure that the power state of the humidifier is “on” by tapping “Mode” and moving the slider to the “on” position. Tap “Done” at the top right once you are satisfied your scene has all the parameters you would like.
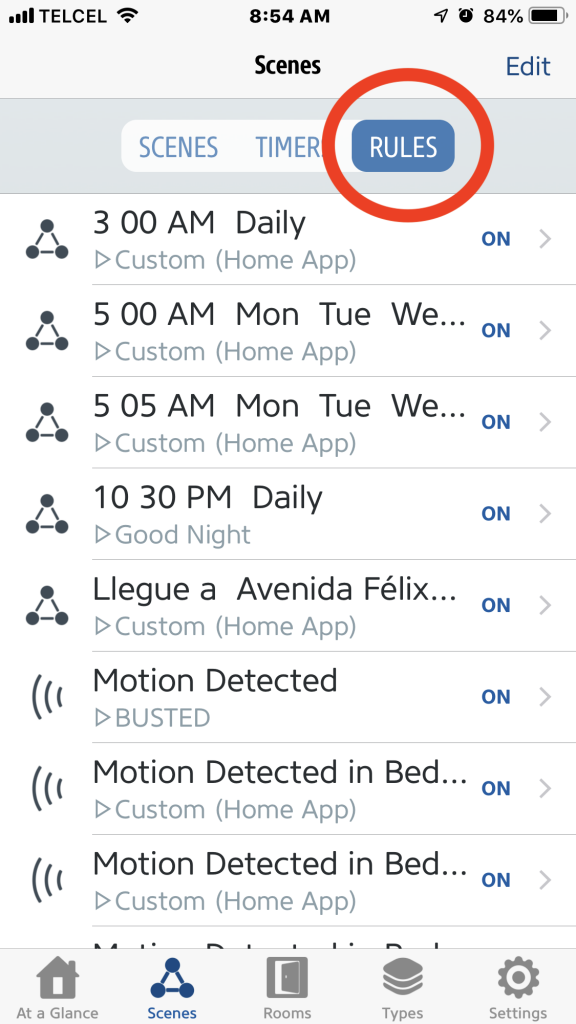
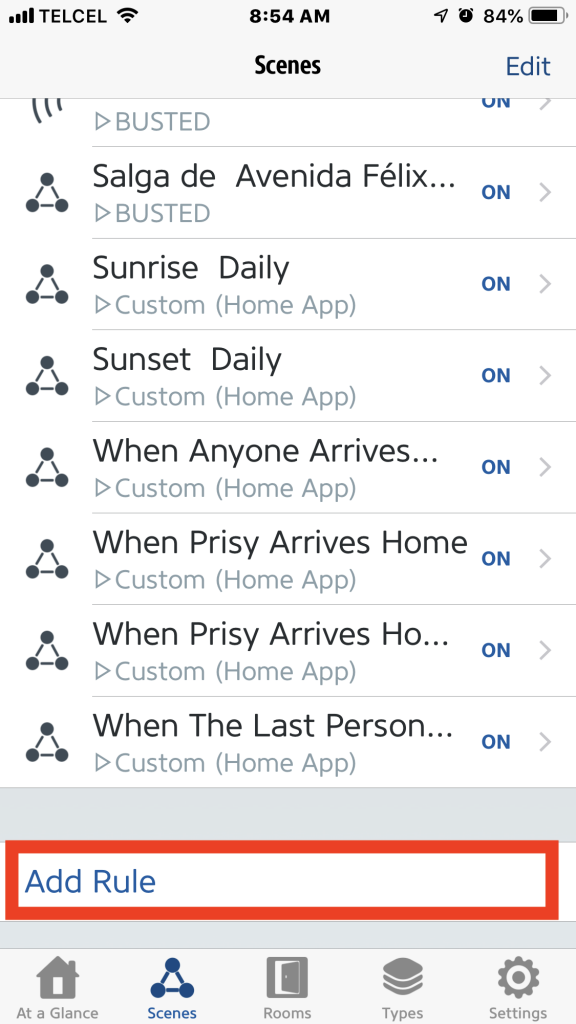
3. We now have to move over to our third-party HK app since environment-based triggers are programmable in Apple’s Home app. Using the Eve app, we’ll choose the “Scenes” tab at the bottom and then the “Rules” option from the top. “Rules” in Eve’s app are equivalent to “Automations” in Apple’s Home app. Scrolling to the very bottom of the list of rules, we’ll tap on “Add Rule”.

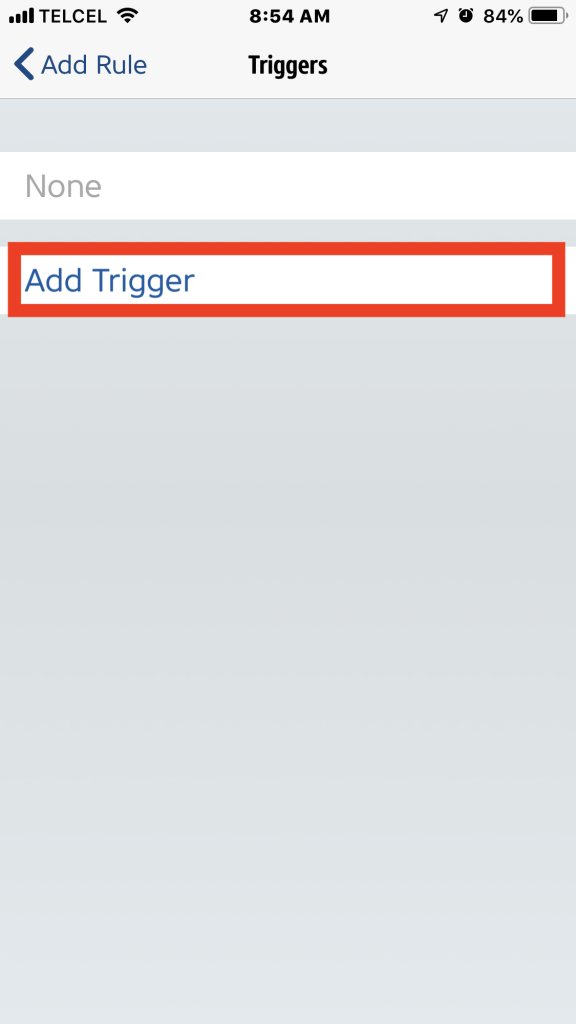
4. After a brief explanation of the nomenclature associated with creating rules in the app, we are guided to “Add Trigger”. This is what will cause our “Action” later on. Since we’re focusing on “Air Quality” in the “Bedroom”, we’ll tap the slider button to the right. Here we are creating the trigger that will enable our previously created scene. I went middle-of-the-road here and chose “worse than or equal to” a “good” air quality measurement. You can, of course, adjust this as you see fit. After tapping “Add” at the top right, we’re given the option to add another trigger if we would like. You can make it as complicated as you wish, but we’ll keep it fairly simple for now.


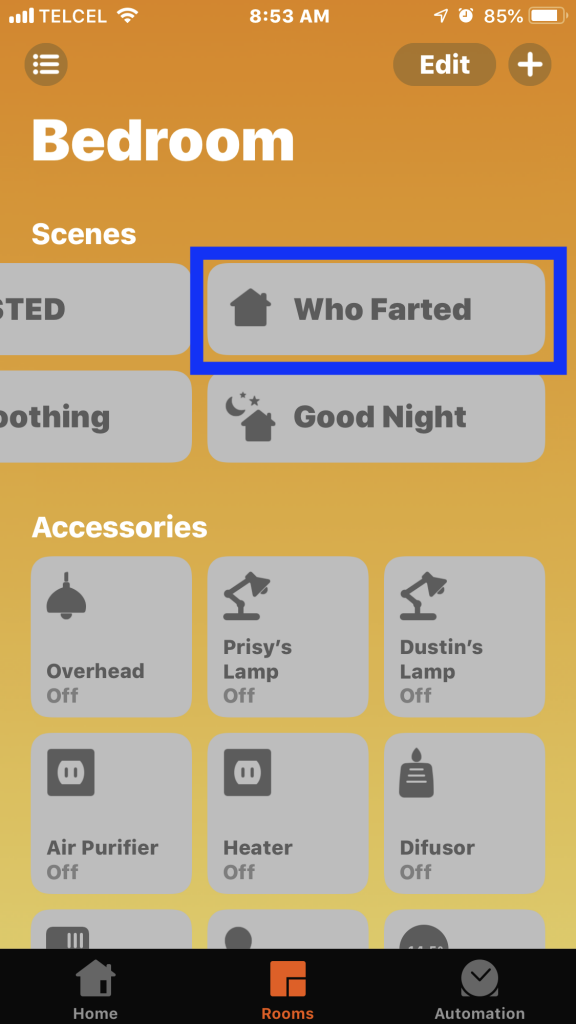
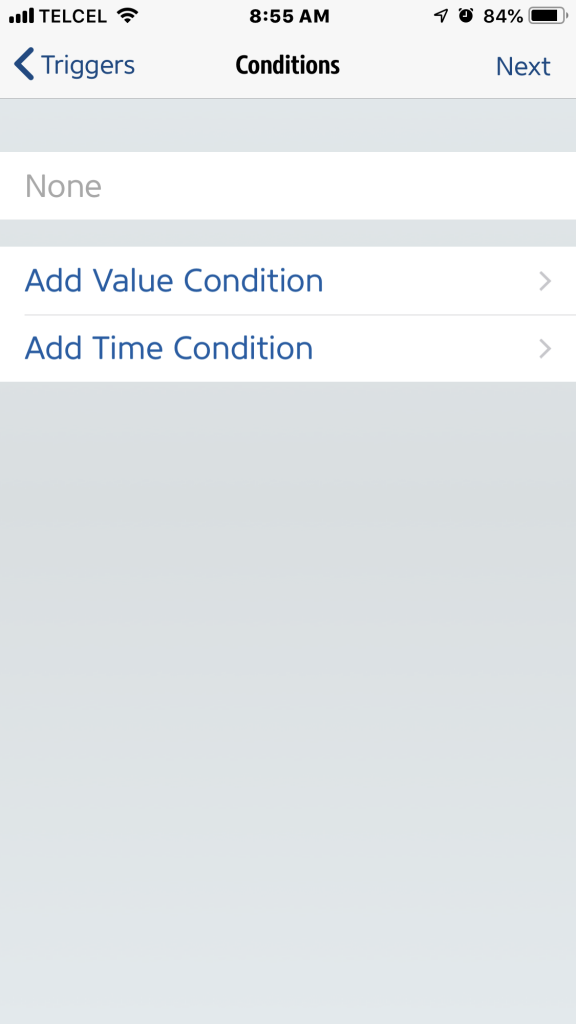
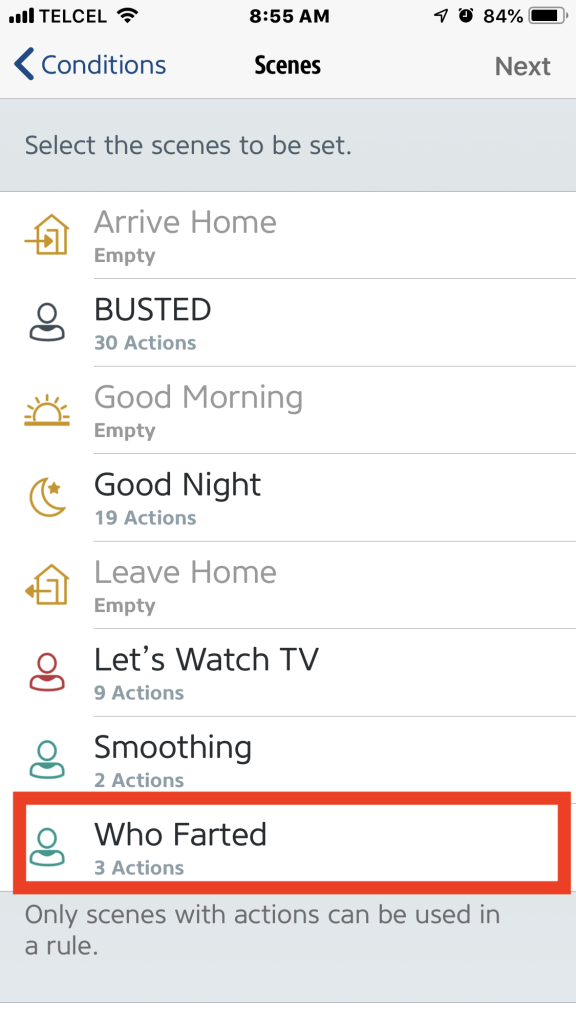
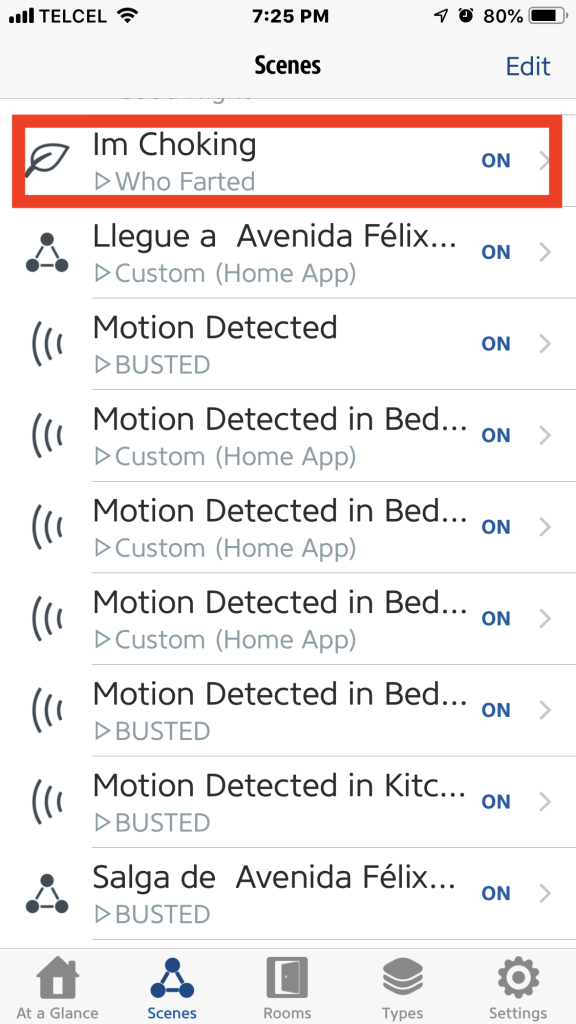
5. Since we’re keeping it simple, we’ll skip over conditions for the moment, but you can add time, people, or other conditions if you’d like. In the Eve app, we need to create a “Scene” in order to control accessories. Since we already created the scene we want in the Home app, we’ll simply select this scene from the list and tap “Next”. Eve also wants you to name the rule, something you can’t do at this time in the Home app. Voila! You’ve done it! Heading over to Apple’s Home app, the newly created automation now appears in the “Automations” tab. Magic!

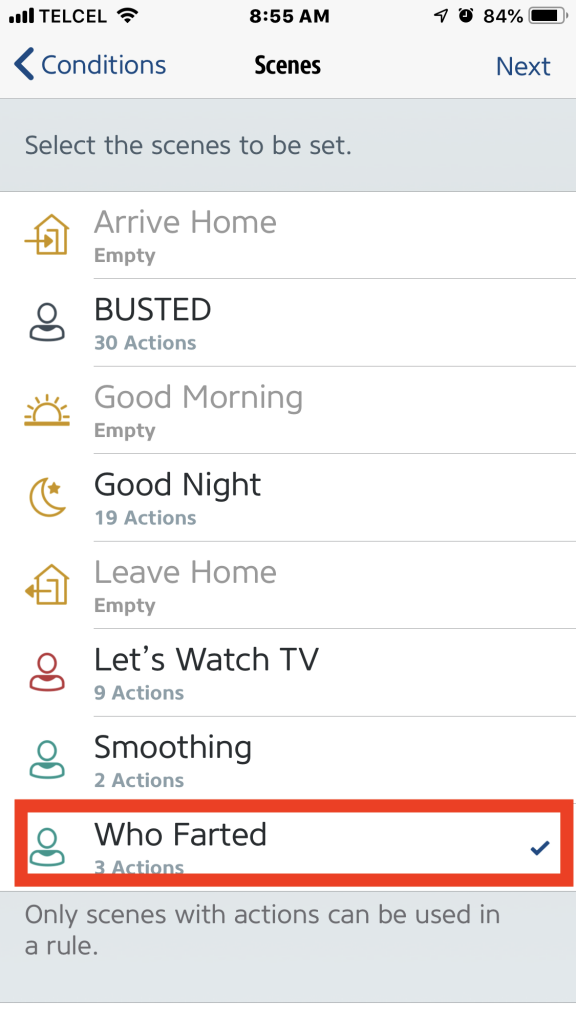


6. Now that we’ve setup our air quality automation to turn our devices on, it’s only natural that we would want them to turn off at some point. While you can do this with a timer, for me it makes more sense to do this once our air quality has reached an acceptable level. Going back to the Eve app, we’ll repeat steps 3-5, with some minor changes. We need to reverse the trigger so that when the air quality is “better or equal to” “good”, our accessories take action.

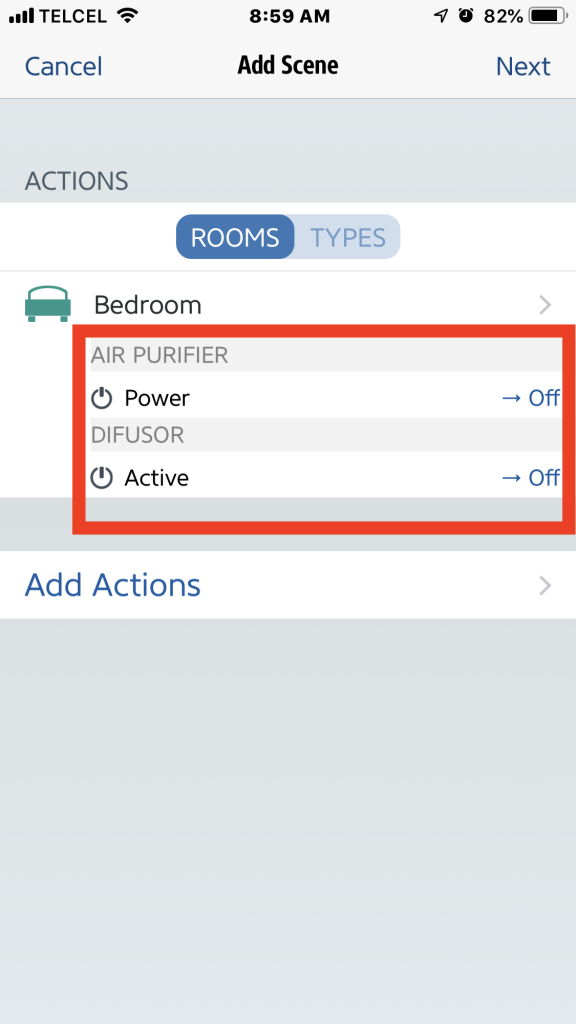
7. Again, Eve forces us to put these actions into a scene. Since we didn’t do it before, we’ll take this opportunity to do it in the Eve app. From the scenes list, we’ll need to “Add Scene” and then “Add Actions” to that scene. From the Bedroom, we select the air purifier ensuring that it’s power state is “Off” and from the diffuser’s actions, we’ll tap on “Active” and choose “Off” to have it power off, as well.


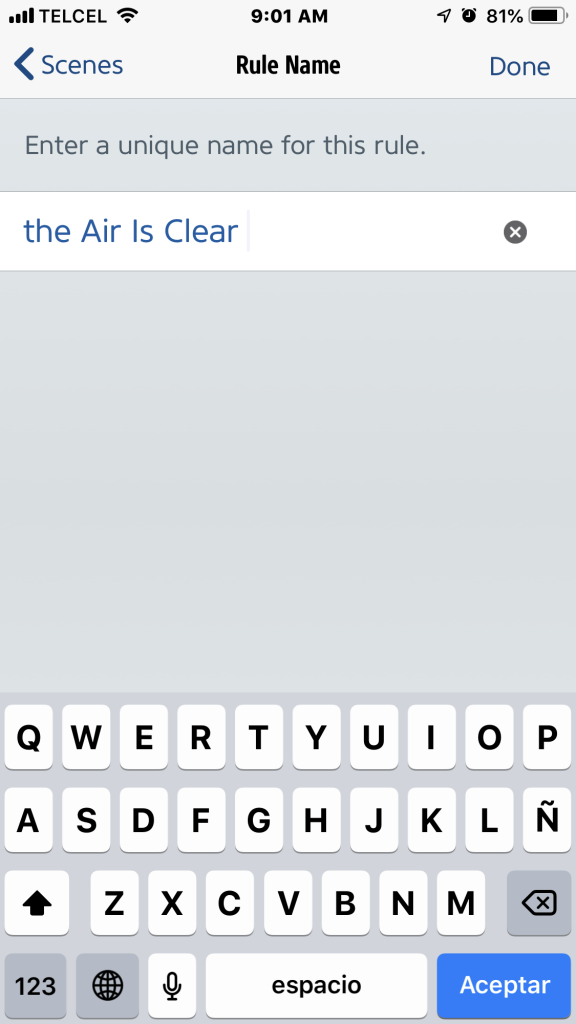
8. After confirming the actions in the scene are to our liking, naming the scene, selecting it as our action, and naming the rule, our automation is finished and it too now appears in the Home app’s automations.


Final Thoughts
It really is as easy as that. Sure, I might prefer that this be able to be carried out in Apple’s Home app, but in the grand scheme of things, it’s not really an issue. This is a pretty basic automation based on a singular condition. You can get more complicated adjusting for time of day, room occupancy, who is home, and even other environment conditions. This is just a simple blueprint for creating these type of automations. Sensors and automations based on their data really do make your home more comfortable and convenient. There’s no need to check your phone or ask Siri about the data. All of these things are maintained automatically and this, to me, is the essence of the connected home.
We’d love to hear from you on how you use these types of automations and other automations. What devices do you use with smart plugs? Do you have any recommendations for air purifiers, humidifiers, dehumidifiers, fans, A/Cs, or heaters? You can connect with us and the community in the comments below or via social media @myhomekithome.
Links & Resources
We use income-earning affiliate links.
We may receive a small commission on purchases made using links on this page at no extra cost to you.