Compared to other diY connected home platforms out there these days, it is no secret that HomeKit has a relatively limited range of compatible product offerings. However with every passing day, this is becoming less and less of a concern. With services like Siri Shortcuts and Homebridge, our options for bringing all of our smart home devices together into a single cohesive experience is easier than ever. Another way we can circumvent some of the limitations of our preferred smart home platform is with cleverly programmed automations. Many manufacturers have some devices that work with HomeKit and some that don’t in their product lineup and we can deploy HomeKit automations to take advantage of this. Today, we’ll explore how to trigger scenes and accessories based on the control of an accessory.
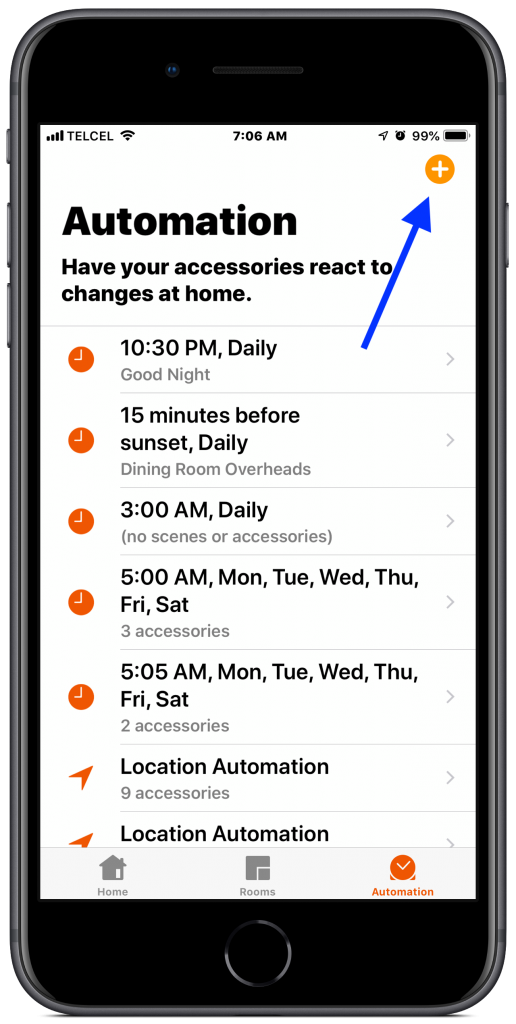
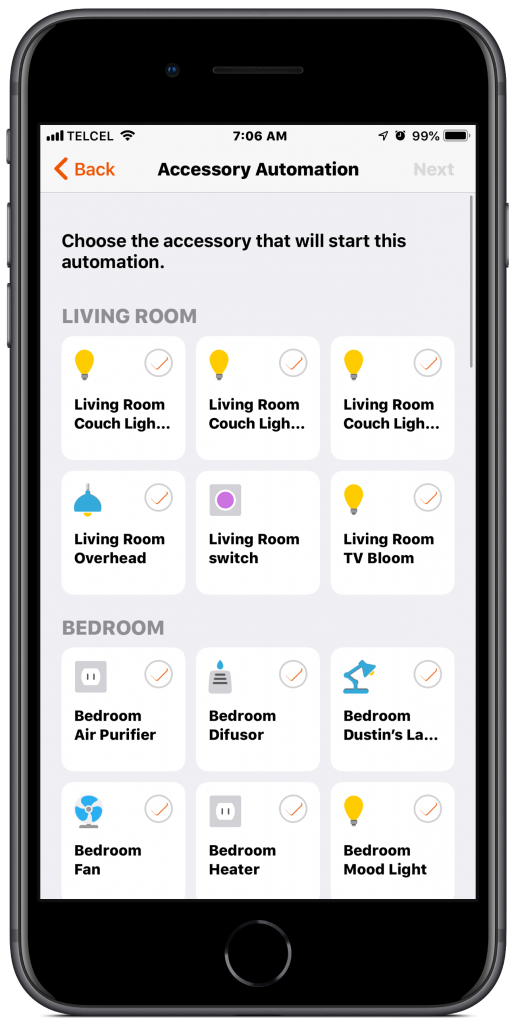
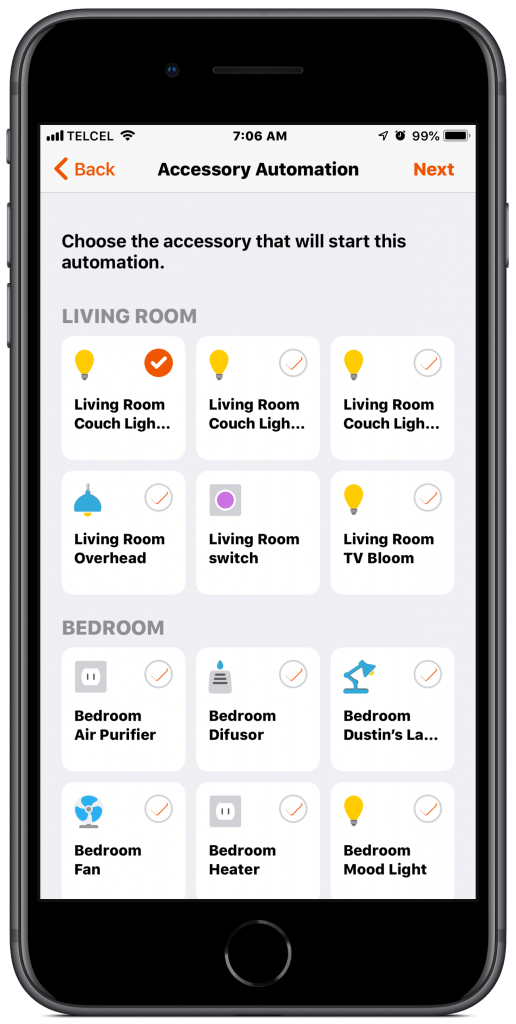
1. From the “Automations” tab in Apple’s Home app, we tap the + button at the top right and choose the fourth option, “When an Accessory is Controlled”. The first step is to choose which accessory will trigger our action. Our trigger for this automation is an on/off state trigger so only accessories that have this control will appear. On a side note, though in Apple’s Home app we don’t have granular control of state i.e. temperature, fan speed, shade open/close percentage etc., this is something we can access in a third-party HomeKit app and we explore this in other posts.

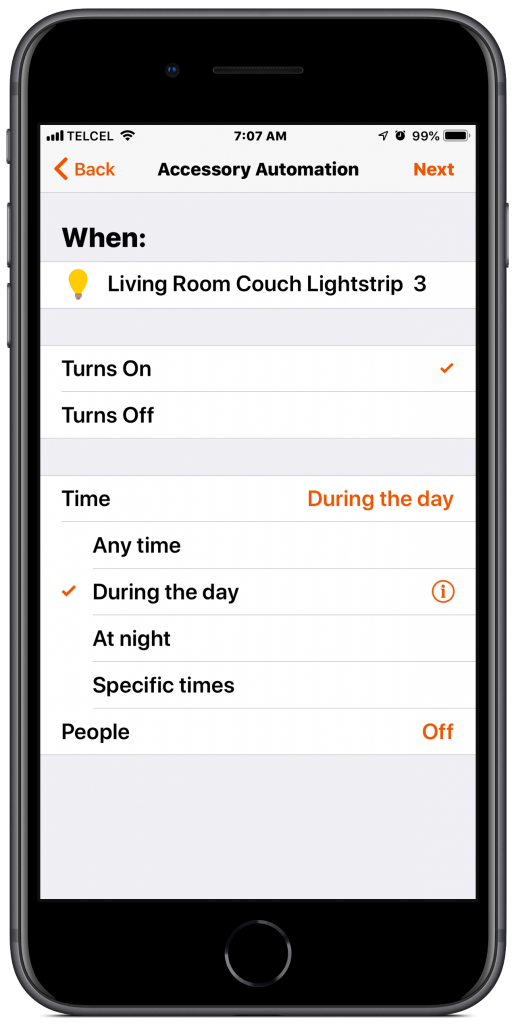
2. Once we’ve chosen our trigger accessory, we must now choose it’s state change, “Turns On” or “Turns Off” meaning that our actions will occur based on this change in the state of the accessory.


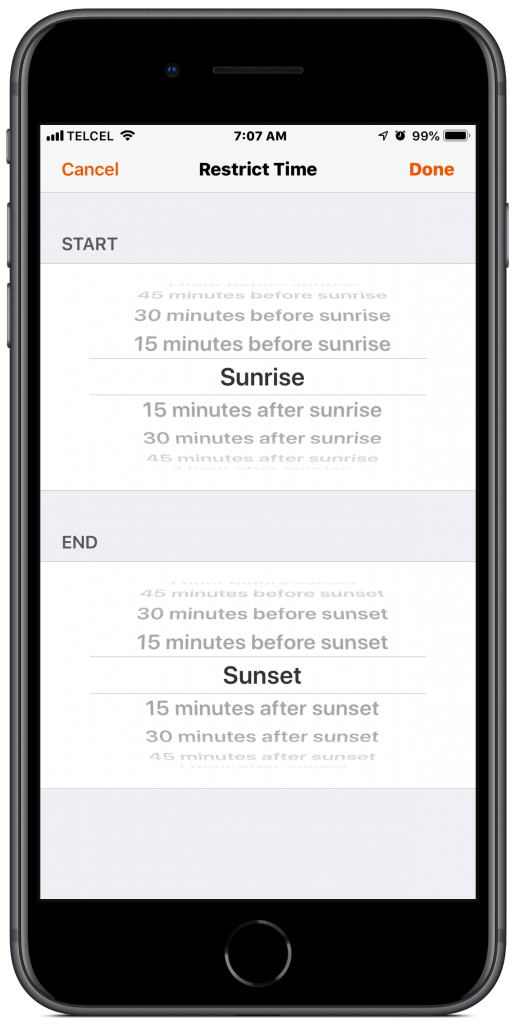
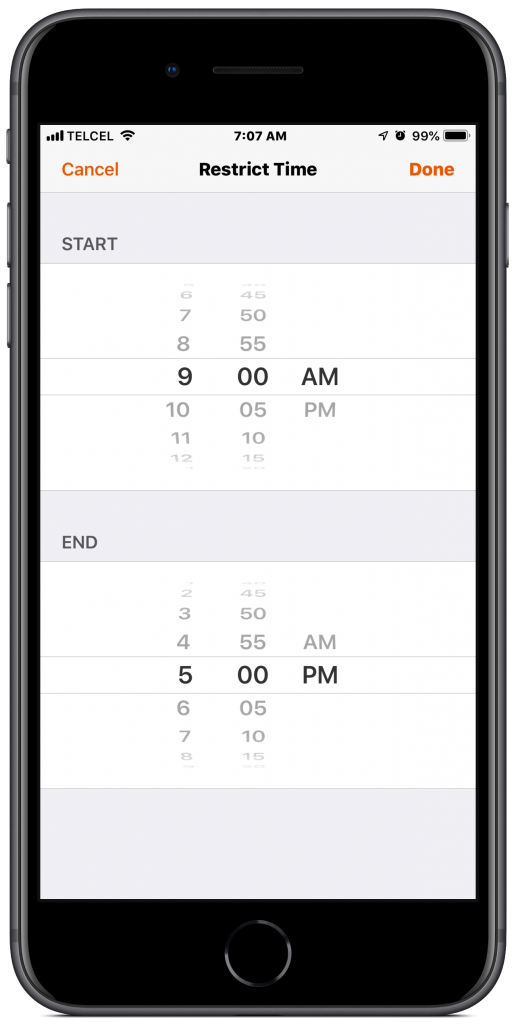
3. We can also apply “Time” and “People” conditions. In terms of the former, we can indicate either “Sunrise” or “Sunset” with the added ability to specify in 15-minute increments before or after these times. We can also indicate a specific window during a 24-hour period that we would like to apply this automation. As for the “People” condition, we can select when somebody or nobody is home and whether the person setting up the automation is home or not. Finally, if we are uninterested in applying “Time” or “People” based conditions, we would select “Any” or “Off”, respectively.


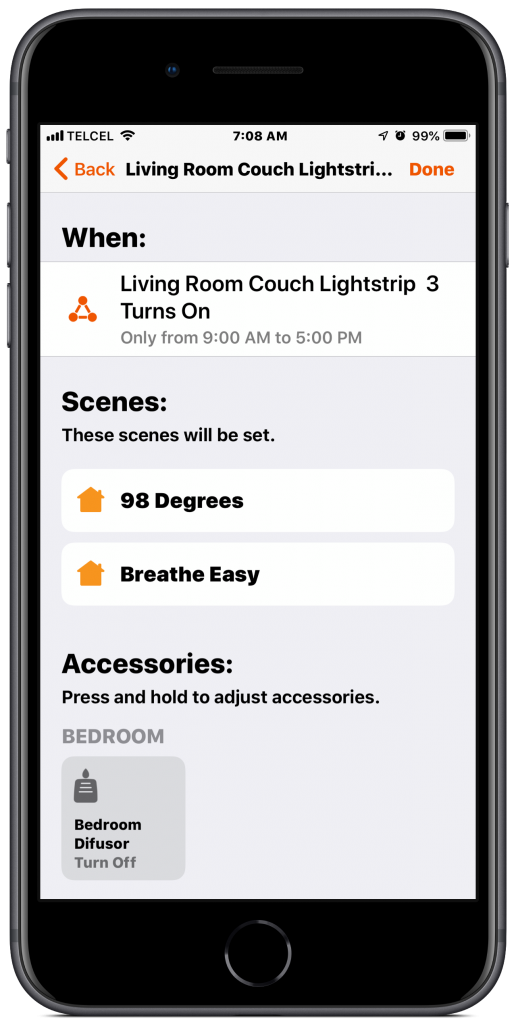
4. Now that we are satisfied with our trigger and conditions, we choose which scenes or accessories we would like to run once the trigger and conditions have been met. As with all HomeKit automations, we can choose multiple scenes or multiple accessories, or a combination of the two.
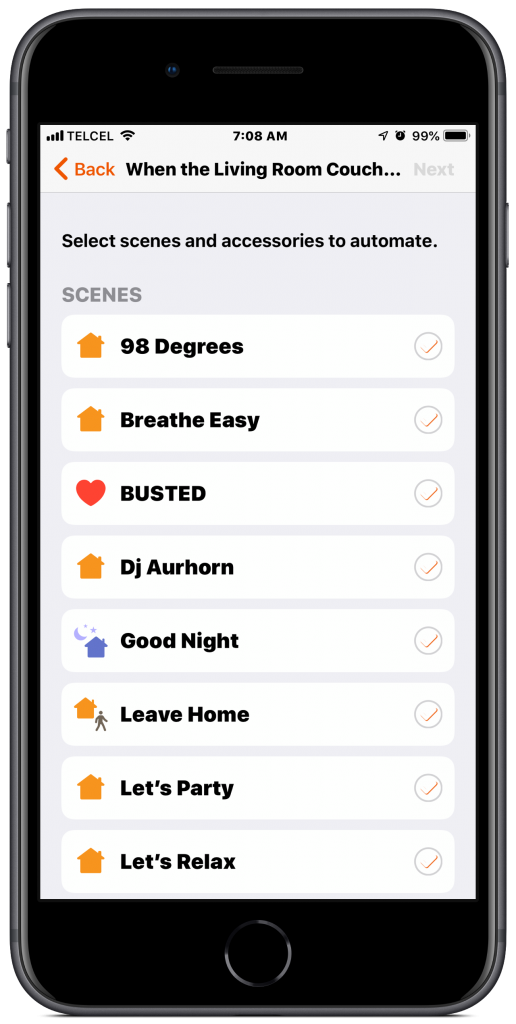


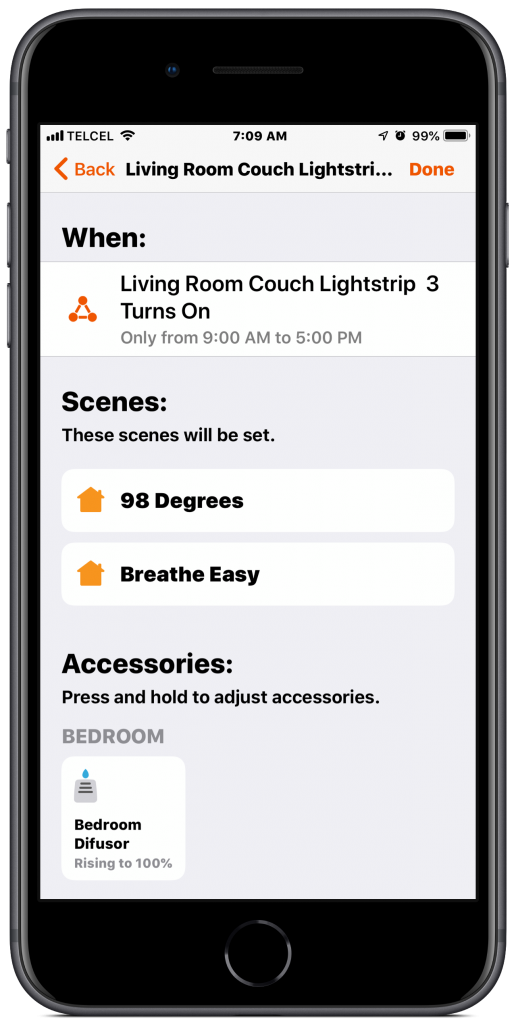
5. If we added accessories, we’ll want to adjust their actions. Tapping on the accessory’s tile will toggle its power state and long-pressing it will take you into its variable controls.


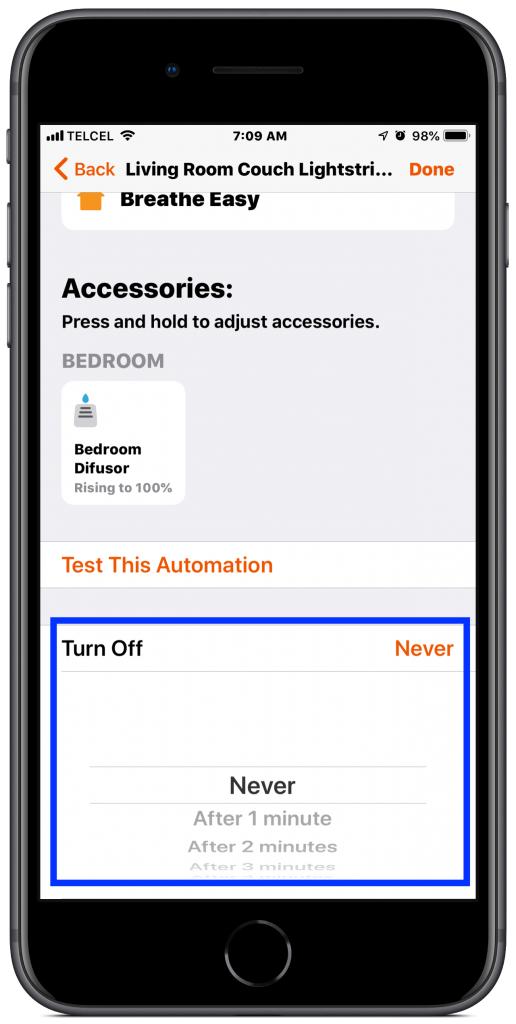
6. After setting our conditions and choosing our actions, we can test that the automation works, but as with testing any automation, it tests only the actions of that scene as in order to really test the automation, we have to meet the conditions. We also have the option to “Turn Off” the automation after 1, 2, 3, 4 and 5 minutes or in 5 minute-increments after that up to an hour after the automation has been triggered.

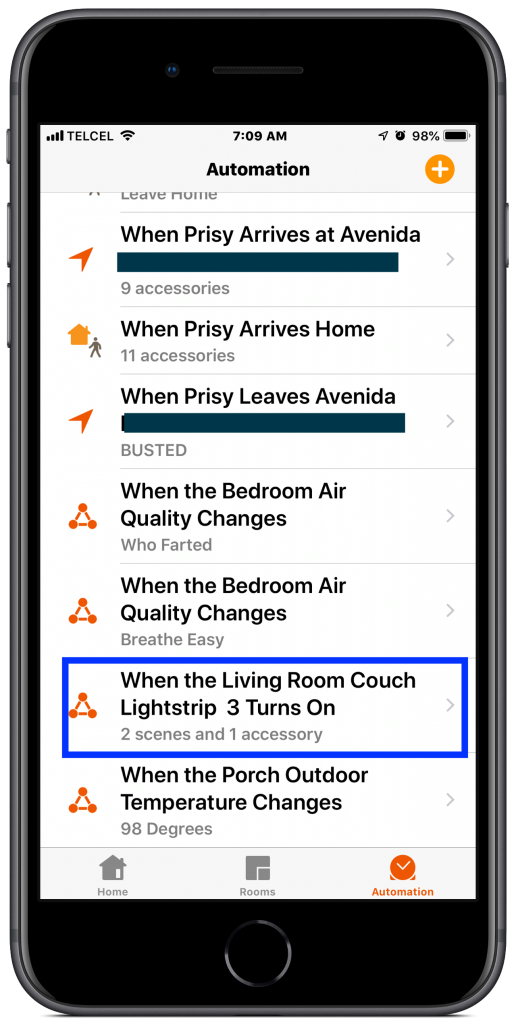
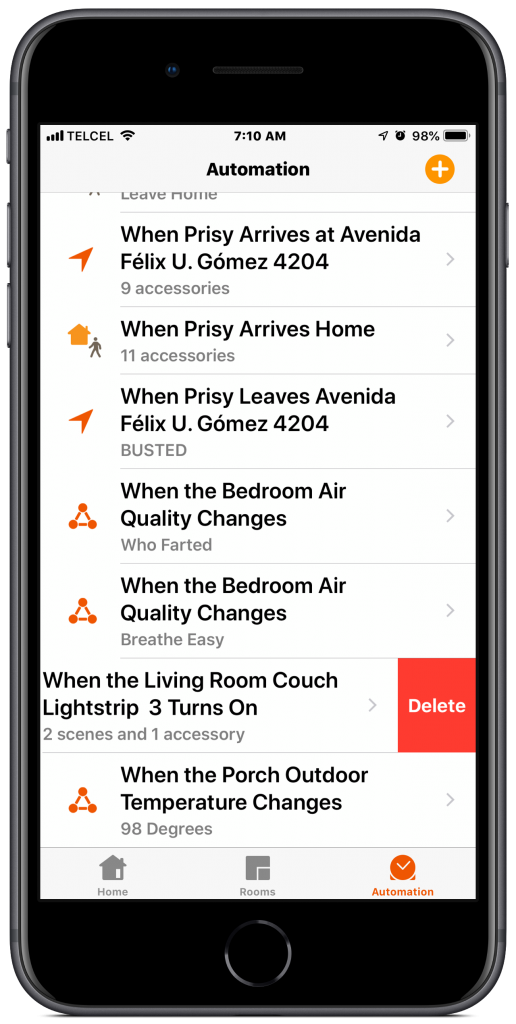
7. Tapping “Done” sends our automation to the cloud and it’s ready for primetime. Tapping on the automation from the “Automations” tab allows us to disable or enable the rule, as well as adjust any of the triggers, conditions, or actions of the automation. If we lose all hope of adjusting the automation or find that we simply don’t want or use it anymore we can “Delete [the] Automation’ or we swipe to the left and forget it ever existed.


Final Thoughts
Though it may seem that these automations are pretty basic and you may find yourself struggling to figure out how you can integrate them, there are a couple of unique cases where these automations can work really well for us. As you may know, extra security measures apply to product categories like garage door openers and locks, and for good reason. When these are added to automations, we need to verify that it is in fact us using Touch or Face ID. However, by creating a location-based automation for an accessory with an on/off power state like a light or smart plug and then creating one of the above mentioned automations, we can circumvent the verification process and feel like we have somehow gotten a leg up on Apple.
A second interesting use-case can allow us to potentially access unexposed features of a HomeKit accessory or even let us have limited use of non-HomeKit devices that are part of a manufacturer’s smart home offering, but there may only be a few, or one, HomeKit-compatible device in the lineup. For example, the iHome iSS50 5-in-1 Smart Monitor is HomeKit-compatible, but has a sound sensor that is not exposed in HomeKit. Using the iHome Control app, we can create a rule that triggers an iHome ISP6X smart plug to turn on once a certain sound threshold has been breached. Using the automations covered in this post, we can then create an automation that reacts to that plug being trigger to say sound our Aqara alarm or turn all the lights red, or both.
These two cases are quite specific and force us to take some detours, but offer more home automation goodness nonetheless. In all fairness though, I don’t really use these automations. I might be inclined to use them more often if we were able to create notifications based on these automations. This is something I’ve wanted for a while and hopefully we’ll see it come to the Home app in iOS 13.
How do you use these automations in your HomeKit setup? We’d love to hear from you down in the comments and don’t forget to follow us on social media @myhomekithome for the latest and greatest in the HomeKit world.
We use income-earning affiliate links.
We may receive a small commission on purchases made using links on this page at no extra cost to you.