It is hard to remember a time without a remote control of some sort for many of our consumer devices. Usually we think of televisions or maybe even air conditioners or fans. As our homes become more and more connected, it’s now easier than ever to remotely control accessories. With HomeKit and a Home hub, we have access to our connected home devices at any time from anywhere. But what about those times when we want to control a connected device using a physical switch or button? from inside the home? That’s right, in this article we’ll use home automation to solve a “problem” created by home automation. We’ll look at how to lock and unlock a smart lock using one single button using HomeKit.
Note that I didn’t say Apple’s Home app we will need to use a third-party HomeKit app as Apple’s Home app doesn’t give us full access to all that the platform has to offer. Here’s what I’ll be using for this tutorial, but this is by no means definitive. Think of it more as a template:
- a Home hub – It’s an automation so we’ll need at least 1 Home hub like a HomePod, Apple TV, or an always-on and at-home iPad
- a button or switch – any HomeKit-enabled button or switch will work here. I’m using a button of a Phillips Hue Tap switch.
- a smart lock – any HomeKit smart lock will do the trick. I’m employing the VOCOlinc T-Guard Smart Lock.
- a third-party HomeKit app capable of more advanced automations – something like Hesperus or the Eve for HomeKit app should get you there, but in this tutorial we’ll use the Home 3 app
Links to everything we used for this post can be found in the Links & Resources section at the end of this post.
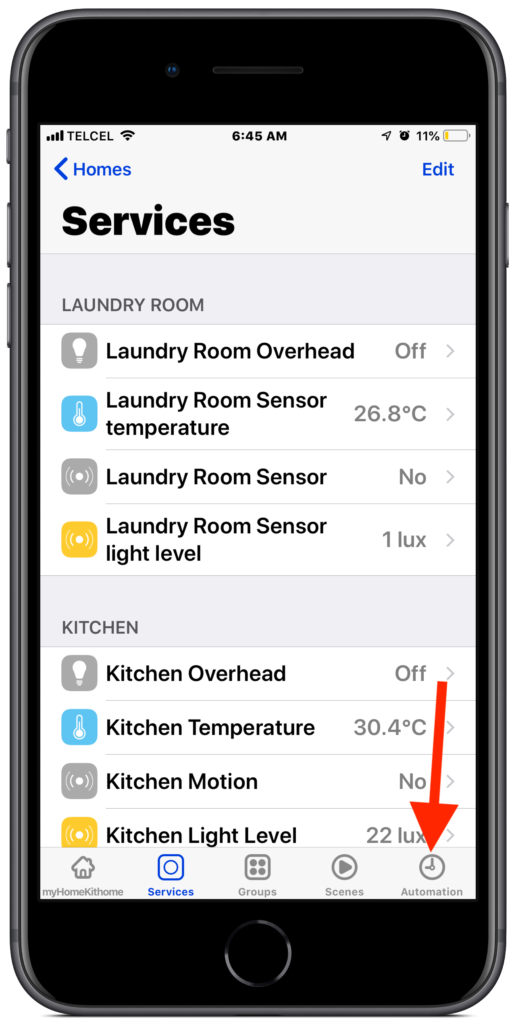
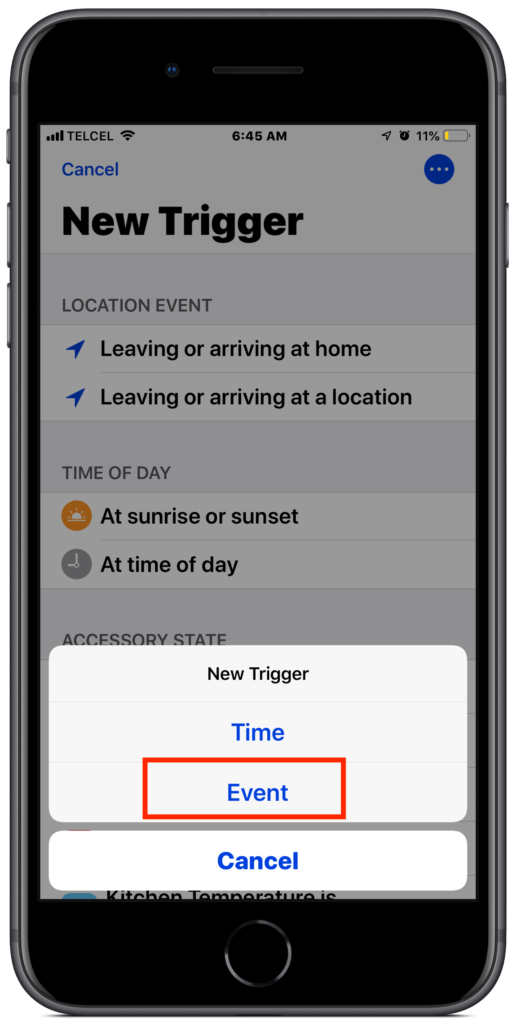
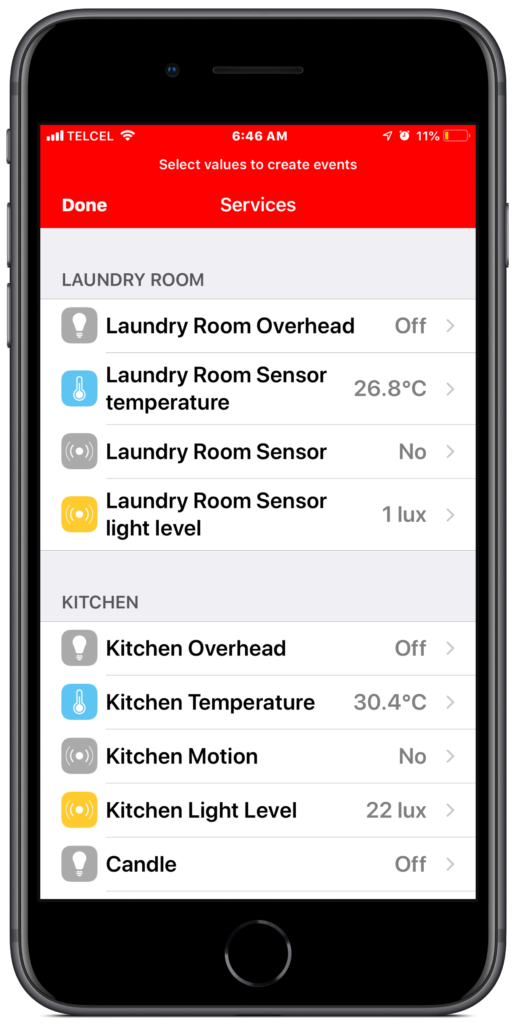
1. Upon launching the Home 3 app, we land on the “Services” tab, but we want the “Automations” tab on the far right. From the “Automations” tab, we’ll tap the + (plus) button at the top right. The Home 3 app allows us to set favorites which may appear here, but for posterity’s sake, we’ll add a new trigger by tapping the 3 dots in the upper right. We’ll be using an “Event” trigger for this automations we’ll select it and give it a name. This just makes the automation easier to recognize in the future.


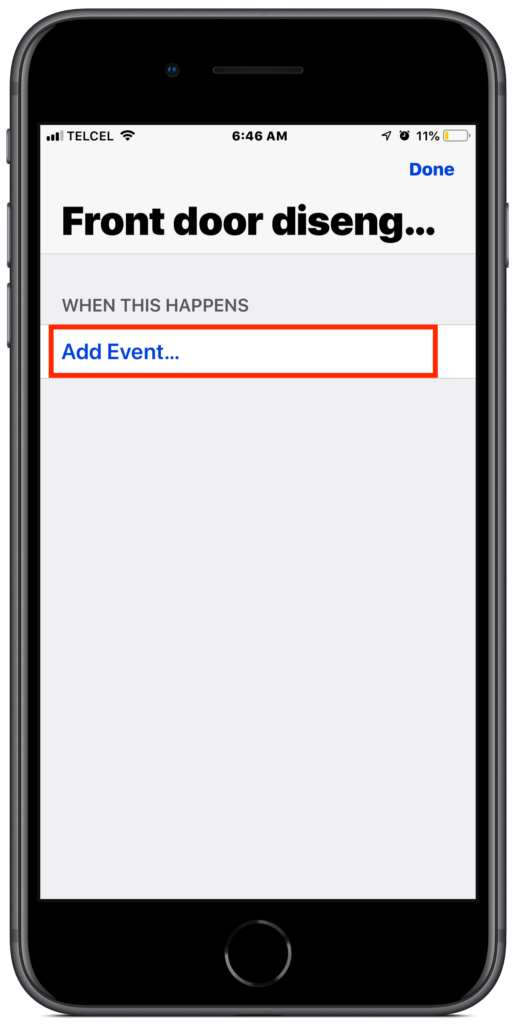
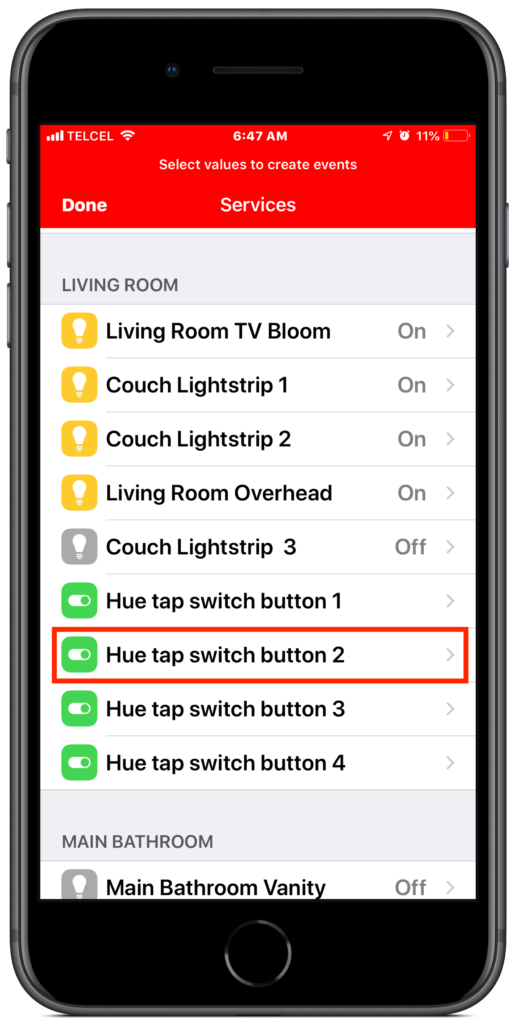
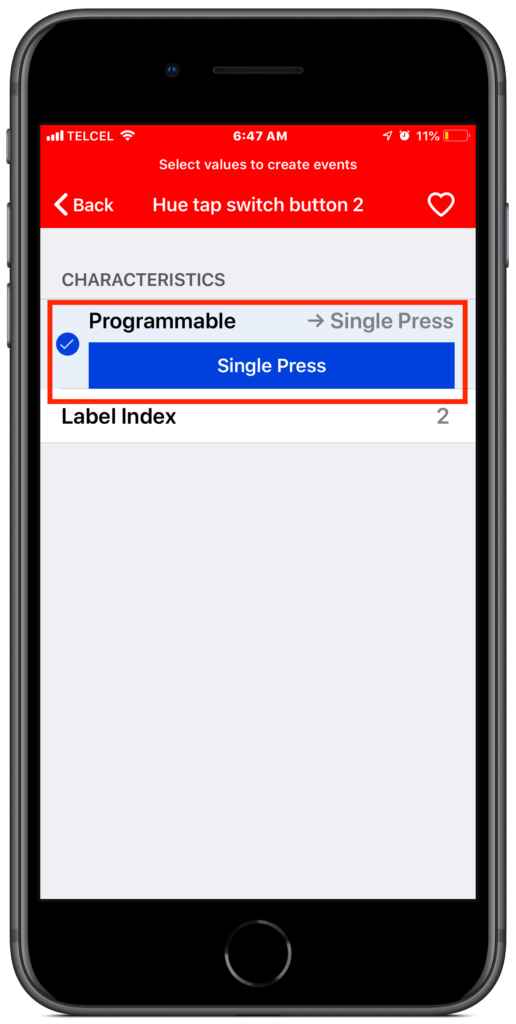
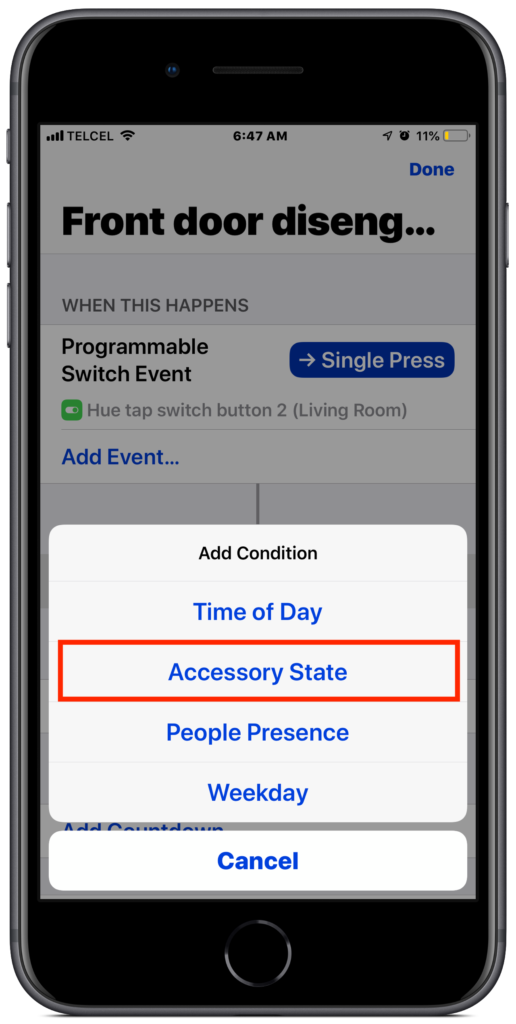
2. Now it’s time to add our trigger “Event”. This is slightly muddy, but we’ll choose “Accessory State” since our trigger event is a button press (and because the other options don’t really fit in with what we’re trying to do.). Now we’ll need to go through all of our available HomeKit services to find our button or switch we want to use as our “remote control”. Mine is located in my “Living Room” and is defined as “Hue tap switch button 2”. Once we’ve selected our event trigger accessory, we need to choose what action will trigger it and since this is a Hue Tap switch, HomeKit only recognizes a “single press”. Once we’ve selected our action, we’ll tap the “Back” button at the top left. I know this doesn’t instill much confidence, but it’s how things work in the Home 3 app. We’ll then tap “Done” and we see that our event trigger is set as a “single press” of the “Hue tap switch button2”. Now, we move on to the all-important conditions.


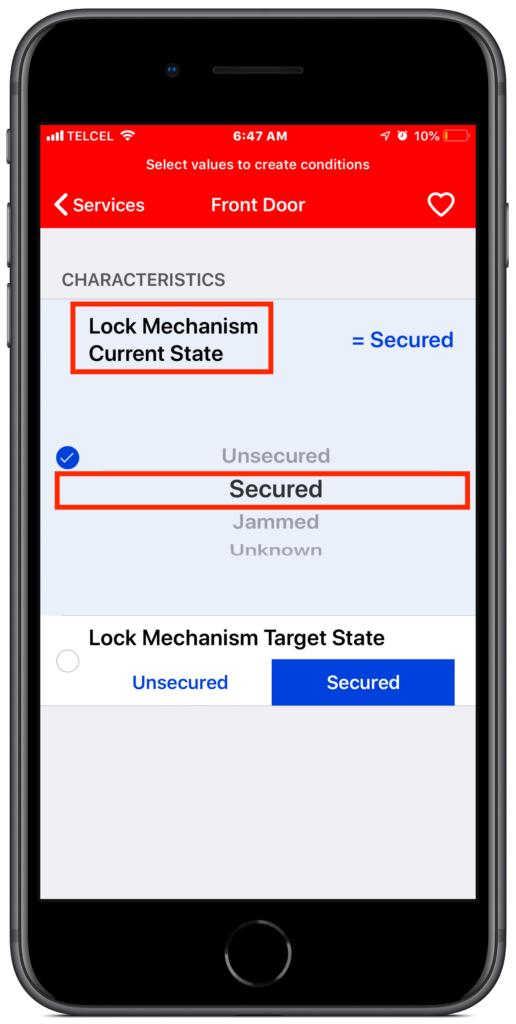
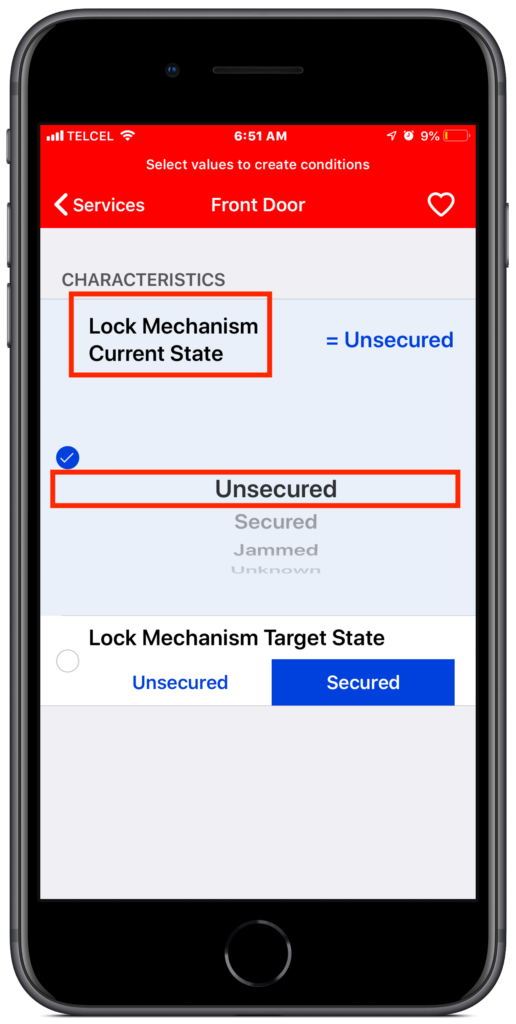
3. The “Condition” really is what the magic sauce is here. It is what allows us to use one single button to toggle the smart lock to locked and unlocked states. For our “Condition”, we need to choose the same accessory that we want to have an action happen once the trigger and condition are met, the smart lock, that is. So track it down and select it. The important thing to keep in mind is the “current” versus “target” states. Whichever automation it is, the current “condition” and the target “action” need to be opposites. For this first automation, we’ll choose “Lock Mechanism Current State” and “Secured”.

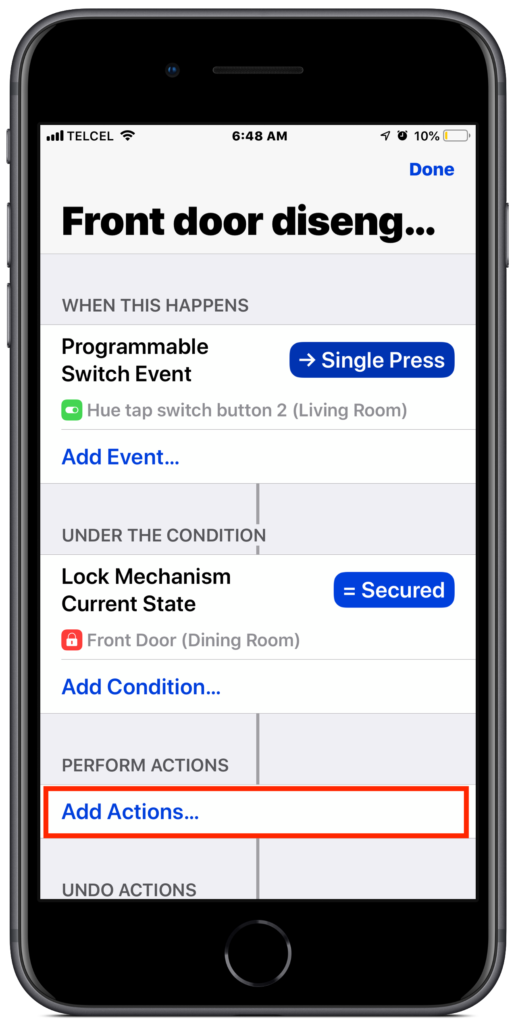
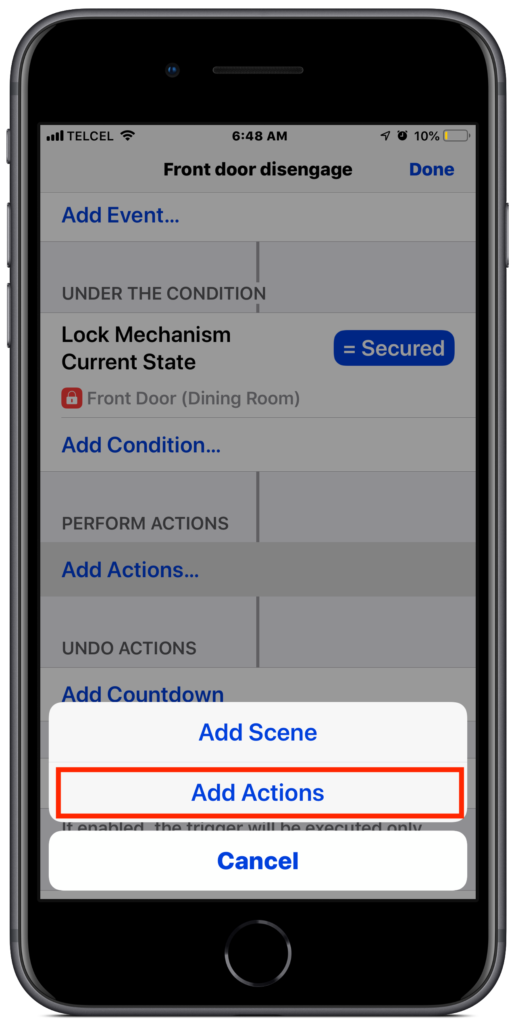
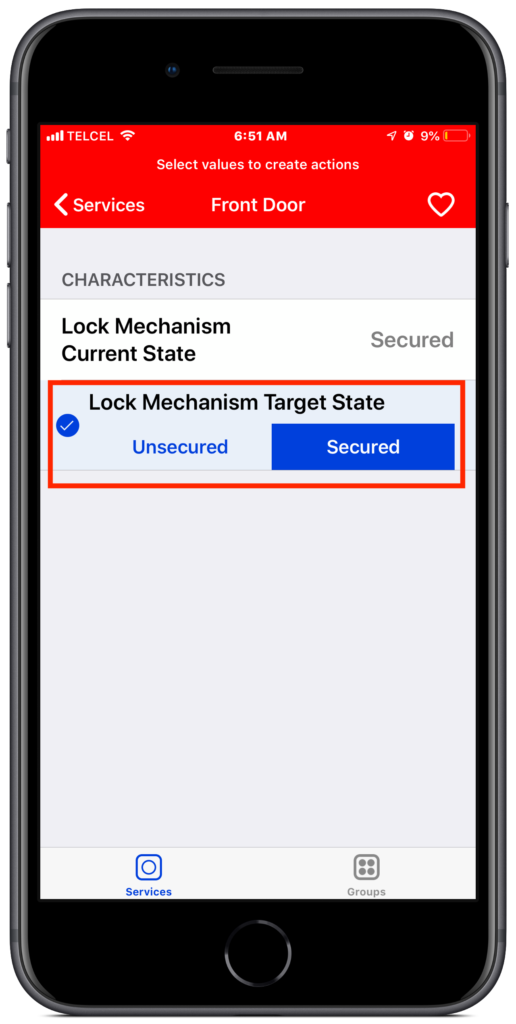
4. When adding “Actions” in the Home 3 app, we have the choice between adding a scene that we’ve already set up or an action. We’ll choose action. Since our ”condition” current state was “secured”, our “action” target state will be the opposite choosing “Lock Mechanism Target State” and “Unsecured”.


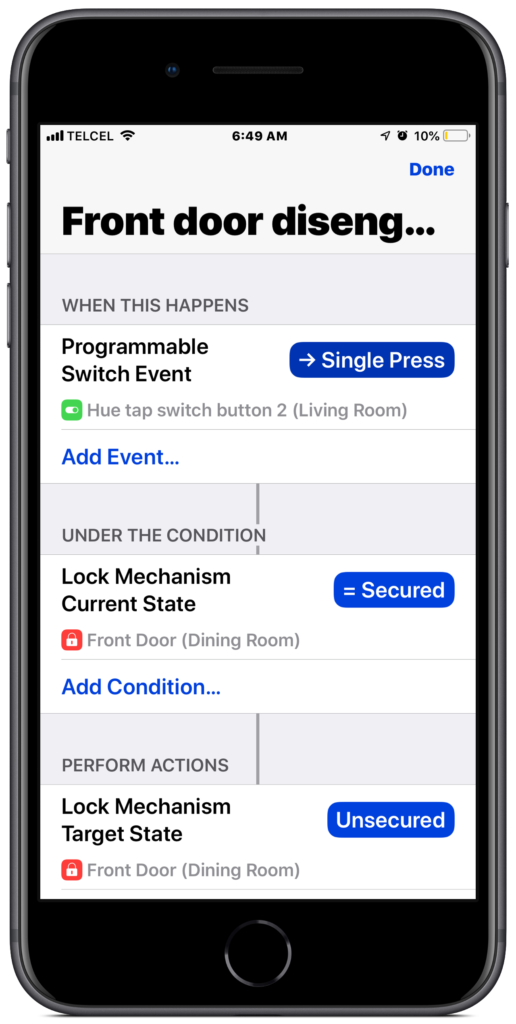
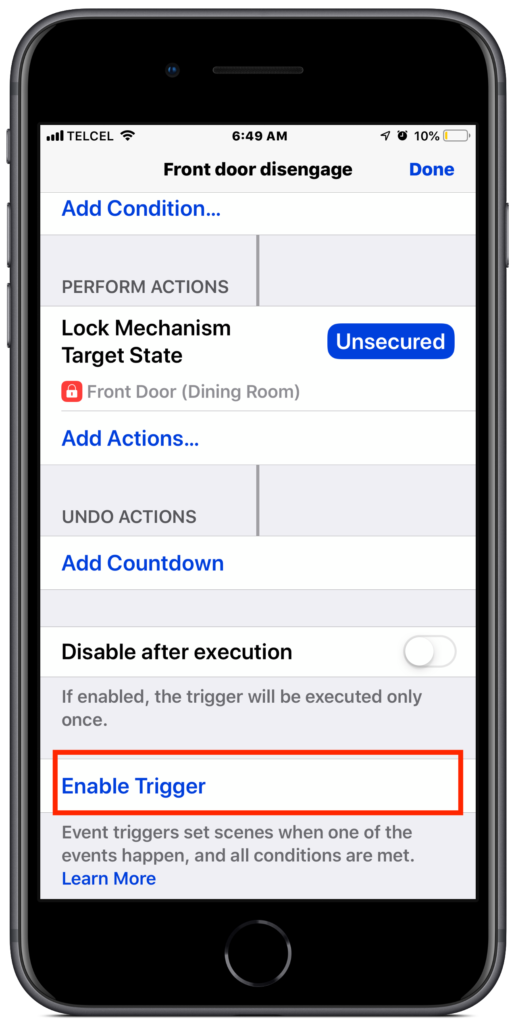
5. So if you’re playing along at home, your automation should look something like this:
Another MASSIVELY important thing to keep in mind here is that we must “Enable this Trigger” for the automation to run.
6. 6. That’s really all there is to it except that if we want the button to toggle the lock to be locked or unlocked, we’ll create a second automation keeping the same event trigger. The only difference is that the secured and unsecured conditions themselves will be reversed, but maintaining the current and target states the same.

Final Thoughts
Why this sort of automation isn’t included in Apple’s Home app, I’ll never know but nonetheless, we’ve thankfully got third-party apps that really help us to get creative with HomeKit. This is the kind of automation that not only has the “cool” factor, let us not forget its importance, but it also has a practical use. This also allows us to work around some of the limitations that an accessory or Apple’s own Home app may impose thus unlocking its full potential.
What are some ways that you use smart lock automations? What creative ways have you found to use buttons in HomeKit? Let us know in the comments below. Don’t forget to follow us on all the social media @myhomekithome.
Links & Resources
We use income-earning affiliate links.
We may receive a small commission on purchases made using links on this page at no extra cost to you.