The last 3 installments of our series on automations have been pretty basic exploring what is possible with arriving and leaving location-based automations and when a time of day occurs automations in Apple’s Home app. Though these are pretty powerful and useful automations, we can take it a step further with HomeKit. Notice that I said HomeKit and not the Home app. As user-friendly and straight-forward as Apple’s Home app is, it oddly doesn’t allow you to do some things that are built into the HomeKit framework itself. These are, however, accessible through some third-party developers’ apps like Matthias Hochgatterer’s Home 3 or Hesperus. Since I’m kind of a cheapskate, I know then why am I a fan of HomeKit, we’ll do our exploring using Eve’s app. Our objective will be to turn a light red and to power on a fan once the temperature reaches 40 degrees Celsius.
Here’s what I’ll be using to accomplish this:
- Eve for HomeKit app
- Eve Weather
- iHome ISP6X Wi-Fi Smart Plug (connected to a generic hard-switched fan)
- Phillips Hue Lightstrip Plus
These are just the accessories that I’m using and I’m not saying that these are by any means the only or best accessories to use so feel free to swap out accessories that you have or prefer. That being said, links to the accessories, and apps, can be found in the Links & Resources section at the bottom of this post.
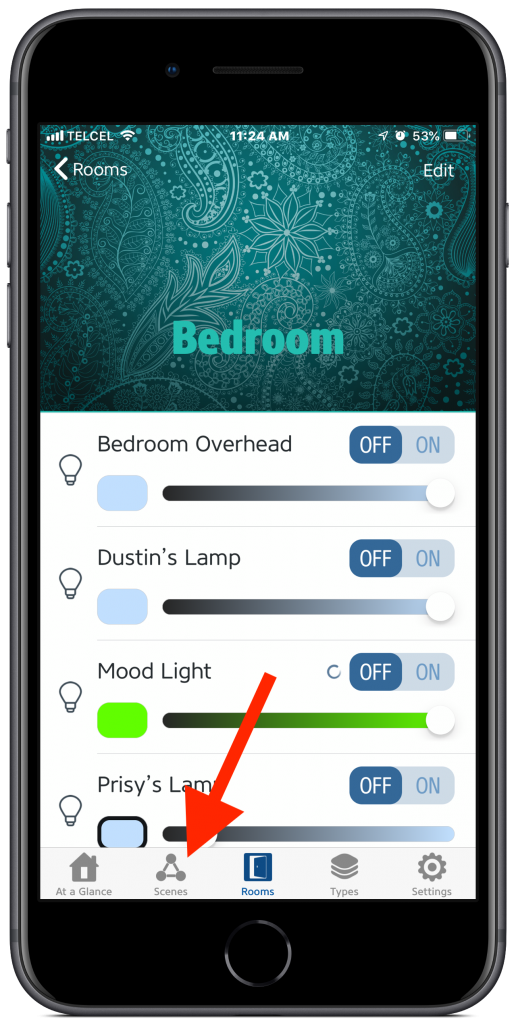
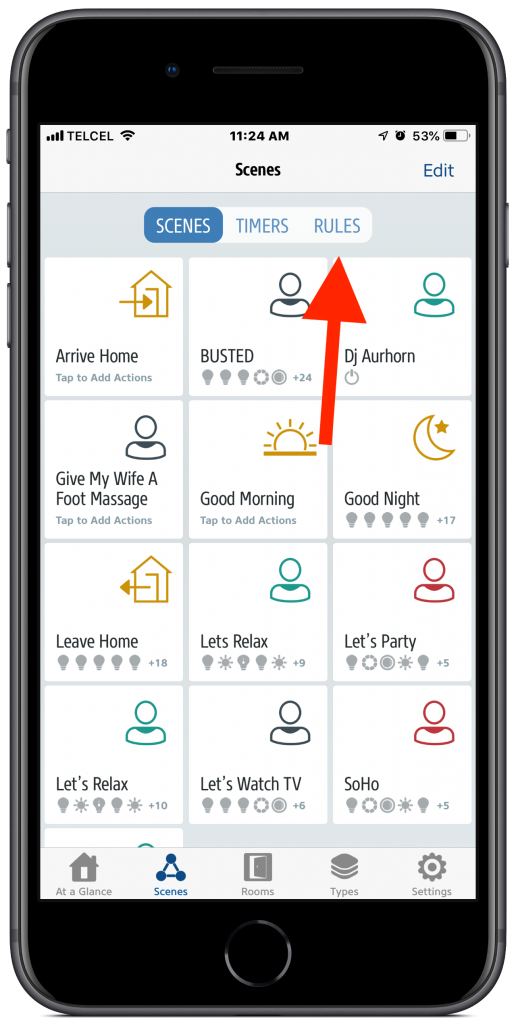
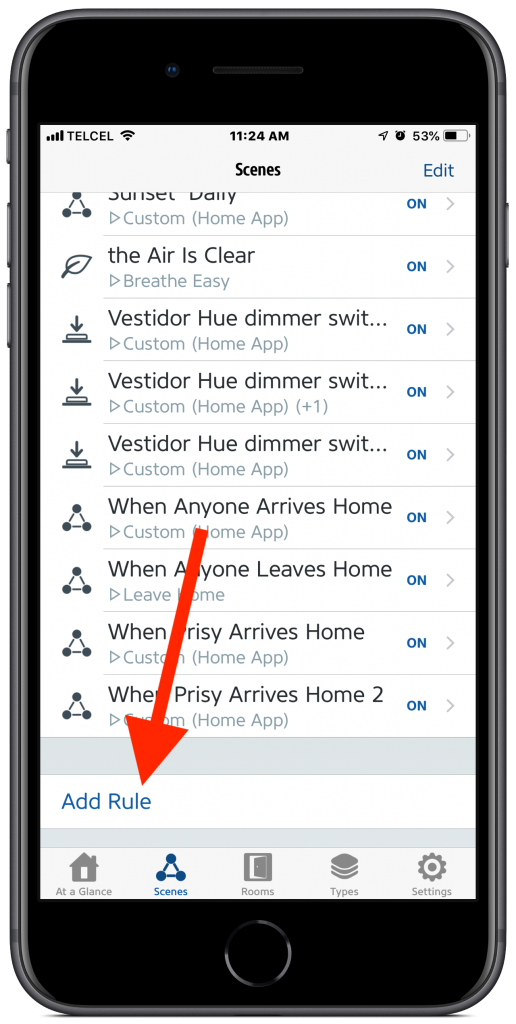
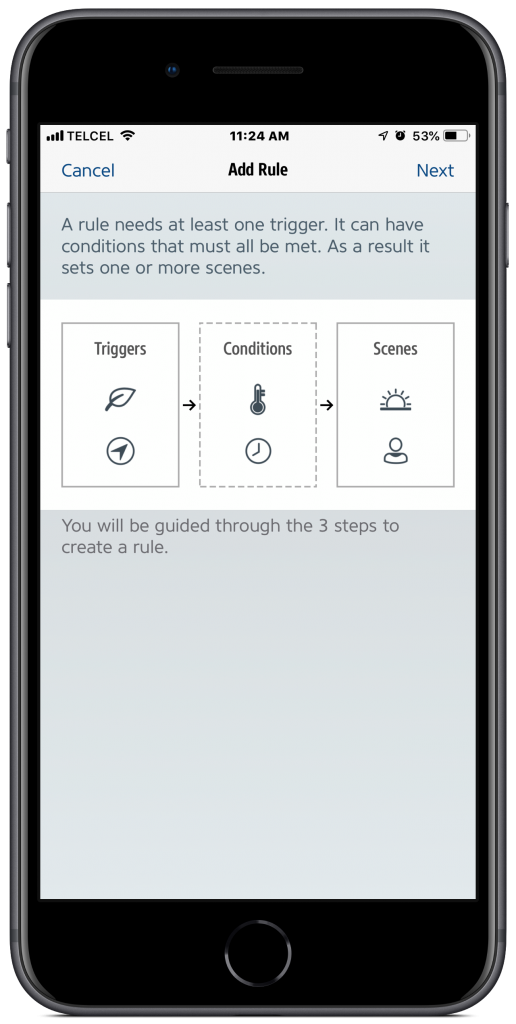
1. Upon launching the Eve app, we land on the “At a Glance” tab, but we are interested in the “Scenes” tab at the bottom. From the “Scenes”, we’ll choose the “Rules” option from the top. “Rules” are Eve speak for automations. The Eve app will automatically transfer over any existing automations that you may have already set up in the Home app or elsewhere, but since we’re interested in creating a new one, we’ll scroll to the bottom and tap “Add Rule”. If a “rule” is an automation, then a “trigger” is what happens that causes our “action”. Furthermore, Eve defines “conditions” as things such as time of day and location.
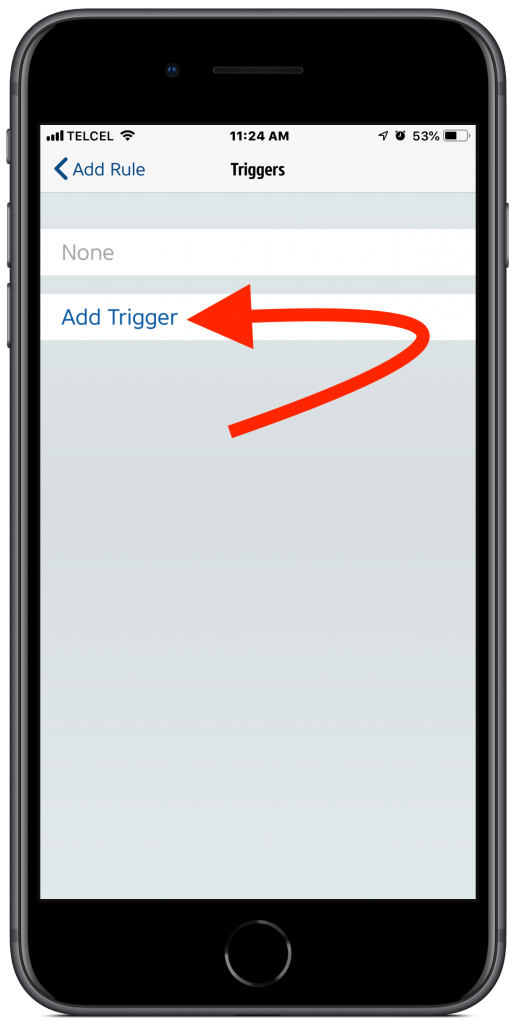
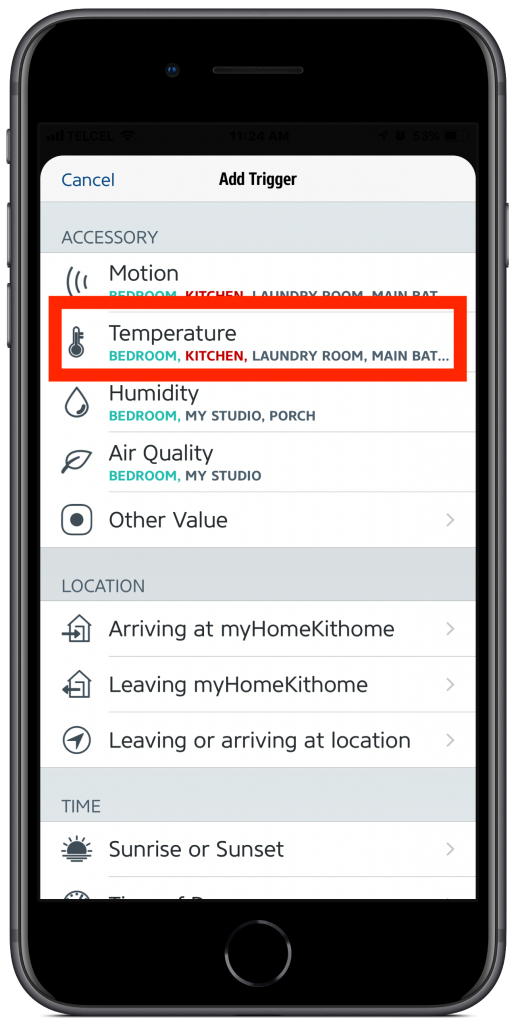
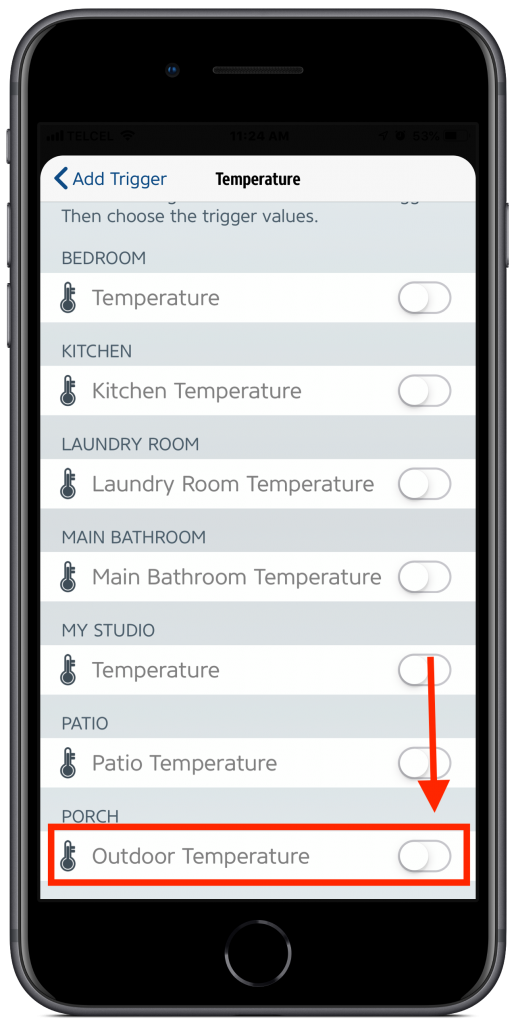
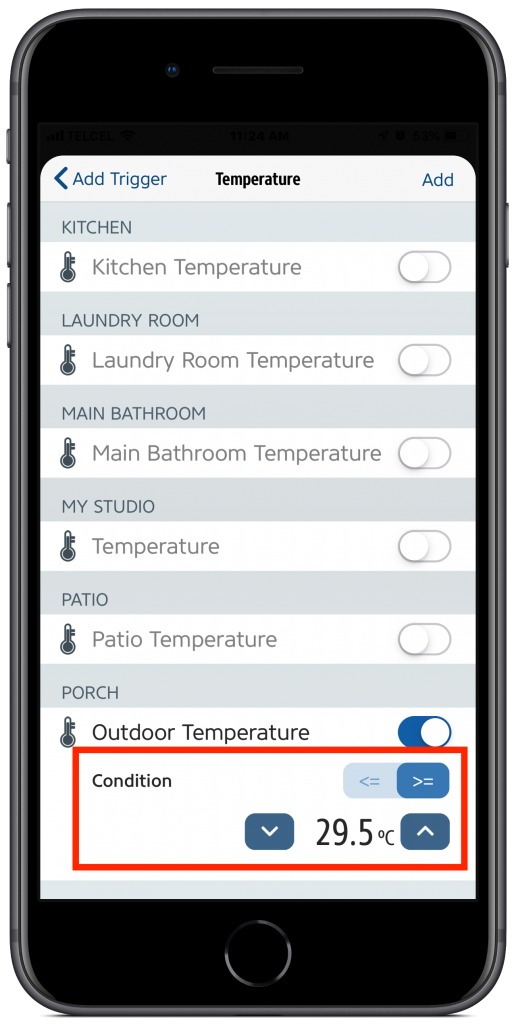
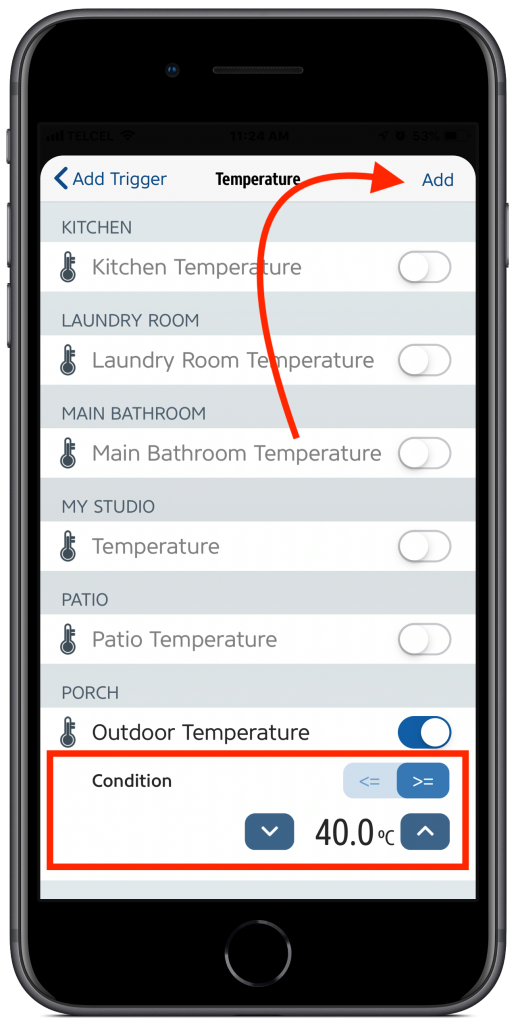
2. Tapping “Next”, we’ll “Add Trigger”. In this instance, it will be our temperature being greater than or equal to (>= ) 40 degrees. Therefore, we’ll choose “Temperature” and then locate our outdoor temperature sensor. Mine is on my “Porch”. We can activate it by tapping the toggle icon to the right and then adjust the parameters so that they reflect our desired temperature, [>= 40.0 C], then we tap “Add” at the top right.
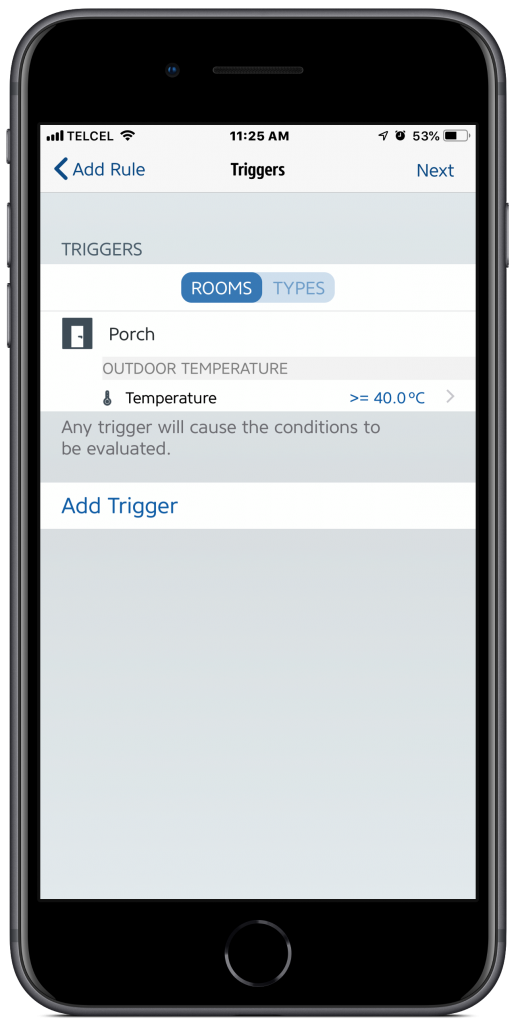
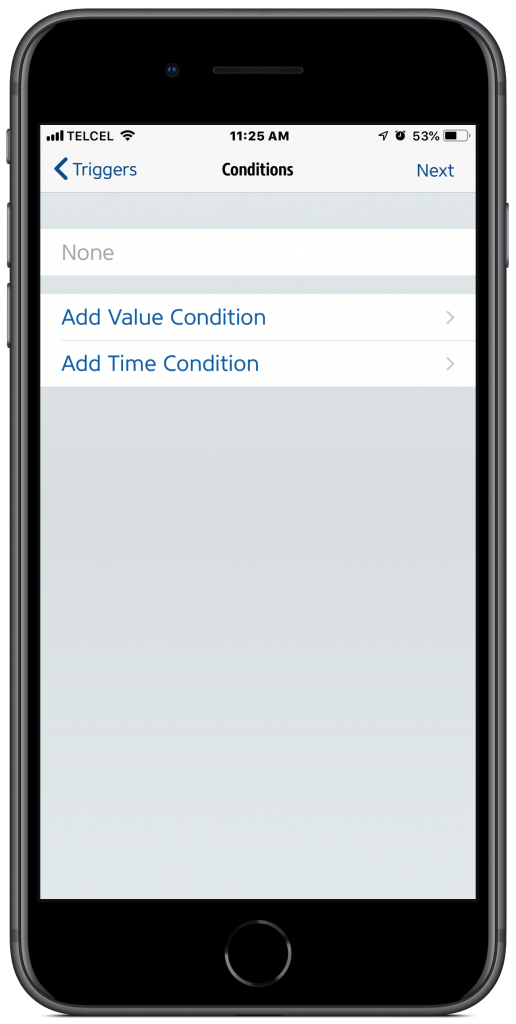
3. We’re now brought to our list of triggers. We can choose to add another if we’d like but for our purposes, the temperature trigger will suffice. As is noted, the chosen trigger then causes our conditions to be checked. You can add a condition but again for our purposes in this post, a condition isn’t necessary so we’ll tap “Next”.
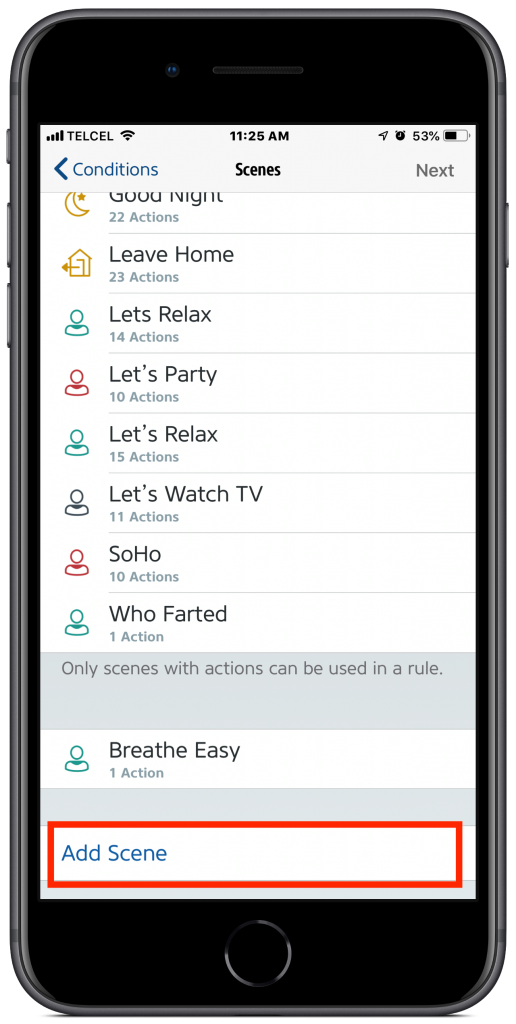
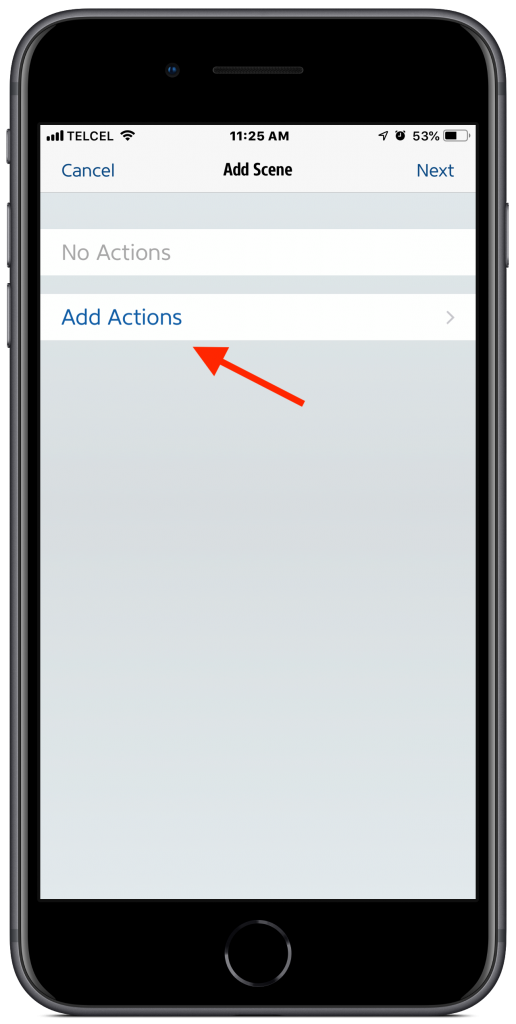
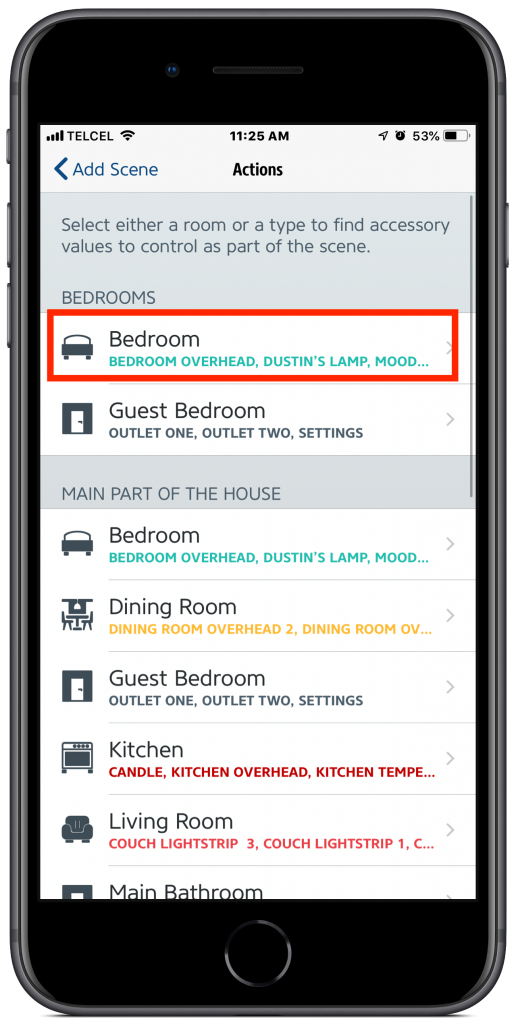
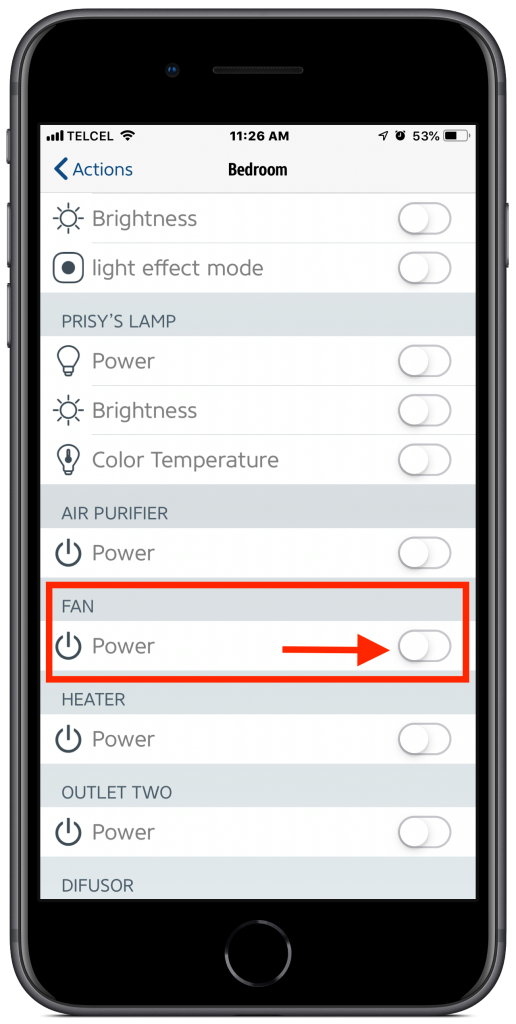
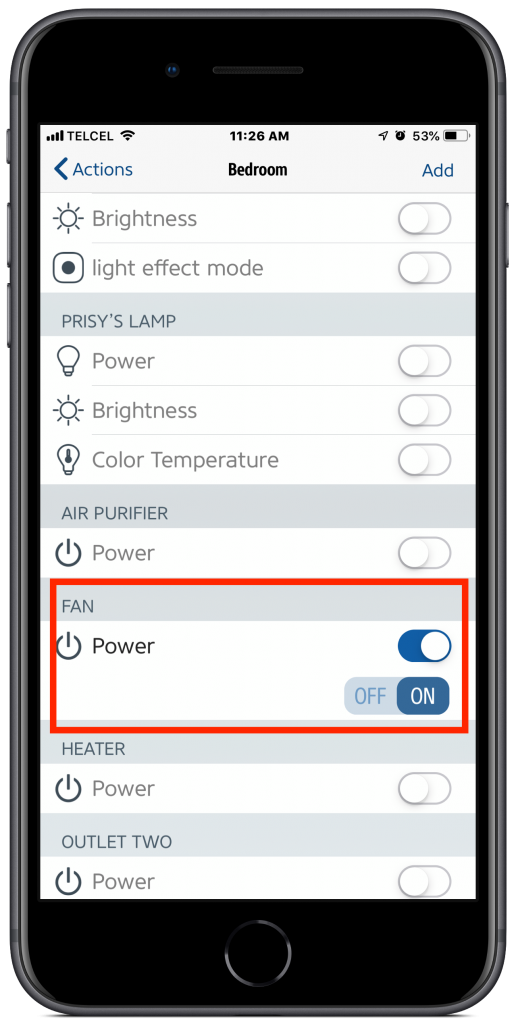
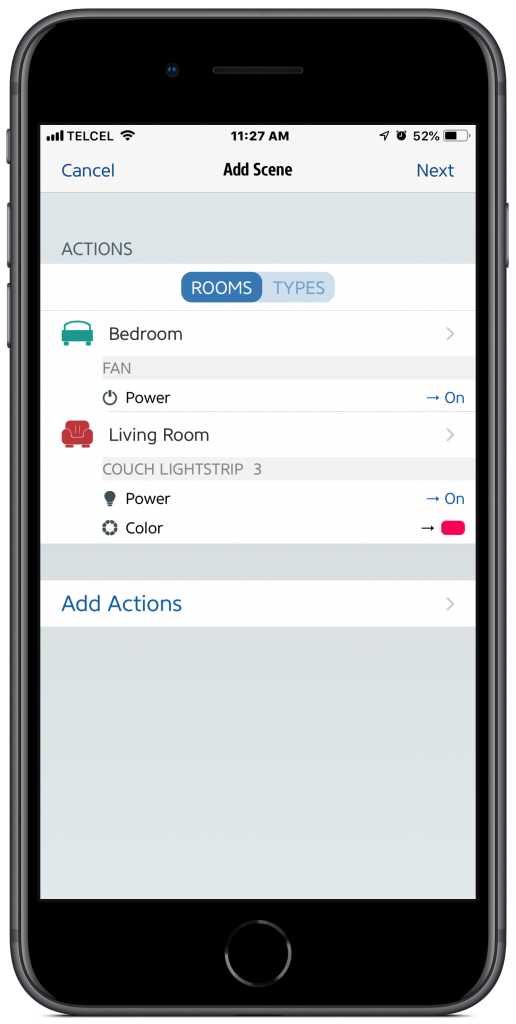
4. Now we’re on to our actions. I’m not sure why, perhaps for tidiness, but we can only use scenes for our actions. You can choose a scene that you’ve previously created either in the Eve app or elsewhere, but for posterity’s sake, we’ll scroll to the bottom and tap “Add Scene” and we’ll “Add Actions”. Since we want two things to happen, a fan to turn on and a light to turn red, these are the two actions we’ll add to this scene. A neat thing about scenes is that the accessories don’t need to be in the same room. To find the fan we want to control, we’ll head into the “Bedroom”, locate the “Fan”, activate the “Power” toggle, and since we want the accessory to switch on, we’ll indicate so by tapping “On”. Tap “Add”.
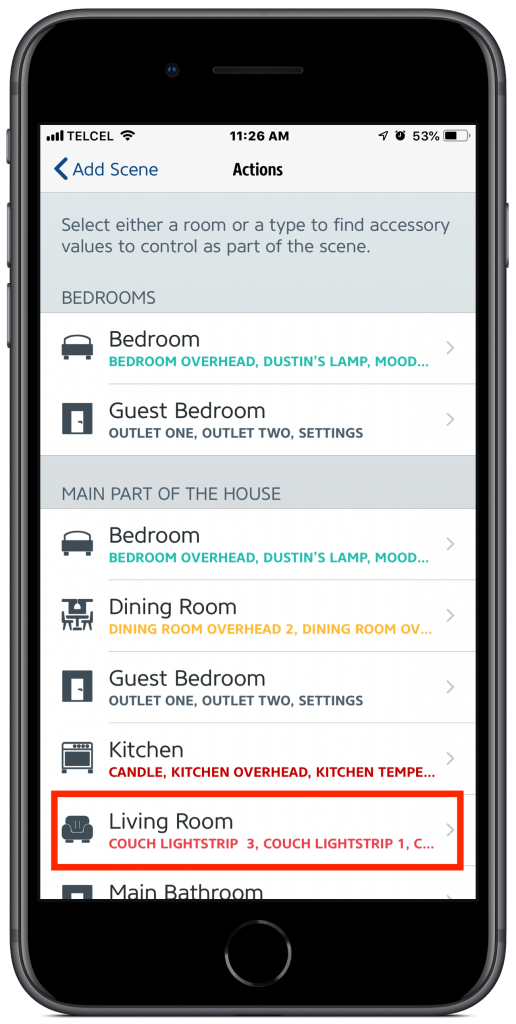
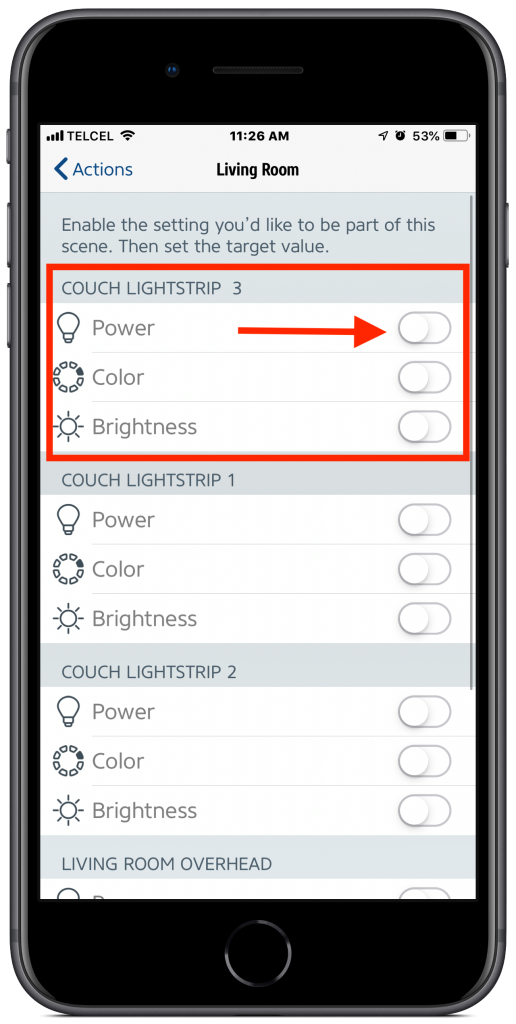
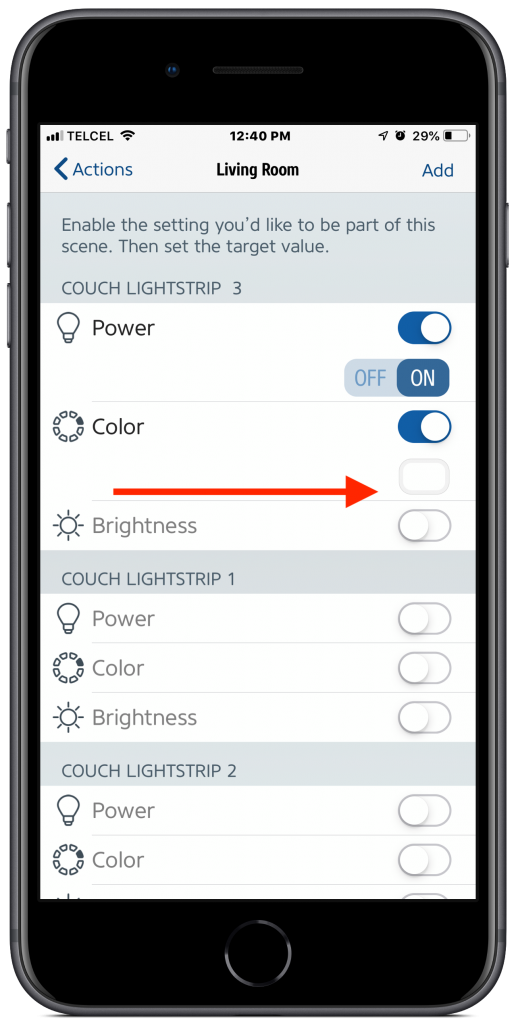
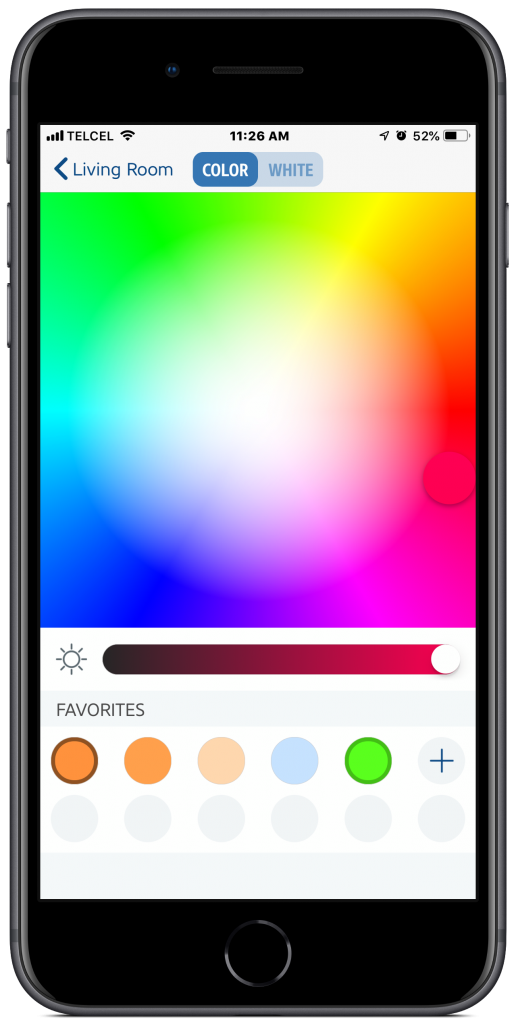
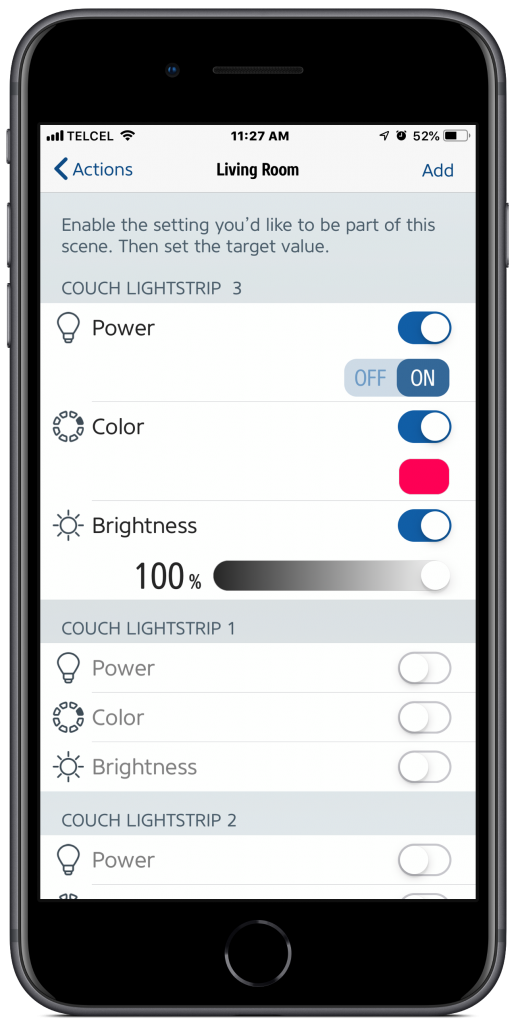
5. Let’s not forget about the light. We’ll tap “Add Actions”, but this time we need to go to the “Living Room” and I’m choosing “Couch Lightstrip 3”. This is very much an order of operations scenario so first we need to toggle the power state to “On” and then we can toggle and choose our color. I realize that it looks like the arrow in the screenshot is pointing to nothing, but trust me there is a little white box just below the toggle button and tapping on that will bring you to the color selector. Finally, we slide around until we reach our chosen brightness and then at last, we “Add” the action to our scene.
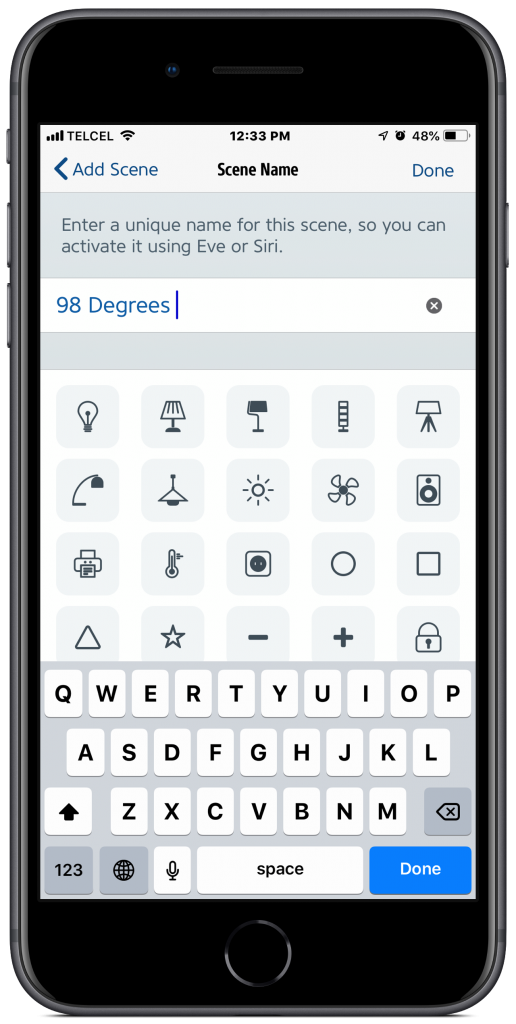
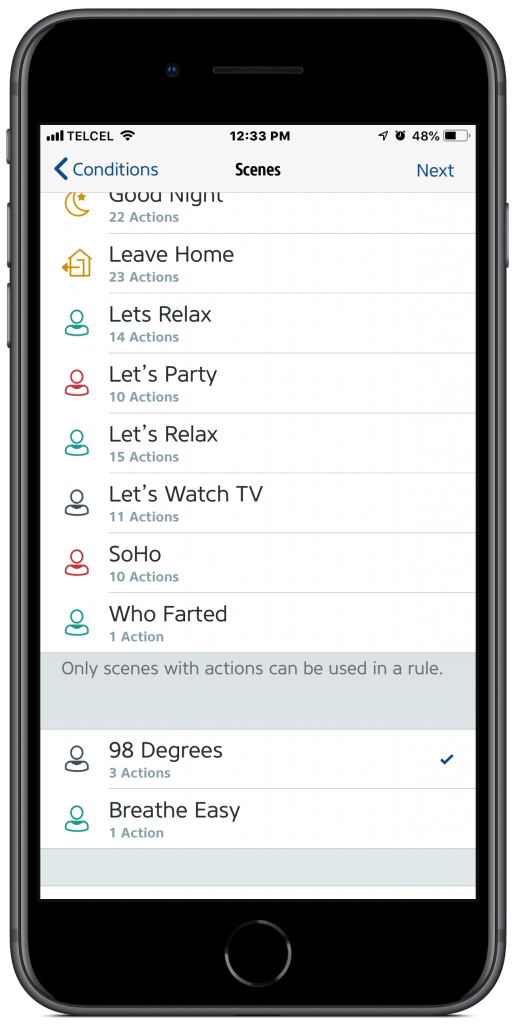
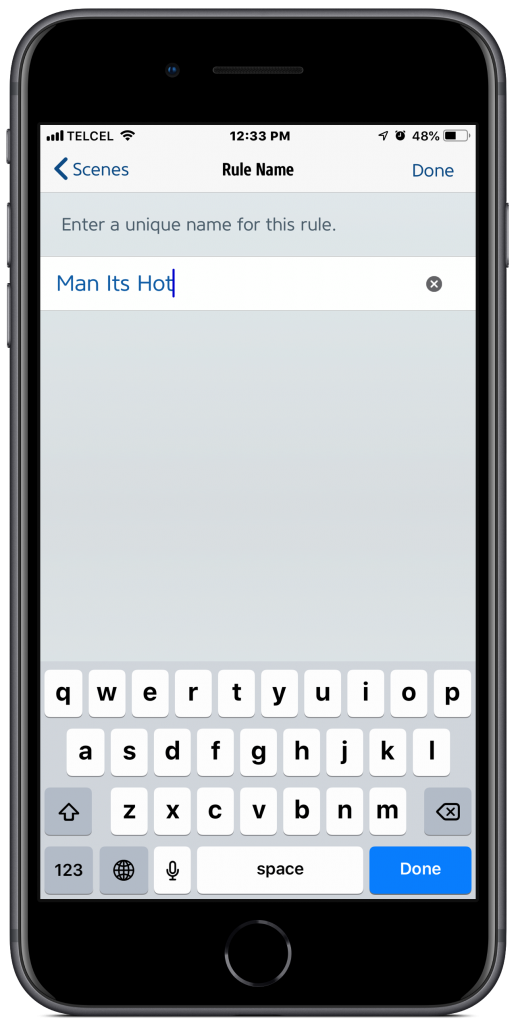
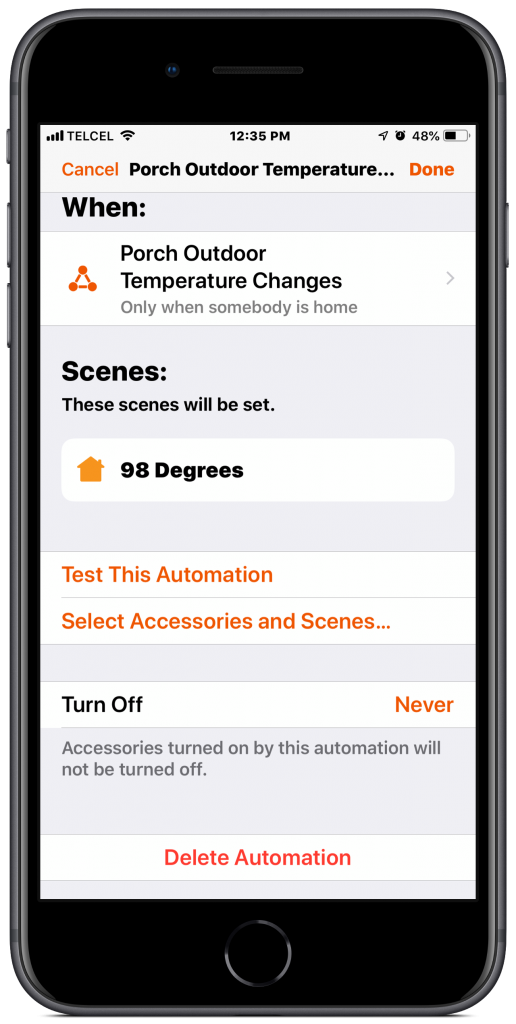
6. Now that we’re happy with our actions, we’ll name the scene something clever. Yes, I know that 98 degrees Fahrenheit isn’t exactly 40 degrees Celsius, but I am a product of the ‘90s. We can also assign an icon to the scene, but be aware that the icon will only appear in the Eve app and is not transferred to the Home app. Once we chosen the scene name, we’re brought back to the scene selection screen where our newly created scene has been automatically selected for us and we’ll tap “Next”. Unlike Apple’s Home app, the Eve app requires us to also assign a name for the “rule” or automation and once we’ve done this and tapped “Done”, our automation is stored in the cloud and, hopefully, synced to iCloud.
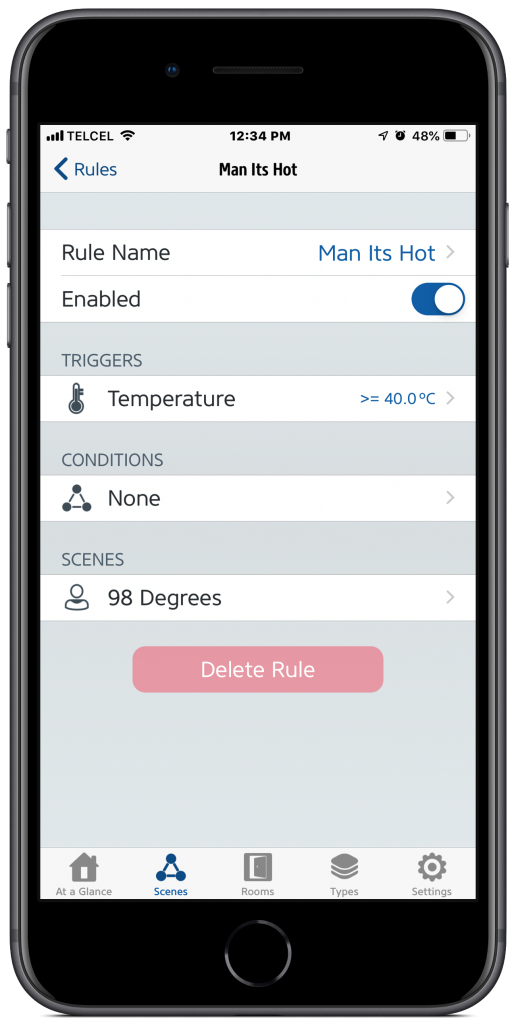
7. Tapping on our newly created rule from the “Rules” option in the “Scenes” tab of the Eve app, we can disable and enable the rule and also make any adjustments to the automation including triggers, conditions, and actions. We also have the option to delete the automation entirely if we feel it simply cannot be recovered. Now, let’s see if this automation was actually synced to iCloud and see what we can do with it in the Home app.
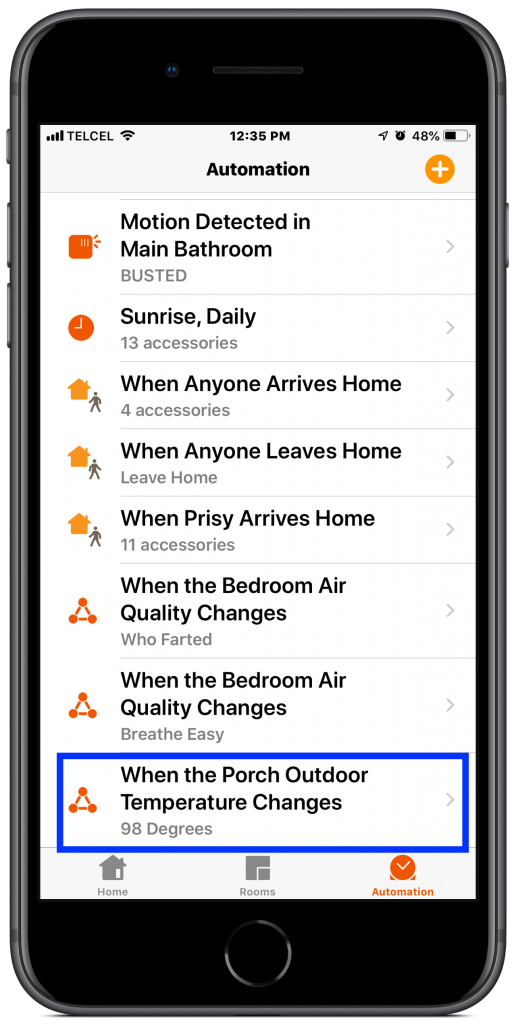
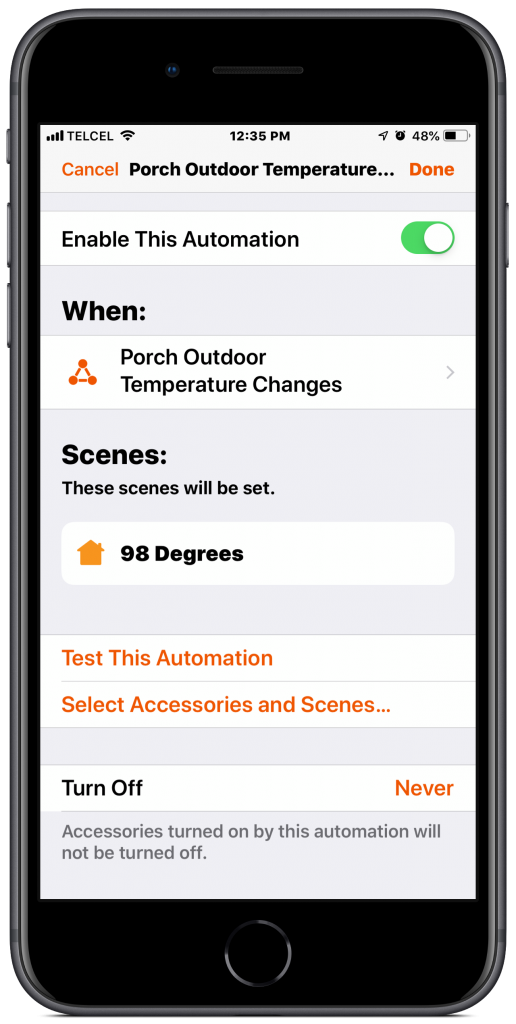
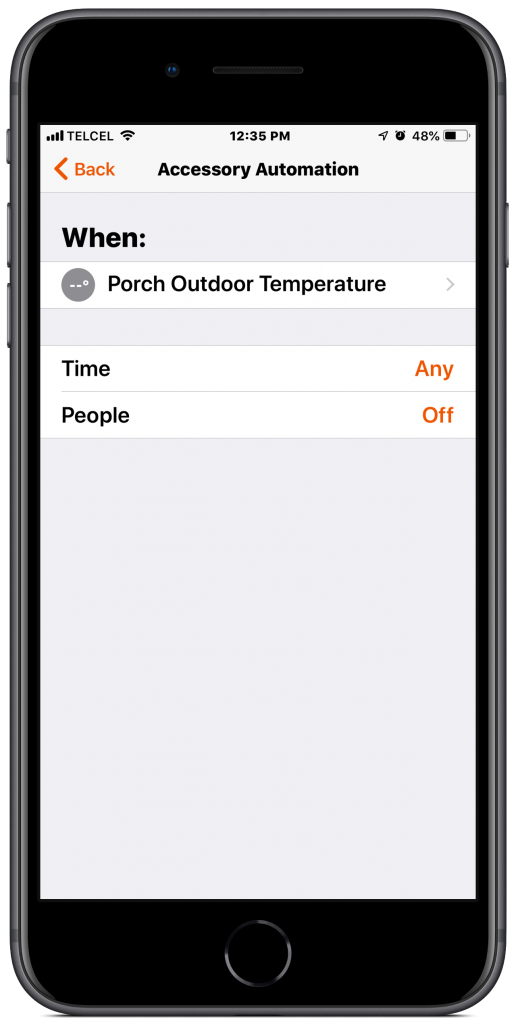
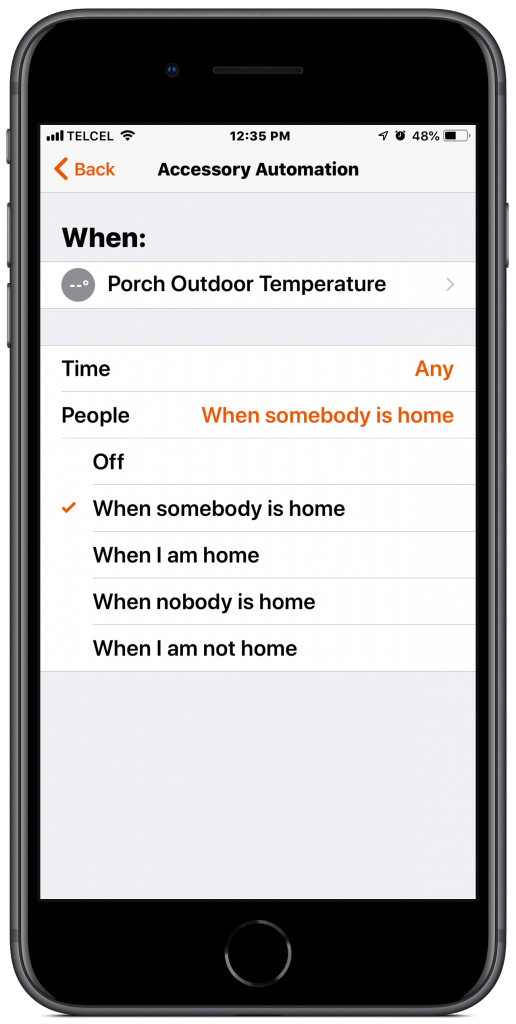
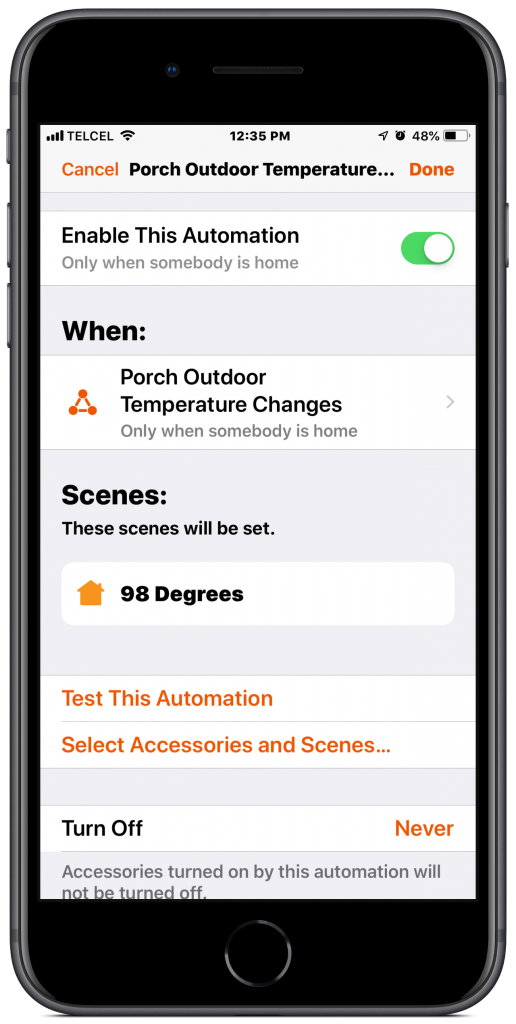
8. From the “Automations” tab, we now see that our “Man its hot” automation appears in Apple’s Home app. Oddly, the icon displayed for the automation is that of the “when an accessory is controlled” type. However, tapping on it does bring us a few options to play with. We can, of course, disable and enable the automation. Tapping on the “When…” part of the automation, our set temperature is not displayed nor can we adjust it in the Home app, but we can add time and people conditions which I wasn’t able to track down in the Eve app. We can also adjust the scenes or accessories that happen once the trigger and the conditions are met as per usual. We’re also able to set the “Turn Off” timer which I was also not able to locate in Eve’s app. Finally, we have the option to delete the automation here as well.
On a side note, though we looked at how to trigger accessories based on outdoor temperatures, we didn’t look at how to turn it off if the temperature drops below your temperature threshold. To do this, simply create another rule in the Eve this time reversing the temperature trigger [<= 40] and creating a scene that would turn the fan off and turn off the light.
Final Thoughts
Many people may not need this type of automation if they have central heating and air and have a HomeKit thermostat, but in many parts of the world, centralized cooling and heating aren’t so popular so this is a great way of maintaining comfortable temperatures without lifting a finger. It’s also nice to be passively notified of general temperature. I have similar automations set for temperatures below 15 degrees Celsius that turn the same light blue and turn on a heater. Furthermore, we can use the same concepts discussed here to trigger actions based on humidity that could indicate that it could be raining.
I am painfully aware that this is a very roundabout and fairly complicated way to create this automation. I am also a bit perplexed as to why if the automation is built into the HomeKit framework that it’s not executable in Apple’s Home app, but that’s the way it is for now.
Do you use a similar technique for creating automations based on outdoor environment information? How could, would, or do you use this type of automation in different ways? We’d love to hear you sound off in the comments down below. Don’t forget to check out our other content on automations using HomeKit here on the blog and our video tutorials. We’re regularly found on social media @myhomekithome
Links & Resources
Eve for HomeKit app https://www.appstore.com/eveforhomekit
Matthias Hochgatterer’s Home 3 app: https://itunes.apple.com/us/app/home-3/id995994352?mt=8
Hesperus app: https://itunes.apple.com/us/app/hesperus/id969348892?mt=8
We use income-earning affiliate links.
We may receive a small commission on purchases made using links on this page at no extra cost to you.
