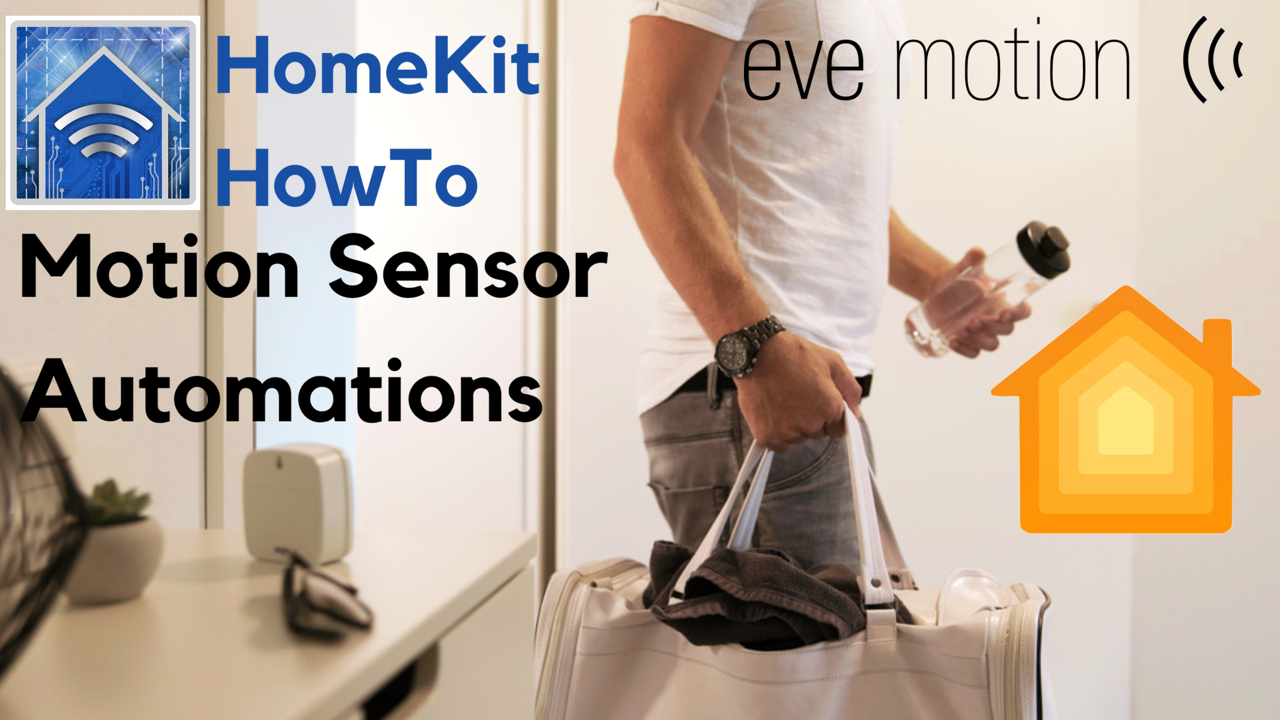
For some time now, I’ve entertained the idea of getting rid of wall switches all together, capping the wires to complete the circuit, covering the switch with a blank plate, and relying solely on motion detectors. Though I haven’t gone this far yet, the lights in nearly every room in my home are controlled by motion sensors Whether home or away, HomeKit and motion sensors can really start to make your home feel smart and intuitive. In fact, with planning, motion sensors, and HomeKit automations, we have the ability to do so much with motion sensors. In this post, we’ll look at how to create motion sensor based automations using Apple’s Home app.
To follow along, here’s what you’ll need:
- Apple’s Home app – Motion sensor automations can definitely be created using other apps also!
- a HomeKit-compatible motion sensor – We’re using Eve Motion, but any HomeKit motion sensor will work the same
- Another HomeKit accessory to control – This can be any number of accessories that are controllable like smart lights, plugs, humidifiers, etc. We’re using a Phillips Hue bulb for this walk-through.
Links to all of the toys used in this guide can be found in the Links & Resources section at the bottom of this post.
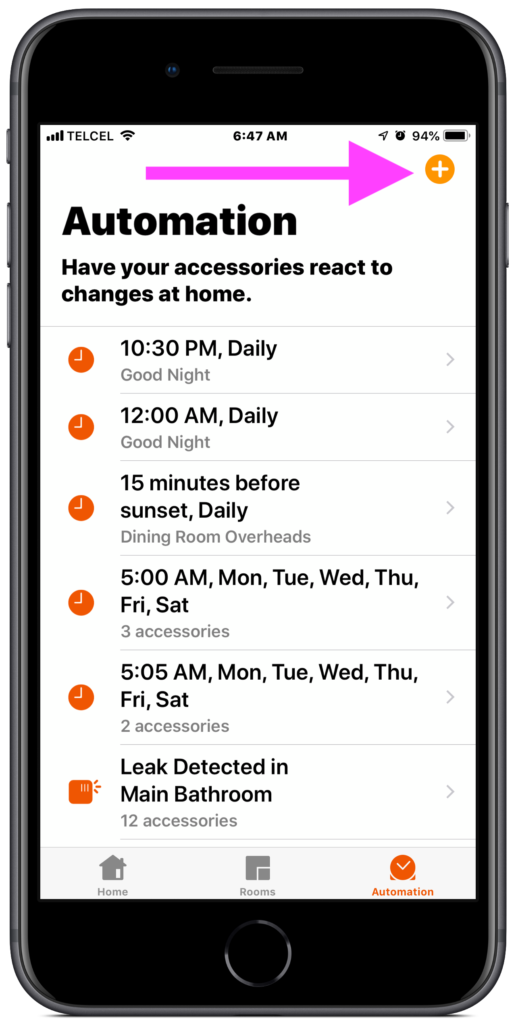
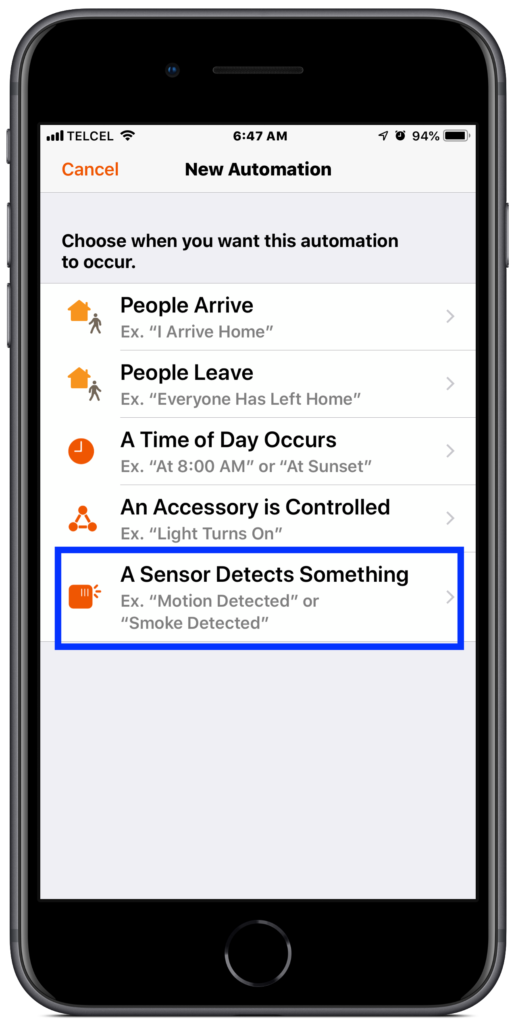
1. From the Home app, we’ll choose the “Automations” tab on the right tapping the + (plus) button at the top right and choosing the final option, “When a Sensor Detects Something”.

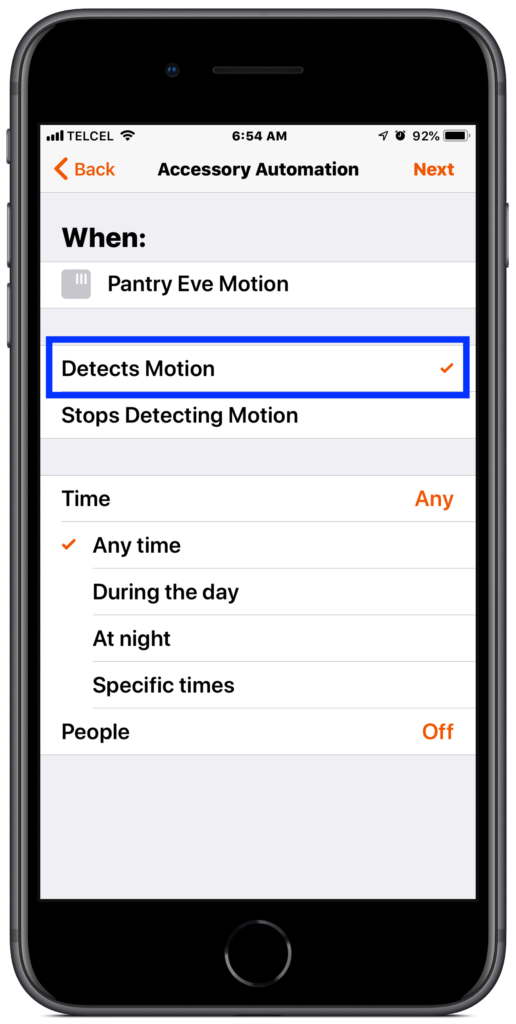
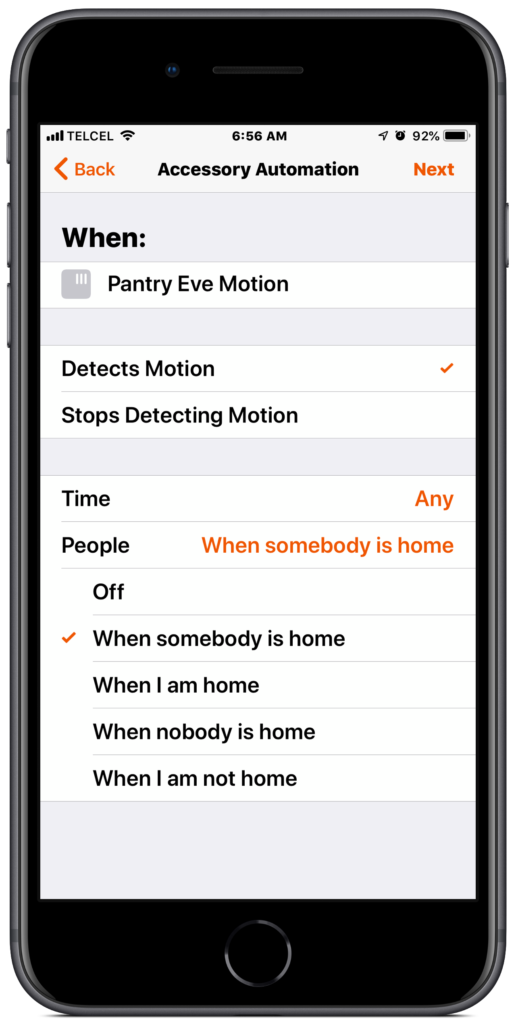
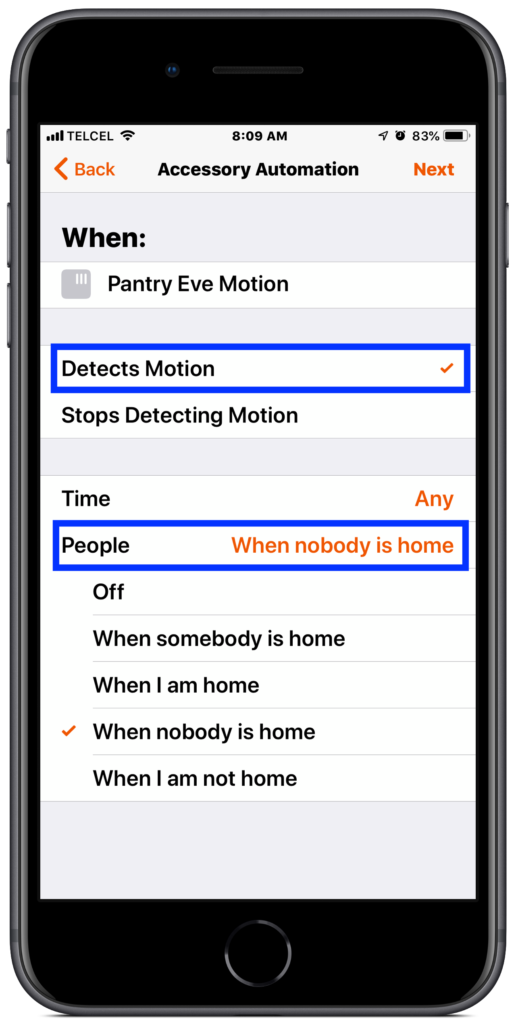
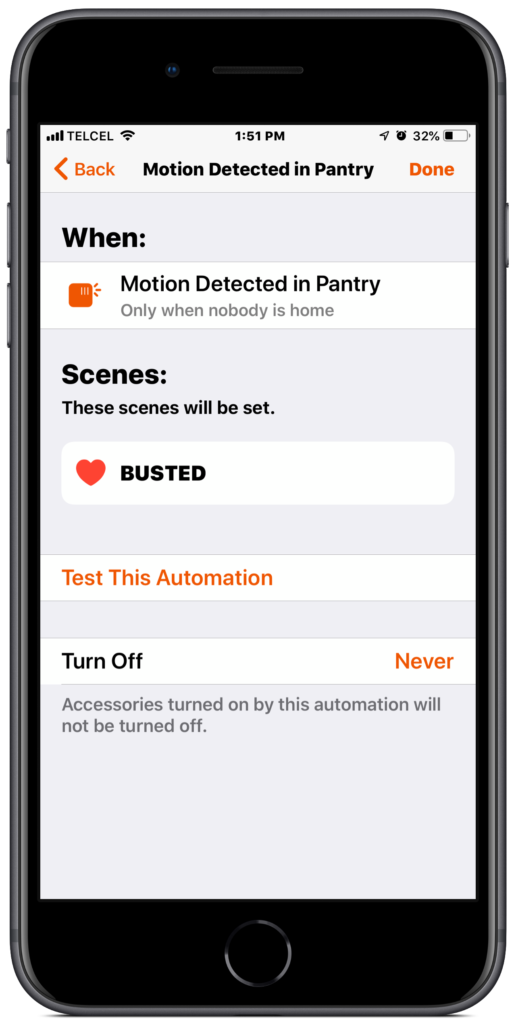
2. We’ll locate the motion sensor that we want to use, in our case it’s the motion sensor in the Pantry. Now, we’ll modify our conditions. For this part of the automation, we want our action to trigger when the sensor “Detects Motion”. We also have “Time” and “People” conditions. Since this is a pantry with no windows and little natural light, it always needs light no matter the time of day so I won’t worry about restricting time. In terms of the “People” condition, I only want this first action to happen if someone is home. While it’s true that you can leave this condition alone and the action will trigger in largely the same way, there is a specific reason why I am choosing this condition that we’ll get to in a moment.

3. As with all HomeKit automations, for our actions we can choose from any combination of previously created scenes or individual accessories. Since for this particular automation, it’s only controlling one light, we’ll just select that light. After selecting which accessory we want to control, we need to tell it what we want it to do. A single tap on the accessory will toggle its power state. Long-pressing on it will bring up any specific controls for the accessory type.


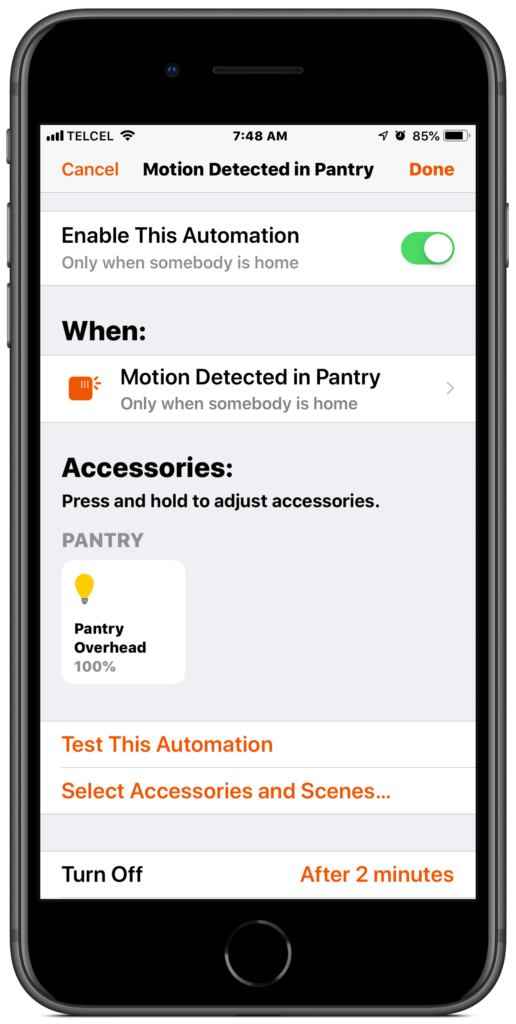
4. We also have the option to “Test This Automation”, however this will only test the actions of the automation and not the automation itself as there hasn’t been any motion. This you can test after you finish the automation and then go back and make any adjustments. Since in this case our action turns an accessory on, we can also select a timeout period for the automation, but this is something we’ll address in the second part of this automation.
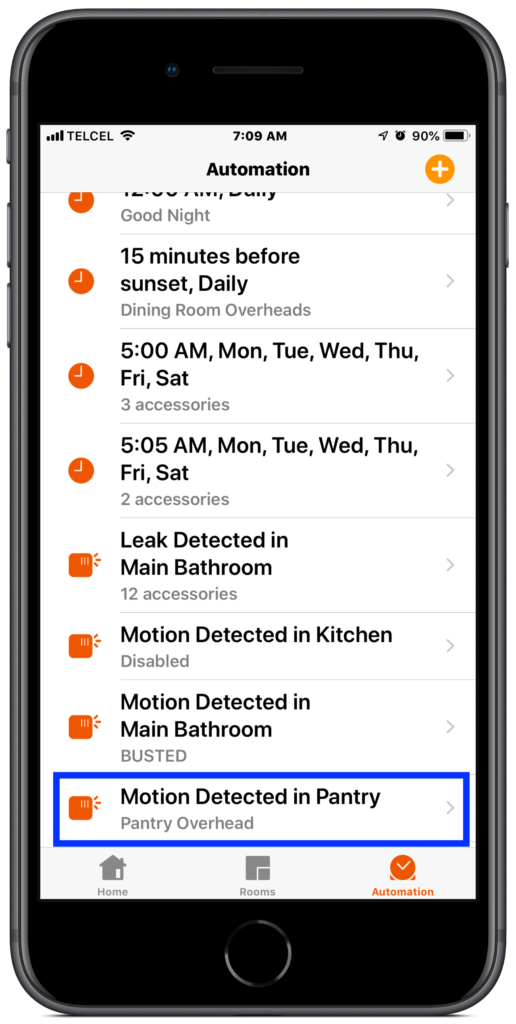
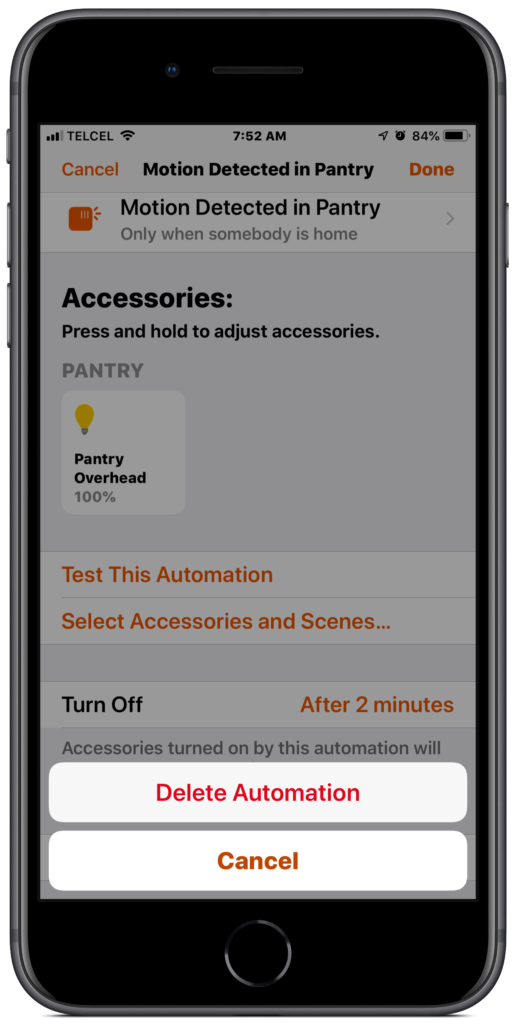
5. Once we’ve finished our initial automation, we can fine tune it by tapping on it from the list in the “Automations” tab. We have all of the same controls as we did before except we can “Enable [or disable] this Automation” and we can “Delete [the] Automation.” Finally, if we need to have the automation vanish quick, fast and in a hurry, we can always swipe left on the automation from the “Automations” tab, but be careful as this method doesn’t ask for confirmation.

Success! Illumination! If you didn’t set a timeout condition when you created this automation or if you don’t have this configured in the vendor’s app, you’ll want to create what I’ll call a counter automation to turn off the light or scene. This won’t apply for every situation, but it’s good practice for being able to fly through automation creation when smartening up your home.
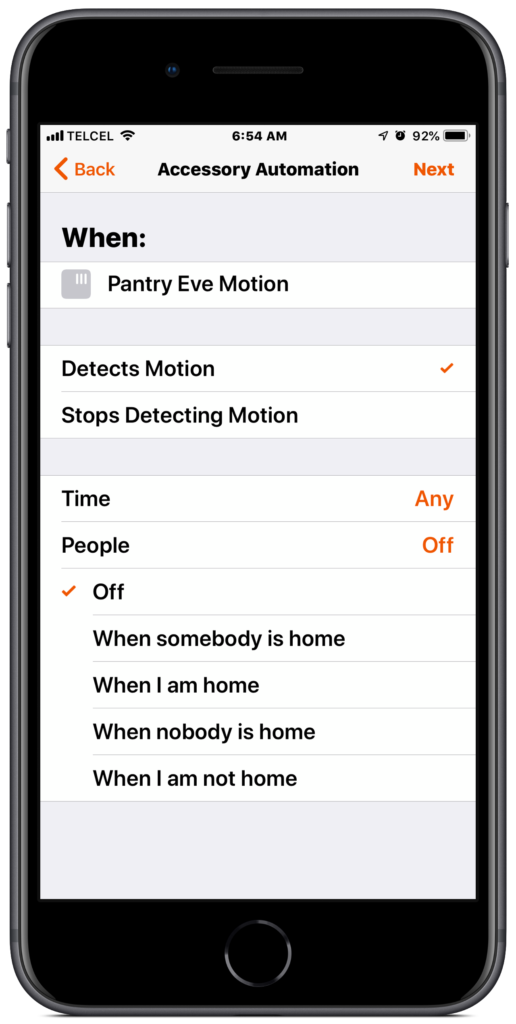
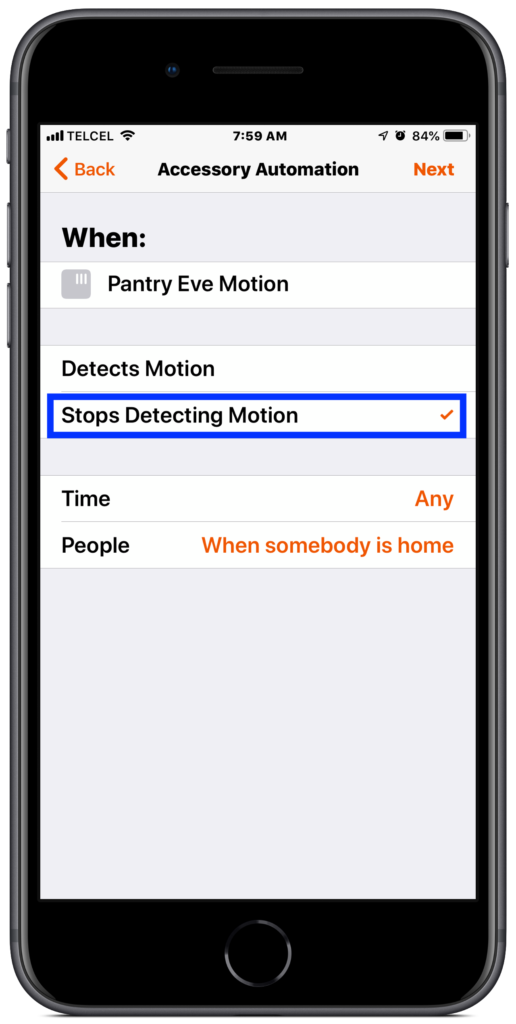
6. There are only two things we need to adjust: our motion sensor state and the action of the accessory. As for the motion sensor state, this time we’ll choose “Stops Detecting Motion” and for the accessory’s action, we’ll give it a tap to make sure it indicates “Turn Off”. Other than these two modifications, everything is exactly the same as we indicated above.

7. Above we mentioned a specific reason for choosing the “When somebody is home” People condition and here’s why. In an attempt to thwart any would-be home invaders, I have created a scene that turns all of the colored lights in my home to red. I have also created automations that trigger this scene if any motion sensor detects motion AND nobody is home. Furthermore, I get a notification if the motion sensor detects motion and nobody is home. If you want to know how to manage notifications in HomeKit, check out this post.

Final Thoughts
There you have it! A simple way to use motion sensors to control lighting. The specifics outlined are the simplest way to use motion sensor automations in HomeKit, but you can really get fancy with it. For example, I have a room dedicated as a home theater and since I can assume that it won’t, or at least maybe shouldn’t, be used for movie watching before 7 PM, if motion is detected after this time, I have a movie time scene which turns on a projector, sets a lighting scene and starts warming up the popcorn machine, because what’s a movie without popcorn? If you really dig into how a space in your home is used, you’ll start to find habits and you may find that you can create automations that respond to these habits.
What creative ways have you found for motion sensor automations? Notes, tips, and tricks are always welcome in the comments. Don’t forget to follow us on the latest and greatest social media @myhomekithome.
Links & Resources
We use income-earning affiliate links.
We may receive a small commission on purchases made using links on this page at no extra cost to you.