I use Siri on a daily basis for a number of tasks from keeping track of my grocery list, reminding me of things I need to do when I get to a certain place, calendar events, timers, the news, and the list goes on. One thing I rarely use Siri for is HomeKit. It seems unnatural to me to bark out a command to turn on the fan or dim some lights when I’m in the middle of a conversation. The smart home for me needs to be just that, smart. It should anticipate changes, react to them, and adjust accordingly. While we’re not quite there 100% yet, sensors allow us to create automations that operate in the background without our direct interaction and carry out certain tasks that we would like to happen. This post will take a look at the different types of sensors currently available on the HomeKit platform, as well as look at how to create automations based on that sensor data using Apple’s Home app.
HomeKit Sensors
While there are quite a few manufacturers producing HomeKit-compatible sensors and many of the physical devices house multiple sensors, we can break the sensor product category down as such:
- Environment Sensors – measure temperature, humidity, and air quality (VOCs)
- Water Sensor – detect the presence of liquid
- Contact Sensors – detect open or close state of the sensor
- Motion Sensor – detect movement including vibration
- CO and Smoke – detect carbon monoxide and the presence of smoke, including natural gas
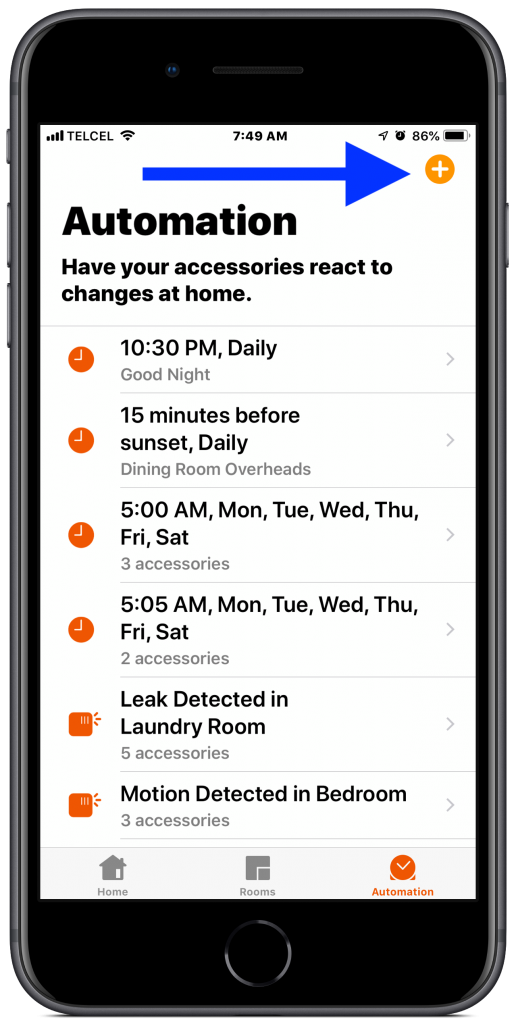
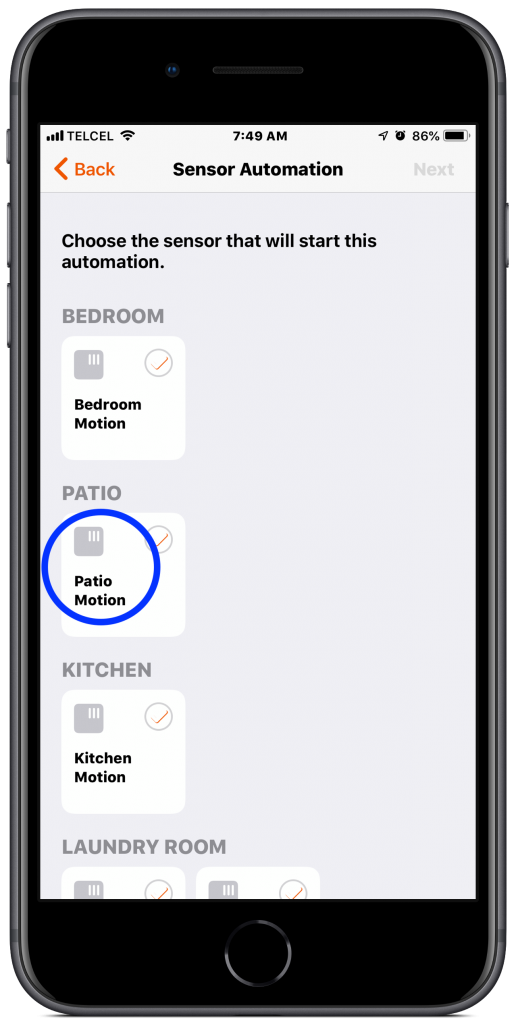
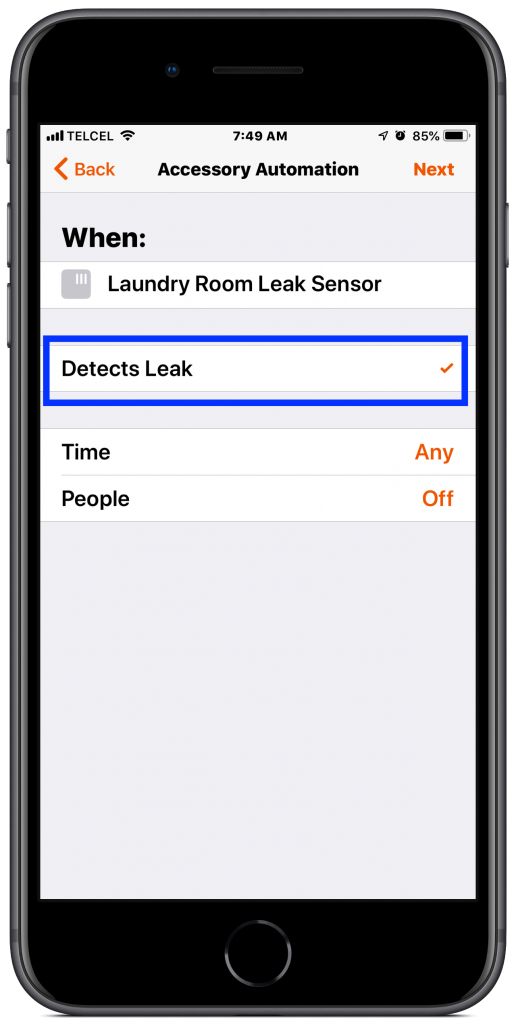
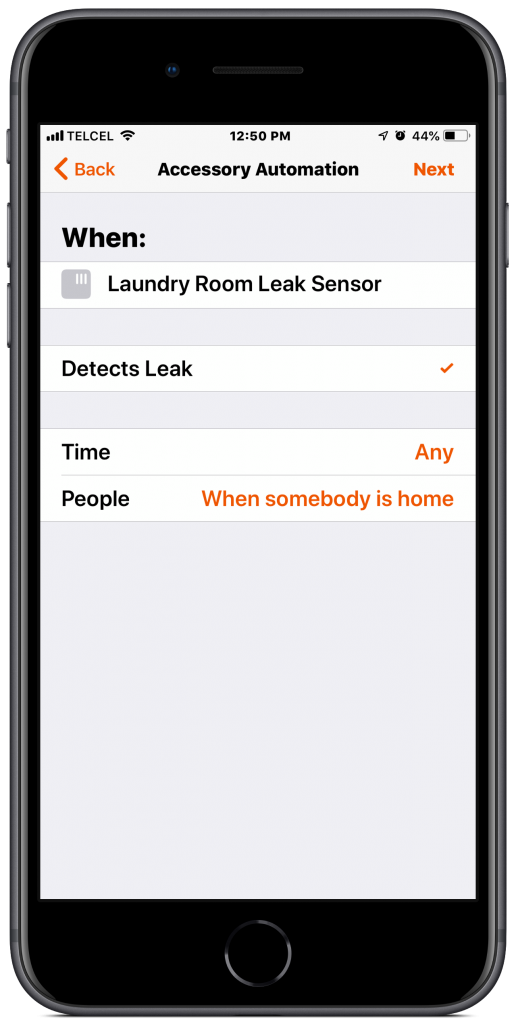
1. To get started with sensor-based automations, in Apple’s Home app we’ll tap the + (plus) button at the top right and select “When a Sensor Detects Something. The Home app will automatically aggregate the different sensors you have in your home and list them here. Depending on the type of sensor, we have different options for its conditions. Motion sensor conditions are based on the sensor detecting movement or when the sensor stops detecting movement. As for water sensors, we only have the option for when the sensor detects a leak. Contact sensors give us the option of an open or closed state meaning that the two pieces of the sensor are physically separated enough for the sensor to register as opened or closed.
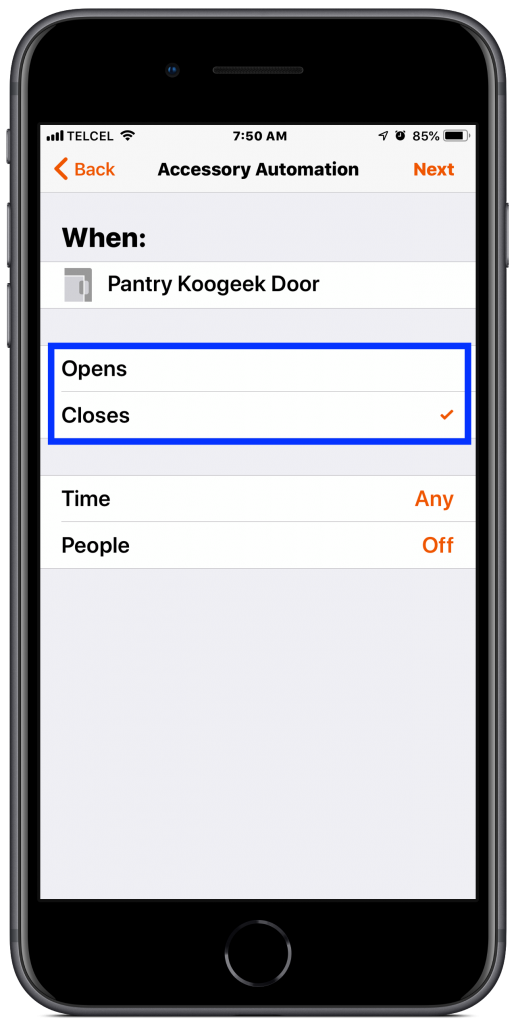
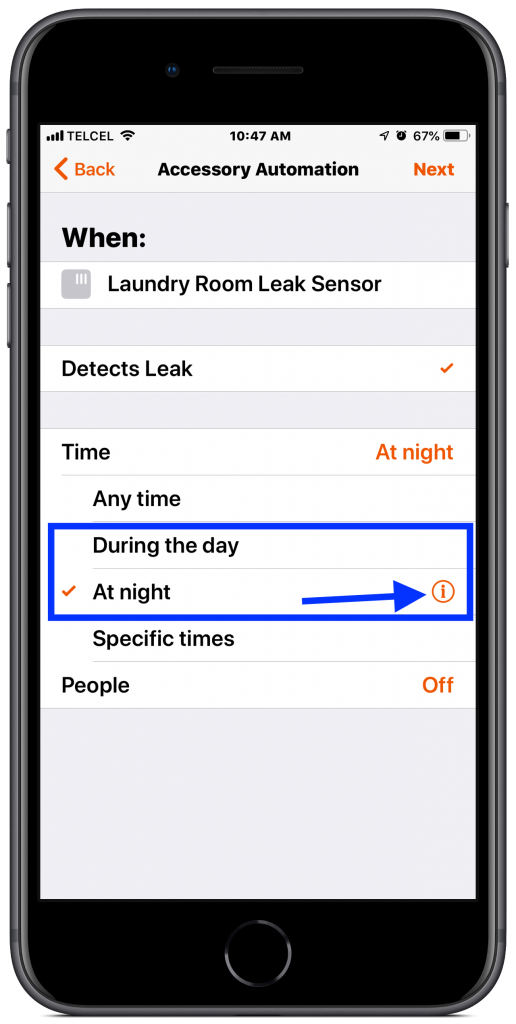
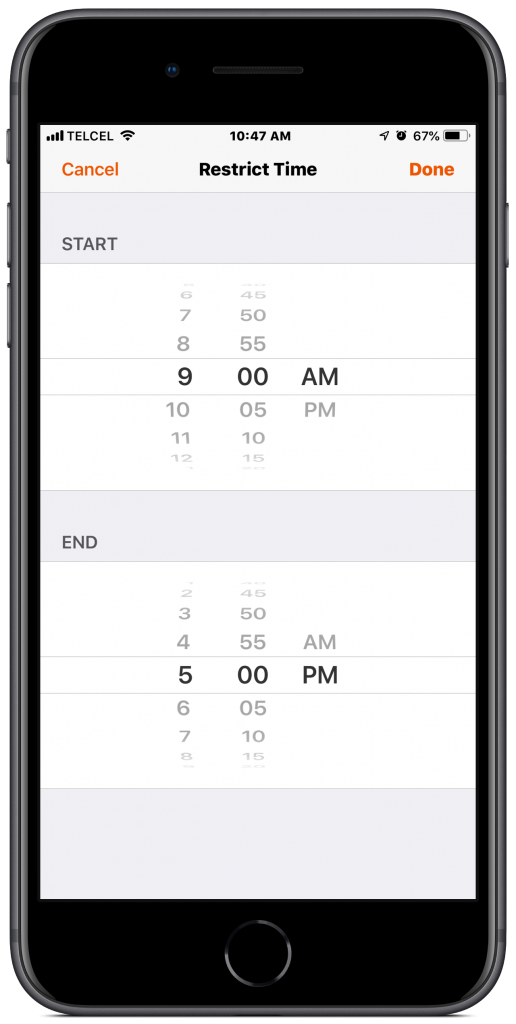
2. Regardless of the sensor type, we have the ability to establish “Time” and “People” conditions as well. For “Time” conditions, the default setting is “Any” which is essentially no time condition. We can also set the time condition to “During the Day” or “At Night” and by tapping the information button to the right of each, we can further specify if the automation should run at sunrise and sunset or in 15-minute increments up to an hour before or after each. Lastly, we can create a specific time window in which we would like this automation to run if we want a bit more flexibility.
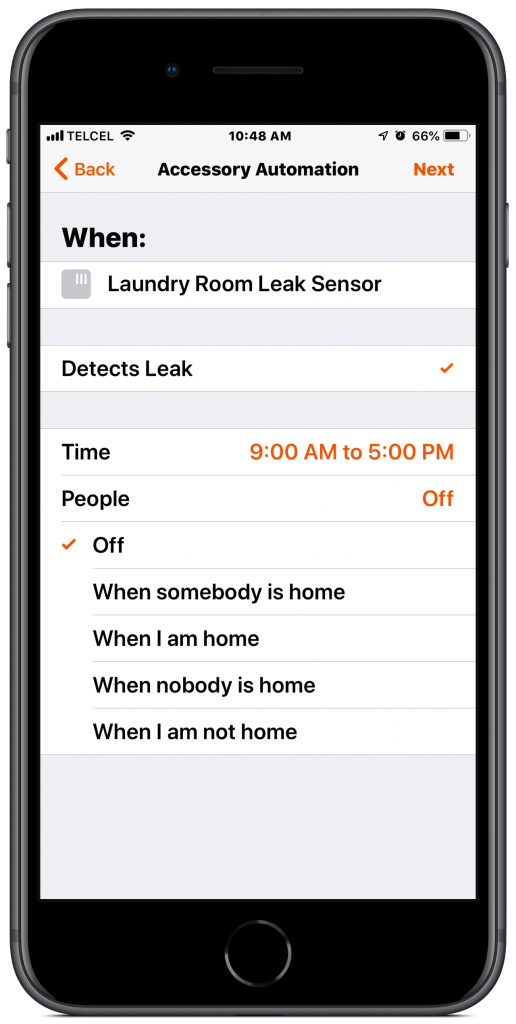
As for the “People” conditions, our default is “Off” which indicates that the automation is not bound by people being connected to the WiFi network, or “at home”. If we’d like, we can bind the automation to either somebody or nobody being home or only when the person creating the automation is home or away.
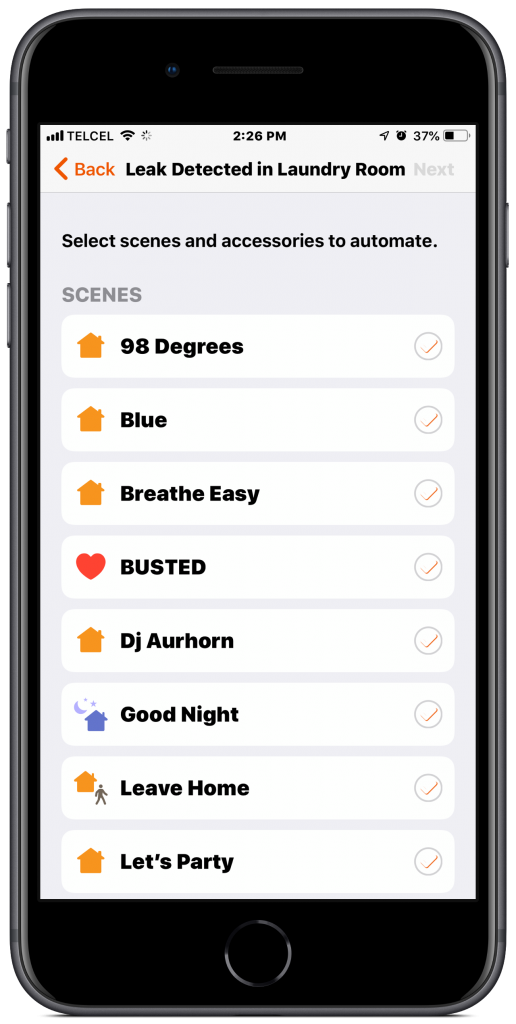
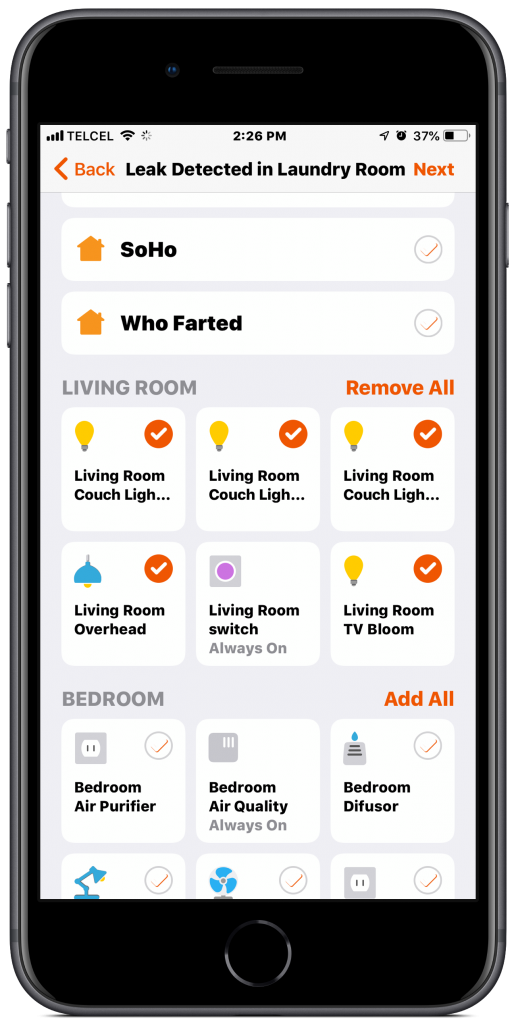
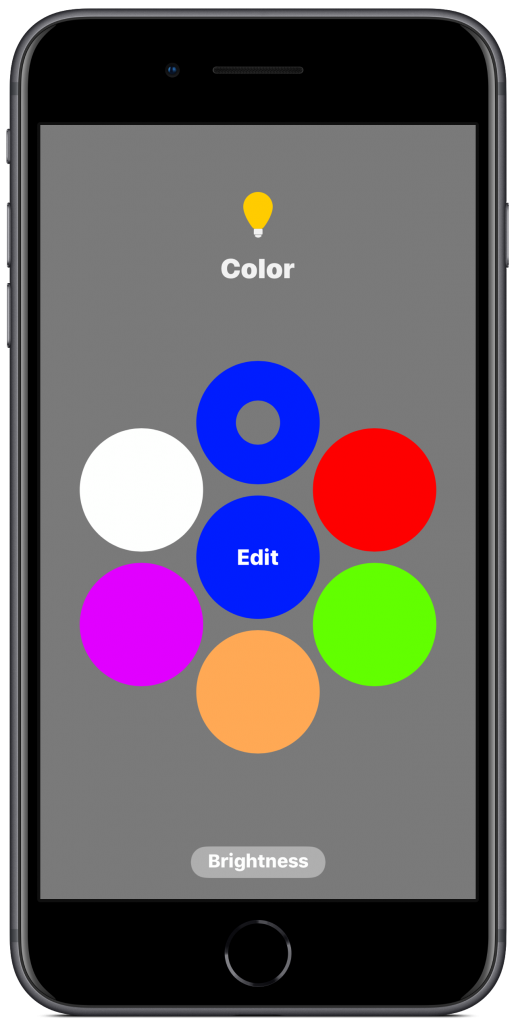
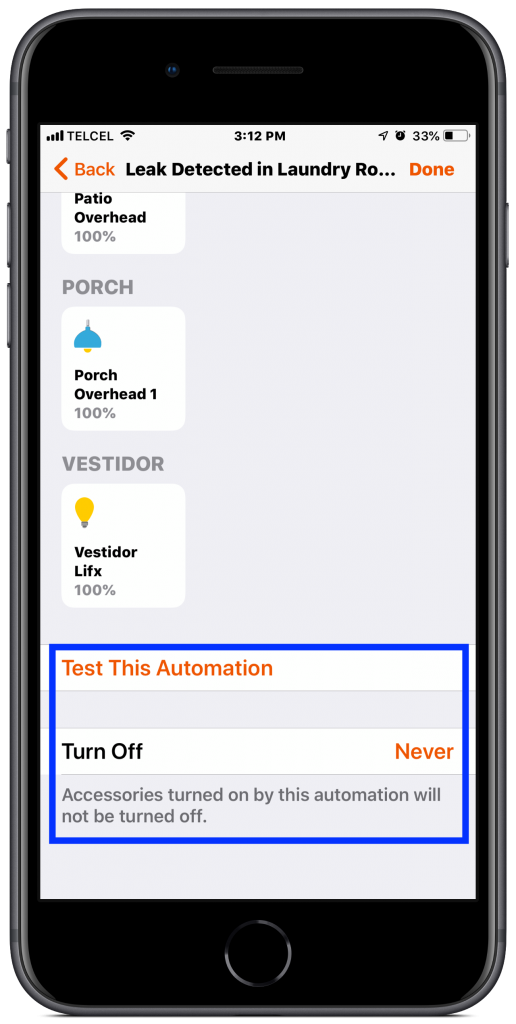
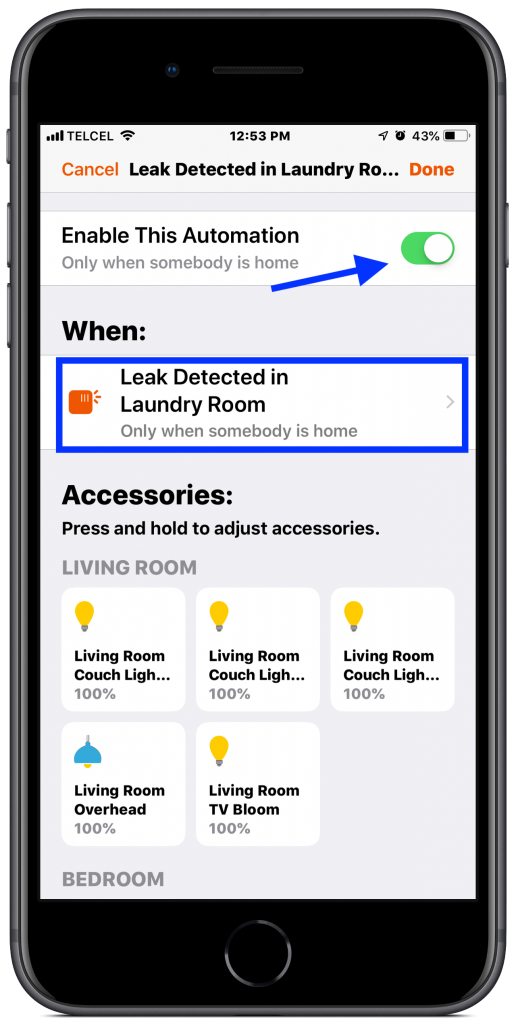
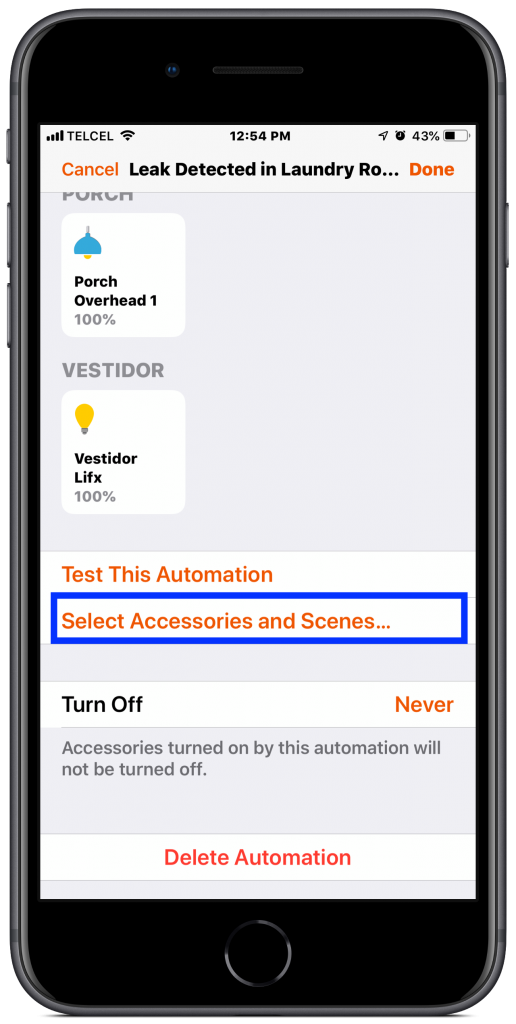
3. As with the other types of HomeKit automations, once we’ve gotten our conditions sorted, we move on to our actions, or what happens once the conditions for the automation have been met. We can choose one or more scenes that we may have previously created or we can choose one or more individual accessories and adjust their actions later. Furthermore, we can choose any combination of scenes and accessories as we see fit. For our example below, I wanted all of the color bulbs in my house to go blue if a water leak was detected. Since I didn’t already have a scene set up for this, I chose all of the color bulbs, set their brightness to 100%, and set their color to blue. Once the actions are set to your liking, you can test the automation bearing in mind that any testing you do will only trigger the actions since the actual conditions haven’t been met. Finally, we have the option of having any accessories that were switched on by the automation”Turn Off” from 1-5 minutes and then in 5-minute increments up to 60 minutes after the automation has been triggered.
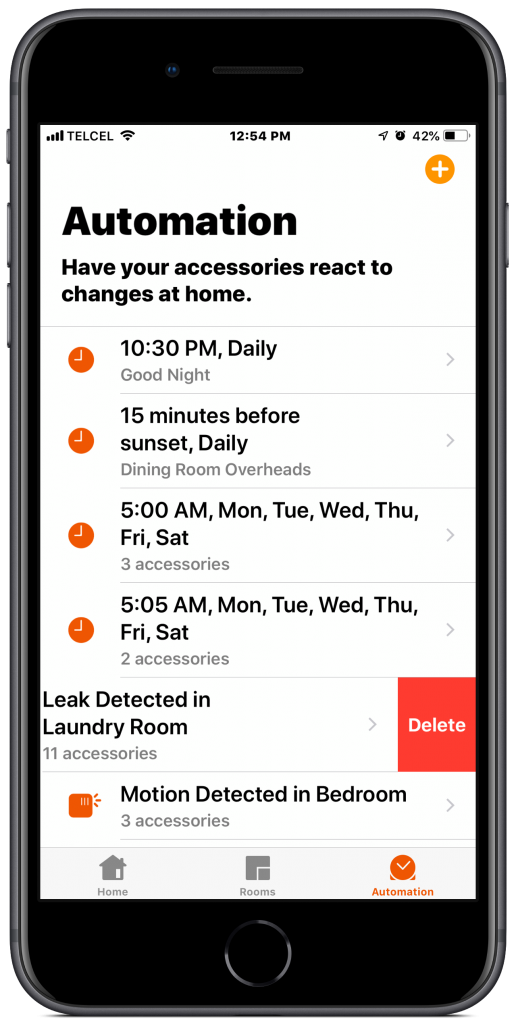
4. Well “Done”! Given that you tapped said button at the top right, your awesome new sensor-based automation is ready to impress. Finding and tapping on it from the “Automations” tab, we can disable it temporarily. Tapping below the “When:” section will give you access to all of the conditions of the automation and you can make all the adjustments that you didn’t realize you messed up when you were setting it up the first time. You might also want to take this opportunity to “Select Scenes and Accessories” that you forgot to add as actions. Along with testing the automation and adjusting the timer of the automation, we additionally have the option to rid the Earth of this automation abomination for now and forever by tapping “Delete Automation” or by swiping left on the automation from the “Automations” tab being sure that this is in fact the decision you want to make because there is no going back.
Final Thoughts
Automations based on when an accessory is controlled or when a time of day occurs provide a little smart home magic, but let’s face it, they’re a little lackluster. Location-based automations are great and pretty useful, but are limited to relatively large geofence radiuses. Automations based on sensors that use ultra-localized data are where we really start to see the automated home come to life. In the past, these sensors were pricey and thus, not so desirable and often overlooked, but as the popularity of HomeKit grows, we are starting to see more and more affordable sensors allowing us to outfit our home and tie these devices into our home automation systems. It might be nice if within Apple’s Home app we had the ability to use data from multiple sensors to trigger actions, but at least we can do this with third party HomeKit apps.
What types of sensors do you prefer and how do you use them? What types of sensors do you think HomeKit could benefit from? Sound off down below. You can find heaps more HomeKit automation goodness on our YouTube channel and even more HomeKit related goings on on other social media @myhomekithome.
We use income-earning affiliate links.
We may receive a small commission on purchases made using links on this page at no extra cost to you.
