It’s no secret that automations can not only be super cool and allow us to feel all Jetsons-y, but they can be extremely useful and practical. With most HomeKit accessories, other than setting up the automation, no further interaction is required. It just works. However, with secure accessories like locks and garage doors, HomeKit requires confirmation before running automations that unsecure these accessories. While great for security purposes, it can get a little annoying confirming that you want the automation to run; almost to the extent that it ruins the whole point of having the automation, honestly. If you too have felt frustrated by this, have no fear, myHomeKithome is here to help. In this post, we’ll first look at how to setup a standard automation that unlocks a smart lock as someone arrives home. Then, we’ll look at how to bypass HomeKit’s built-in security features for secure devices.
This should probably go without saying, but I do want to make it clear. Using the bypass method outlined in this article can potentially make your home less secure. The built-in security features for secure accessories in HomeKit exist for a reason and make it much less likely that someone can access your secured accessories if you don’t want them to. Please be aware of this and use the bypass at your own risk. myHomeKithome is not responsible for any damage or loss due to the use of this article.
Location-Based Automations for Secured Accessories
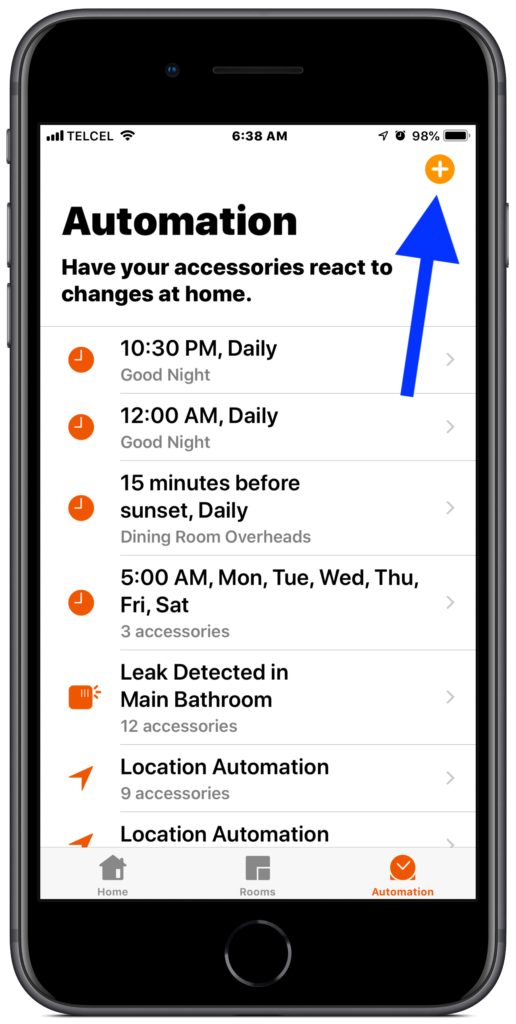
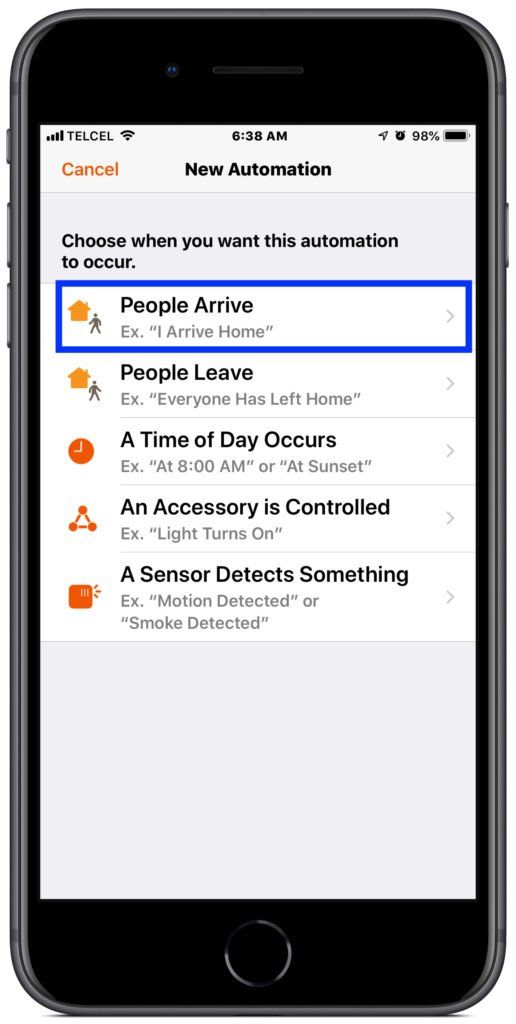
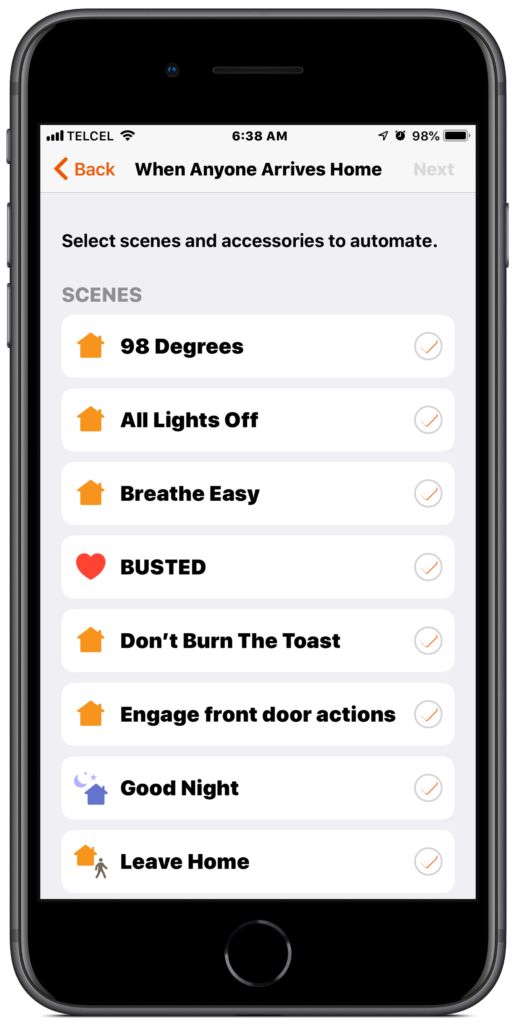
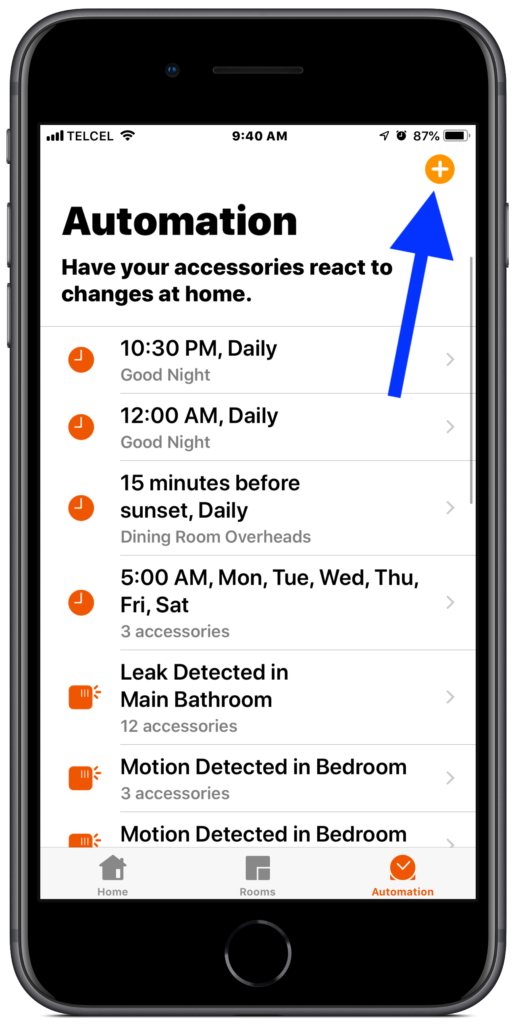
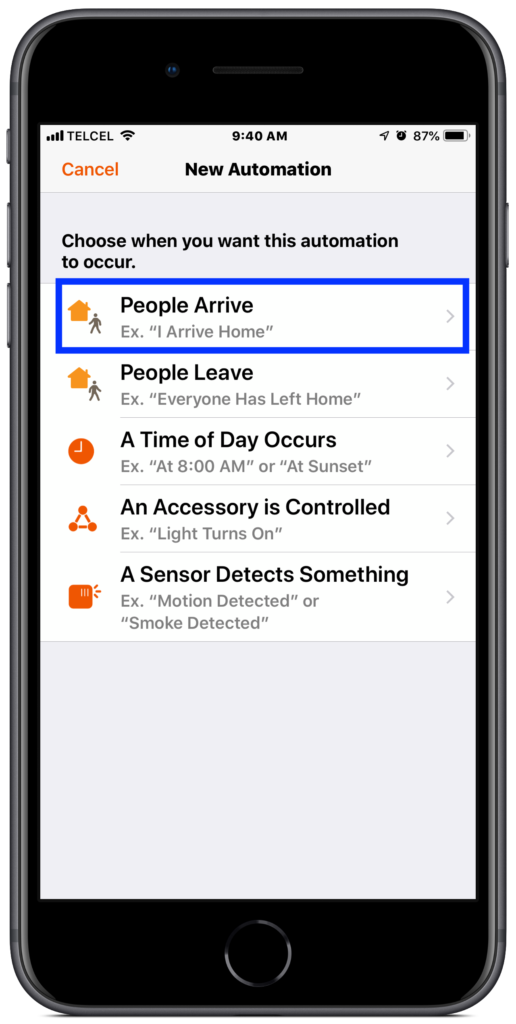
1. From the “Automations” tab in Apple’s Home app, we’ll tap the + (plus) button at the top right and select “People Arrive” as our automation.
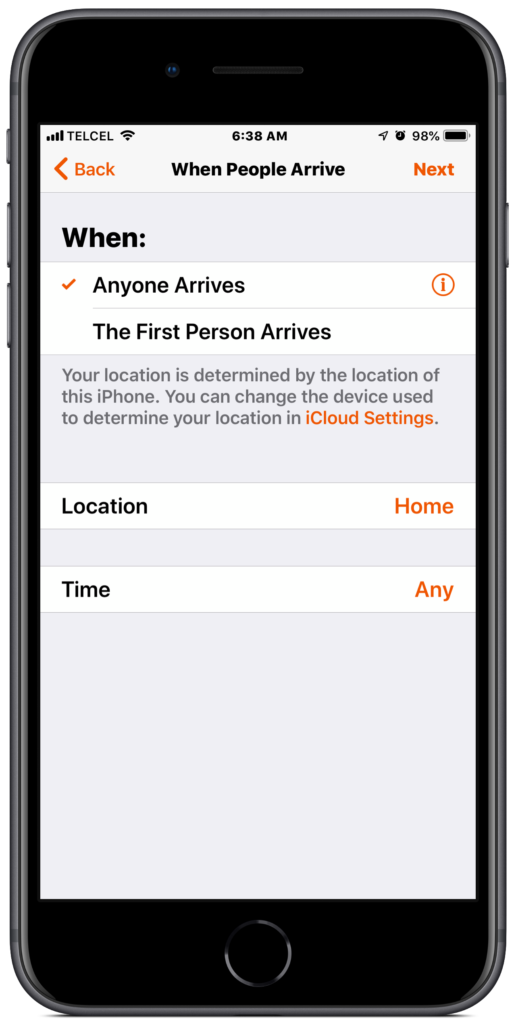
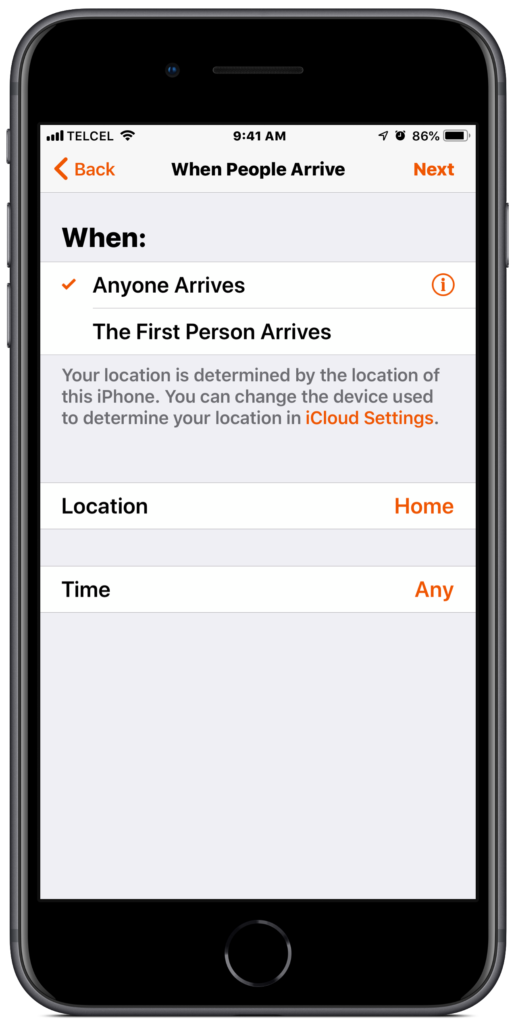
2. We then indicate our automation conditions. Up first is our “People” condition. We can adjust this condition based on only when specific people arrive, however I want this automation to run whenever “anyone arrives” so we’ll make sure that is selected. Though we can change the location for our automation, since I want the automation to run when anyone arrives home, I’ll leave the “Location” as “Home”. Finally, since I definitely don’t want to deny myself, or my wife, access to our home at any point during the day or night, I’ll leave the “Time” condition as “Any”.
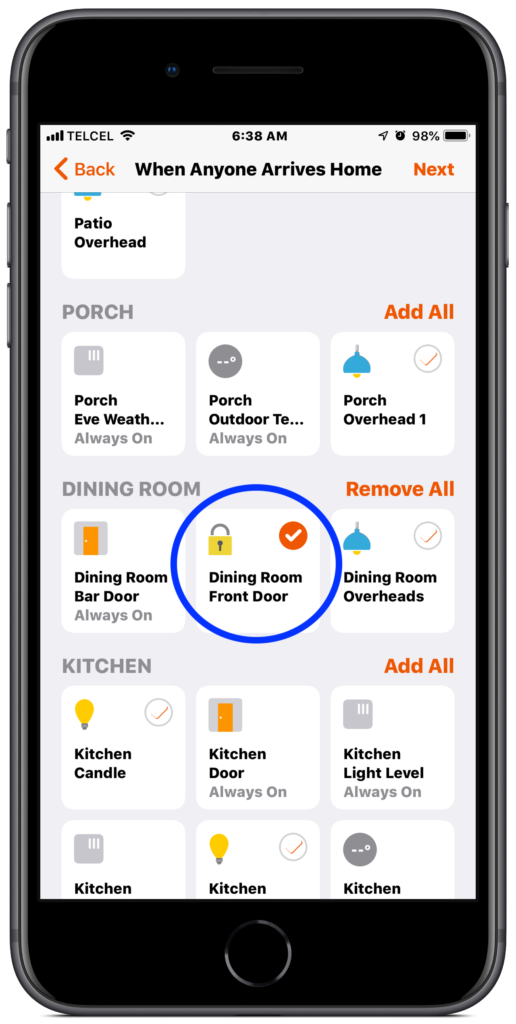
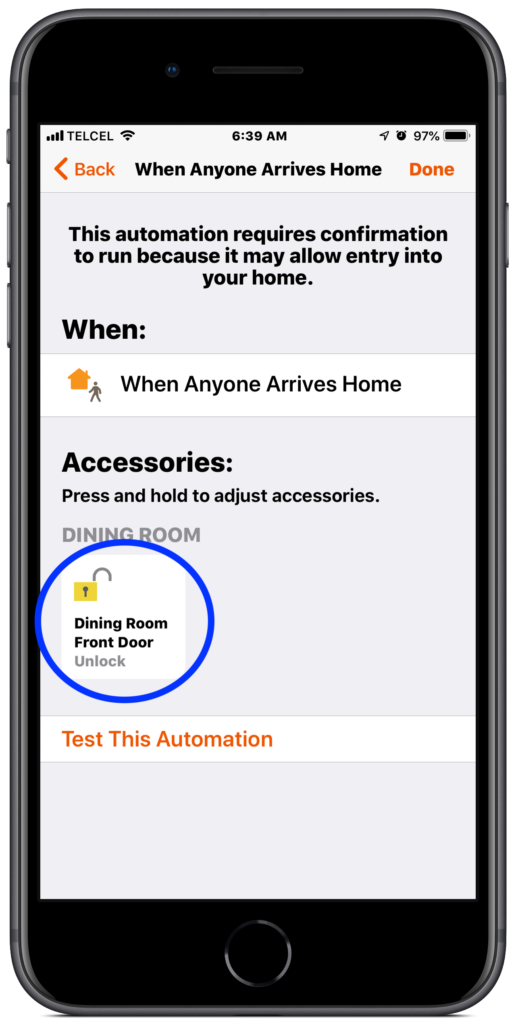
3. Now we turn our attention to our actions or what happens when our conditions are met. Obviously, we want to unlock the front door once the conditions are met. If we’ve already set up a scene that indicates this action, we can choose that one, but for the purposes of this tutorial, we’ll just find and select our accessory. Once we’ve found and selected our lock, we want to make sure that it’s going to do what we want it to do: “unlock” We indicate this by tapping the icon to toggle it to “unlock” Tap “Done” at the top right.
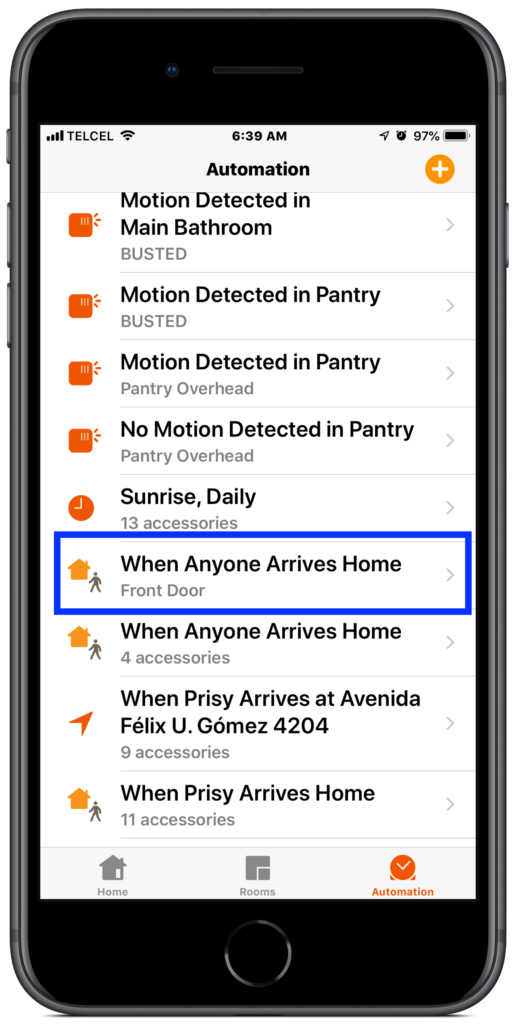
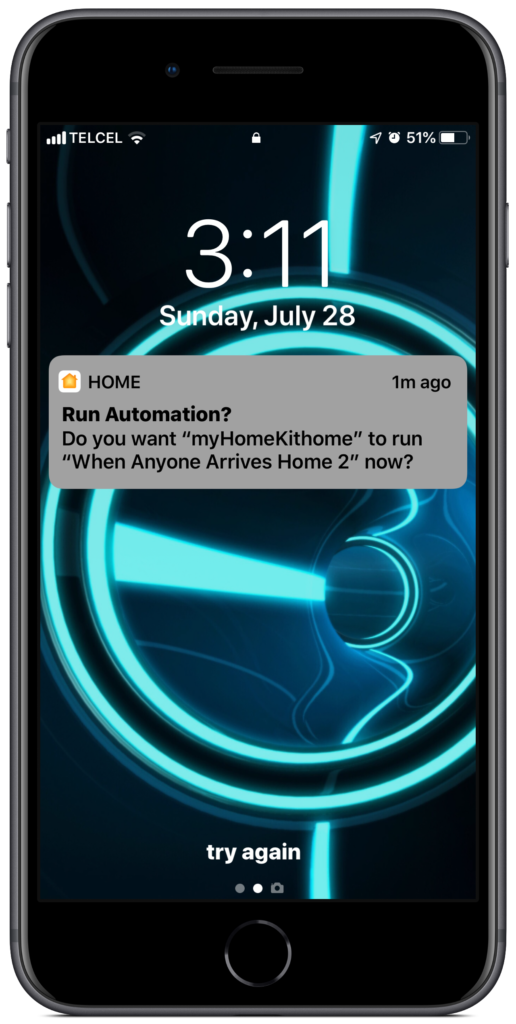
4. If you’ve chosen to use this type of automation, this is the confirmation notification that you will receive as you arrive home:
Secure Accessory Confirmation Bypass for Location-Based Automations
If you don’t mind confirming your arrival and prefer the peace of mind that confirming brings you, by all means use the automation above. However, if you want to live on the edge and potentially make your home less secure, you can deploy the following two-pronged automation to circumvent the confirmation. To perform this, you will need some other accessories to act as a control accessory for the secure accessory. This can be any HomeKit accessory that has an on/off state like a light or, as is in our case, an outlet that is not being used by another device.
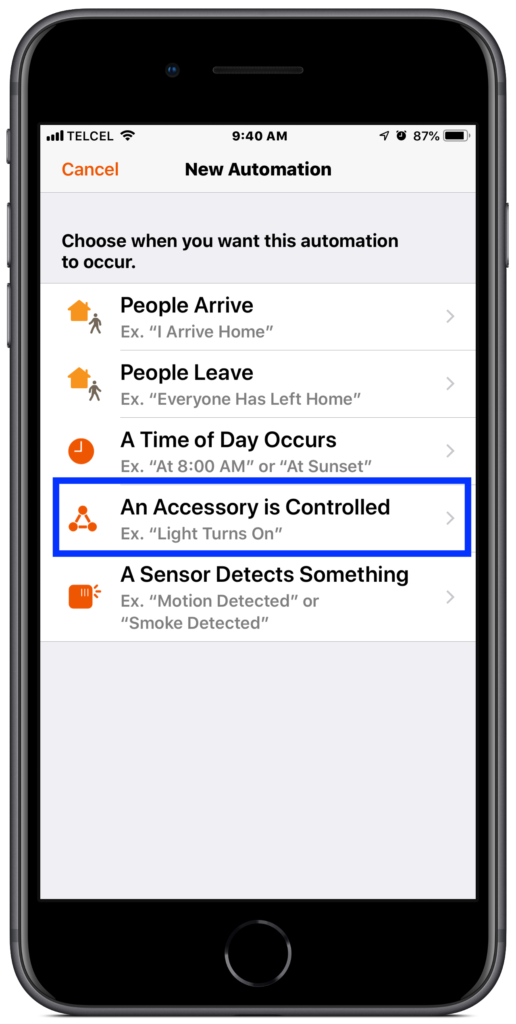
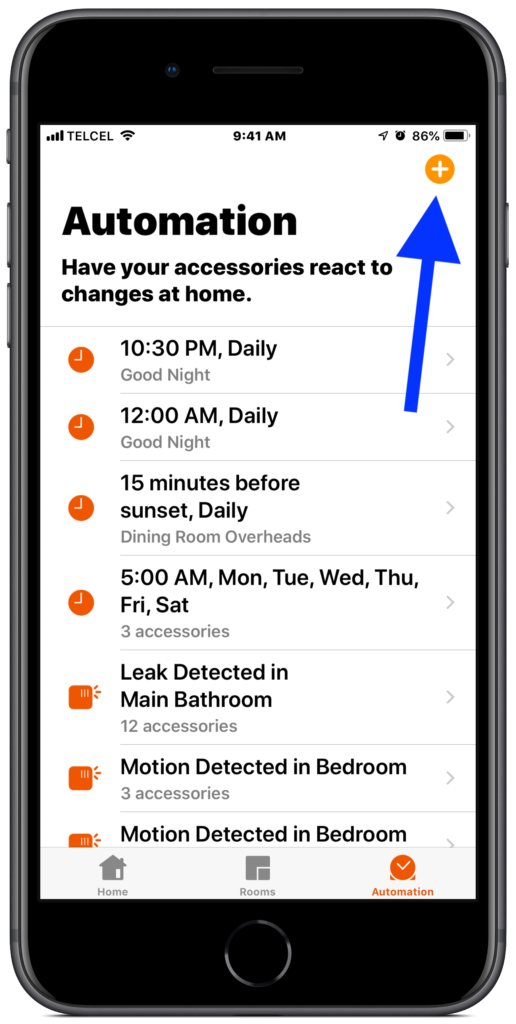
- From the “Automations” tab in Apple’s Home app, we’ll tap the + (plus) button at the top right and we’ll choose “An Accessory is Controlled”.
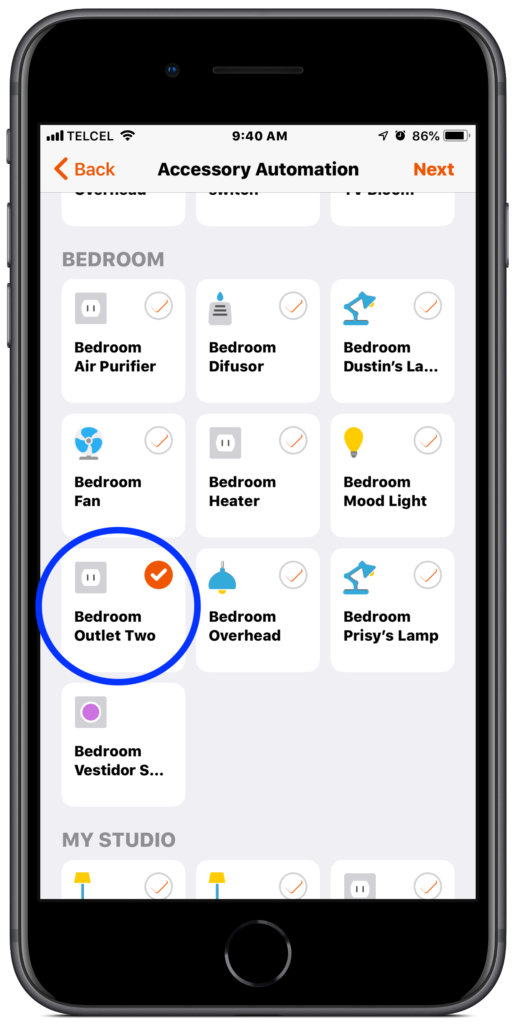
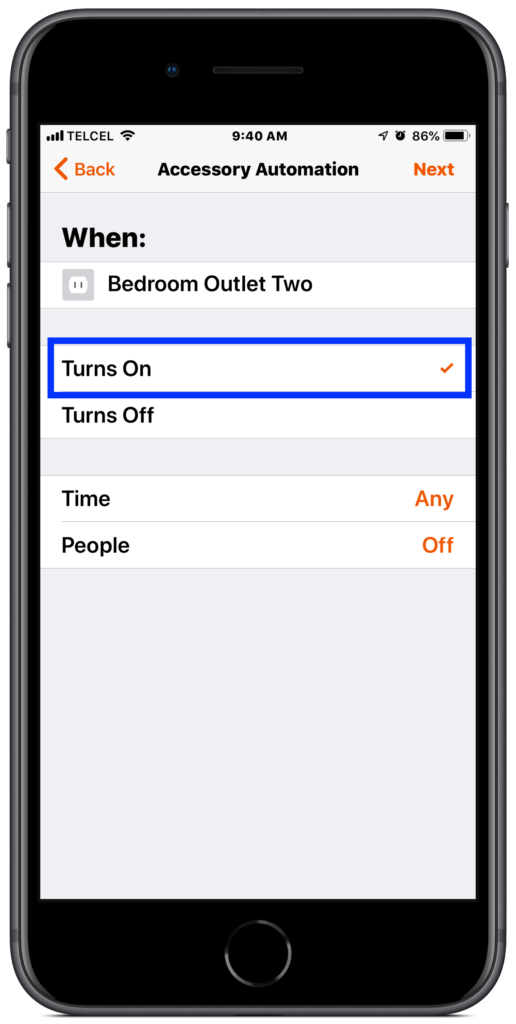
2. First, we’ll need to track down and select our control accessory. As I mentioned above, we’re using an outlet that isn’t connected to anything, “Outlet Two” in the “Bedroom” Once we’ve selected our control accessory, we need to indicate our trigger action i.e. ON or OFF. I’m choosing ON and you’ll see why in a moment. Again, feel free to restrict your “Time” and “People” conditions if you so desire.
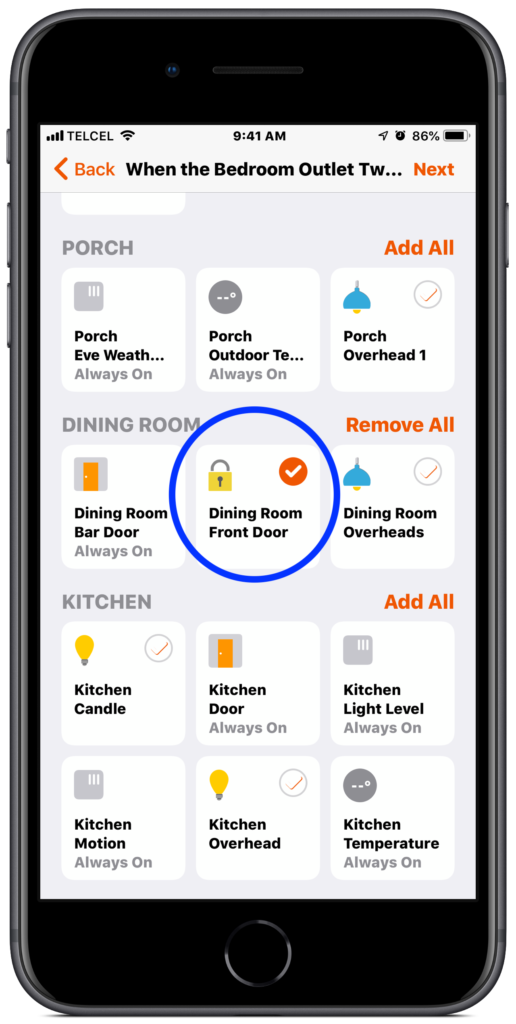
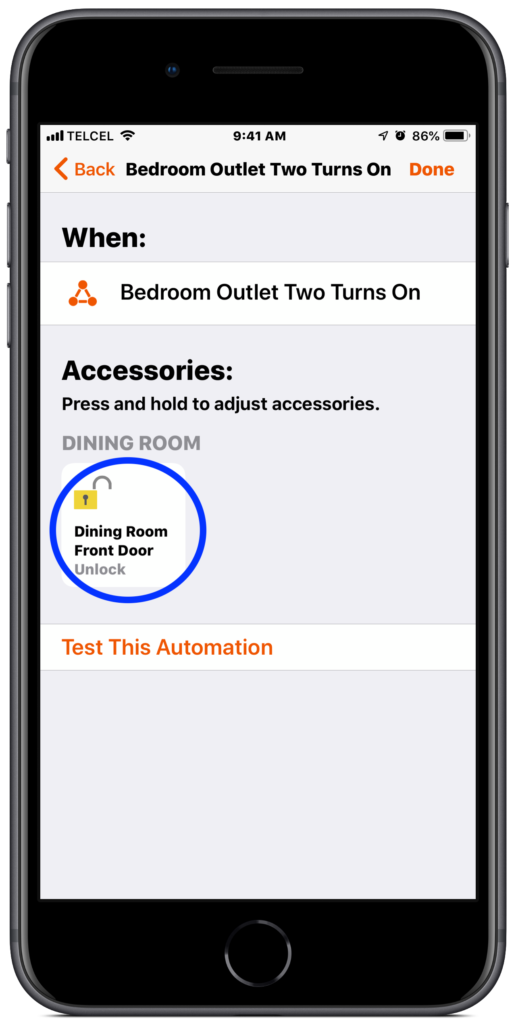
3. Now, we choose our action or what happens when the first accessory turns on. In this case, we want our secure device to unlock. So, we track down and select our “Front Door”. Alternatively, if we have this action already set up in a scene we can choose that scene. Once we’ve selected our accessory, we need to make sure that we indicate it’s action by tapping the icon to toggle it to “unlock”. Tap “Done”
4. The second prong in our bypass automation is the location-based part of things. We’ll build another automation in the same way as we did before except this time we choose “People Arrive”. 15-16
5. Since I don’t want to deny myself or my wife the pleasure of automated entry at any time day or night and since the “Location” is “Home”, we indicate this by making sure that our “People” condition indicates “Anyone Arrives”, the “Location” is “Home”, and the “Time” is “Any”. 17
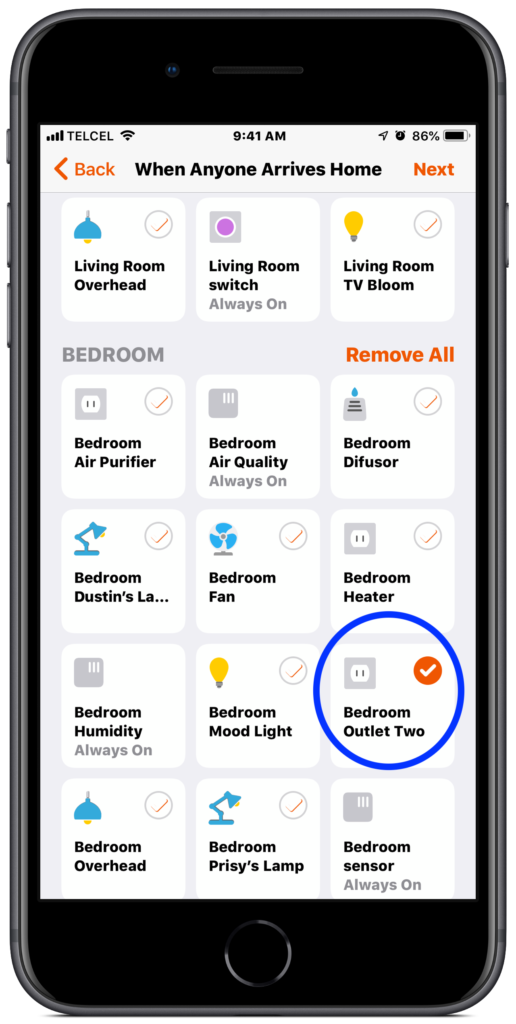
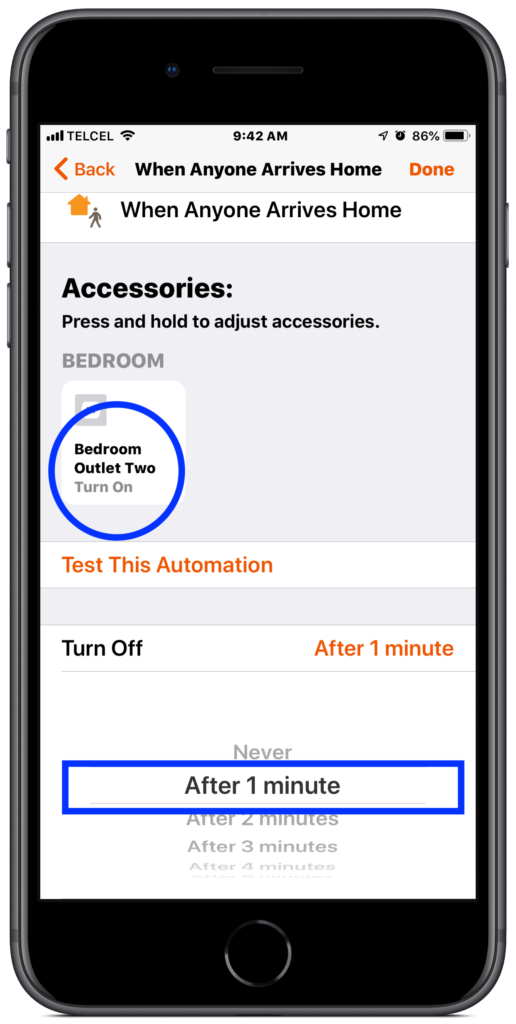
6. In contrast to our very first automation which used the smart lock unlocking as the action, we’ll now choose our controlled accessory from the first prong of this automation, “Outlet Two” in the “Bedroom”, as our action accessory ensuring that we toggle it to on as the action so that the first automation will be triggered as we arrive home thus unlocking our door as we arrive. Finally, since I want to ensure that the outlet I am using to control the smart lock isn’t always in an ON state as the change to the ON state is what triggers the secure device to unlock, I’ll set this automation to “Turn off” or reverse after 1 minute. Tap “Done” 18-19
While sure we may still need to grasp the door handle in order to open it, we can definitely use automations to unlock the door as we approach our home. Whether we choose the more secure route of the initial automation or the less-secure, but more convenient bypass, one thing we may want to keep in mind is any auto-lock feature we may have in place. Unfortunately as it stands now, HomeKit does not allow us to adjust the geo-fence radius for our home. This means depending on the auto-lock duration set by you or the manufacturer, your lock, or garage door, may disengage, but then later reengage before you can actually make it to the door. Personally, since this happens to me and I really appreciate the auto-lock feature, I tend to just unlock my door using Control Center or Siri once I’m ready to enter my abode, but of course this depends on your own personal habits and your specific setup. Either way, these are some good workarounds if you ever find yourself in such a situation.
How do you prefer to interact with your secure HomeKit accessories? Let us know in the comments. All of the products we used for this tutorial can be found below and we invite you to come hang out with us on social media @myhomekithome.
We use income-earning affiliate links.
We may receive a small commission on purchases made using links on this page at no extra cost to you.
