
If you’ve landed on this post, it means a couple of things. First, you’ve probably already setup your first HomeKit accessory and likely a few others. Secondly, it also means that you’ve probably got a working knowledge of how HomeKit works. Lastly, it means that you’re probably well on your way to outfitting your entire home with HomeKit devices. In this post, we’ll be looking at Rooms in the HomeKit connected home framework and what we can do with them.
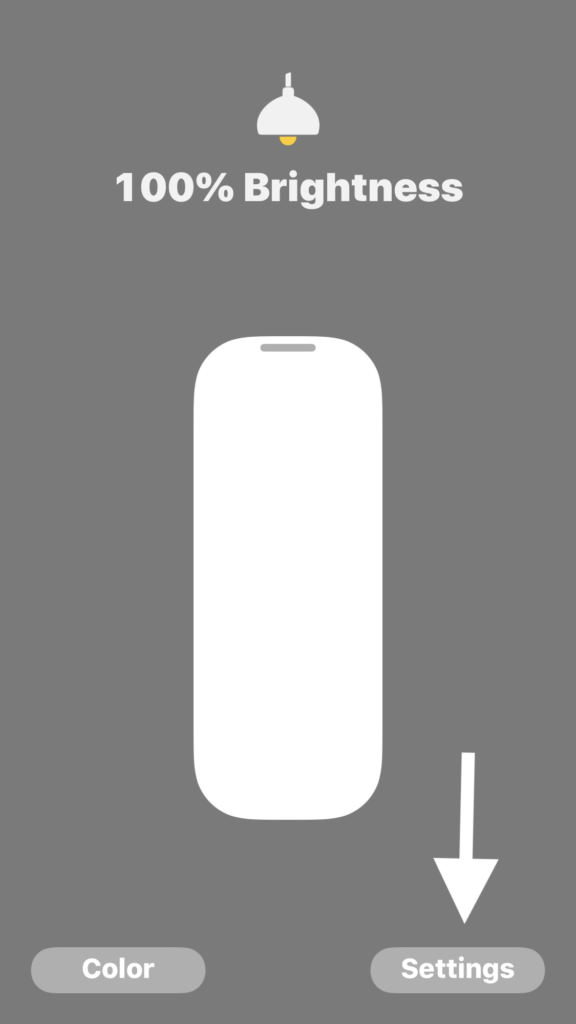
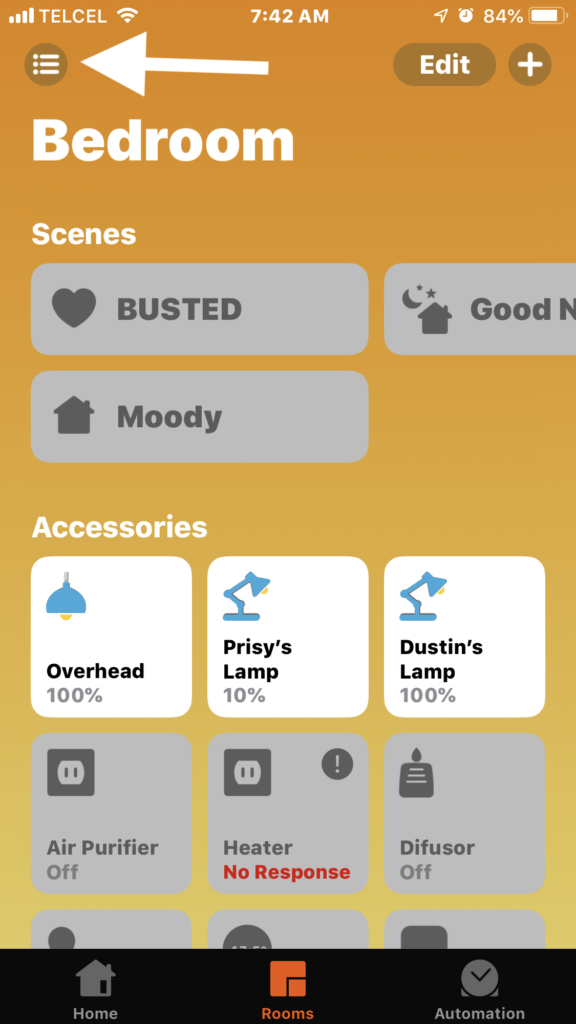
Essentially, Rooms in HomeKit are divisions of the Home where our HomeKit accessories are stored. If you’ve already set up a HomeKit device then you’ve surely noticed that accessories must be placed in a room. Whether that room is representative of the actual room in our home, a default room, or a space that makes sense to you, rooms are the most basic way to organize our HomeKit accessories.
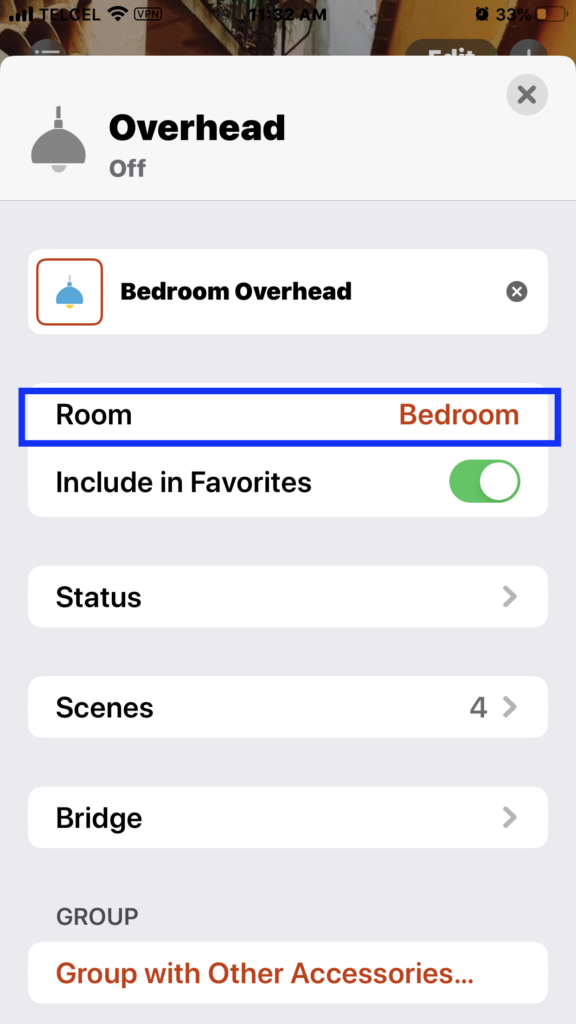
After we’ve set up our HomeKit accessory, we can change the room it’s in by long-pressing on the accessory’s tile and tapping “Settings” at the bottom right. If you have other rooms, you can select one from the list. But if you have other rooms, you probably aren’t interested much in this article. 1-2
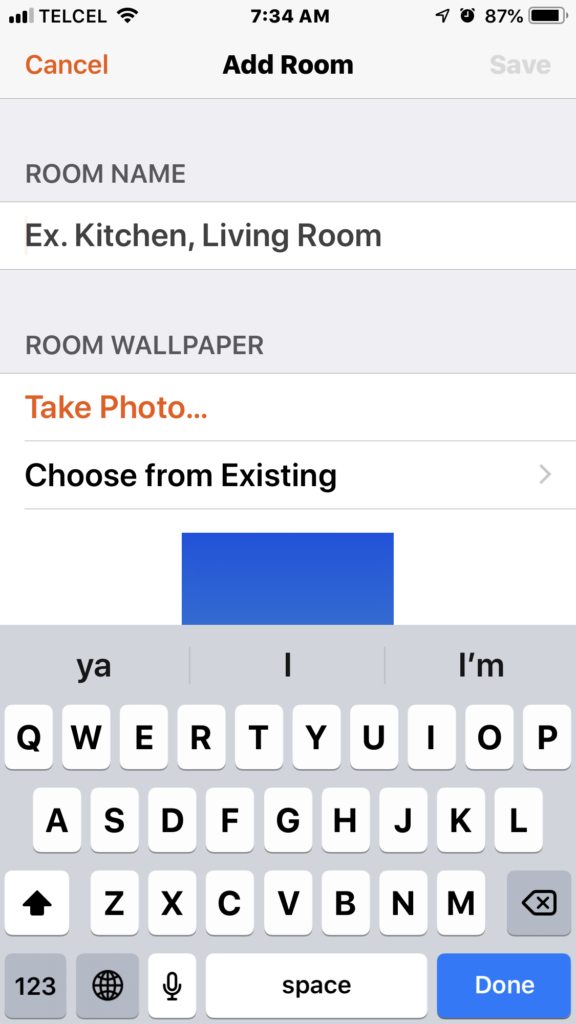
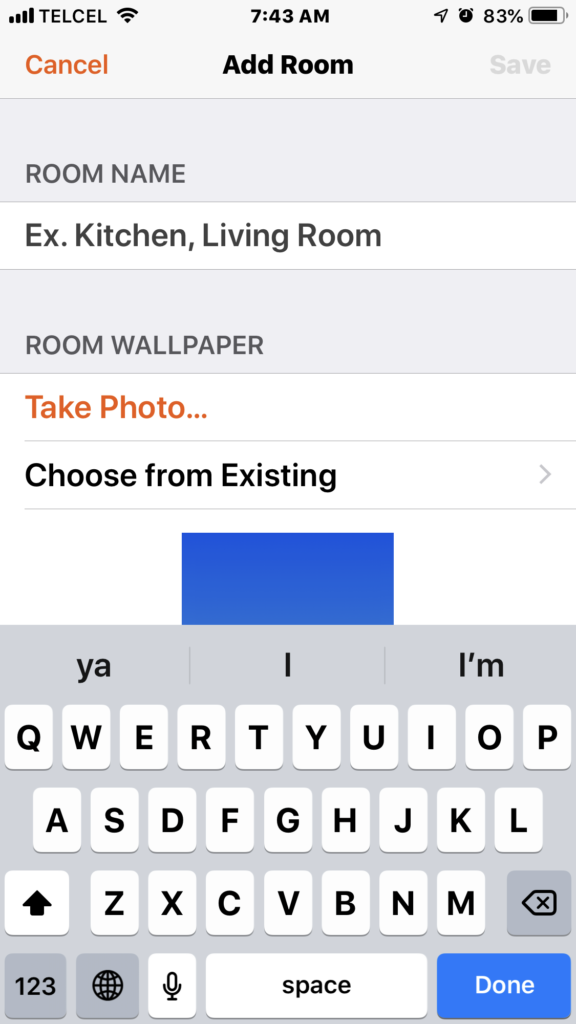
To create a new room, we have a few options. We can continue from where we left off above and tapping “Create New”. This brings us to all of the settings for a room including its name and wallpaper. In terms of the wallpaper, we have a couple of options. We can take a photo at that moment or we can use an existing photo. Choosing the second option, we can either choose from a photo on our camera roll or we can select from one of Apple’s 9 HomeKit exclusive wallpapers. Update: As of the introduction of iOS 13, we can no longer create a custom room when setting up a accessory nor from the room selector of a device. We must place it in either “Default Room” or another room. methods. 3-4
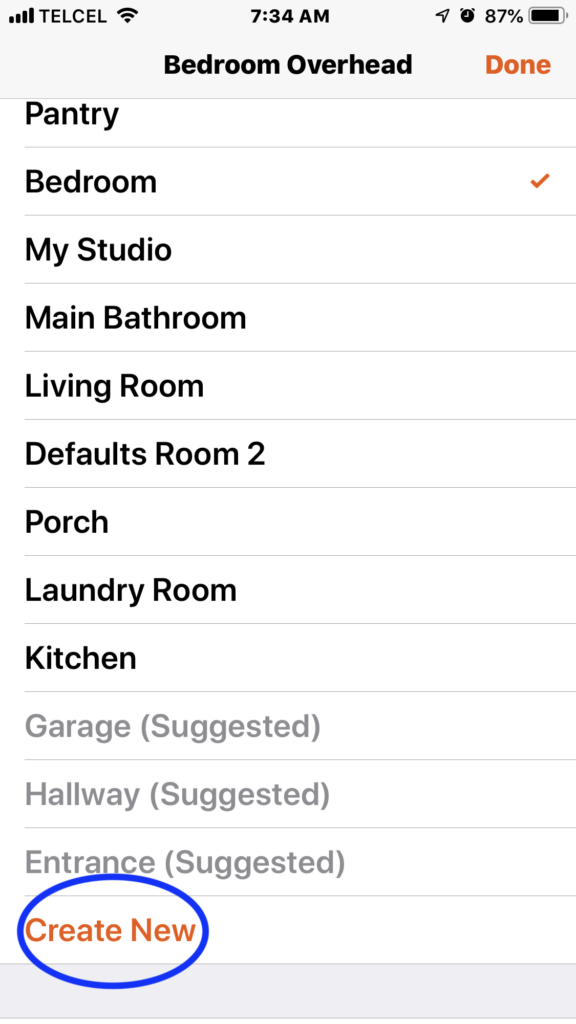
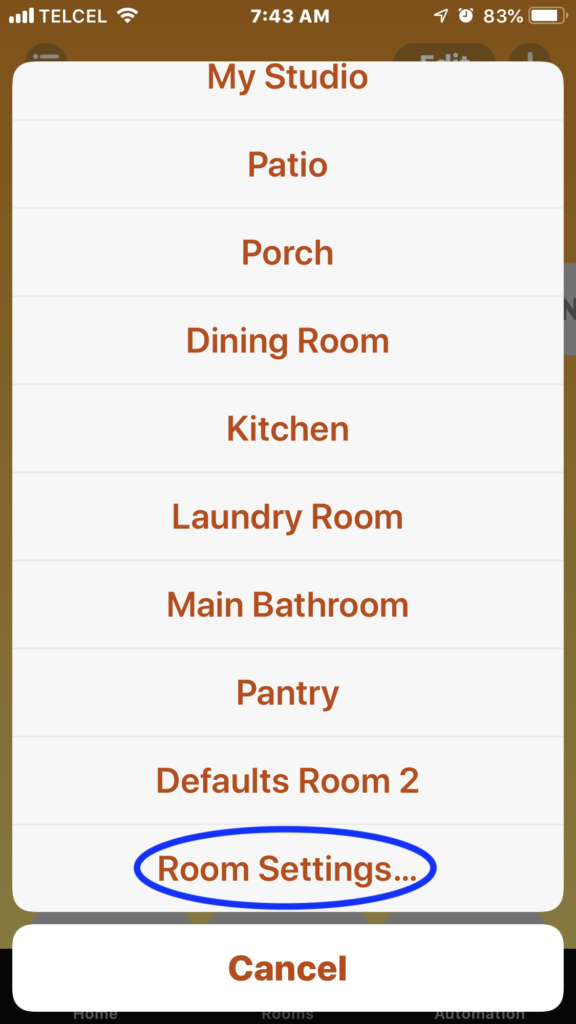
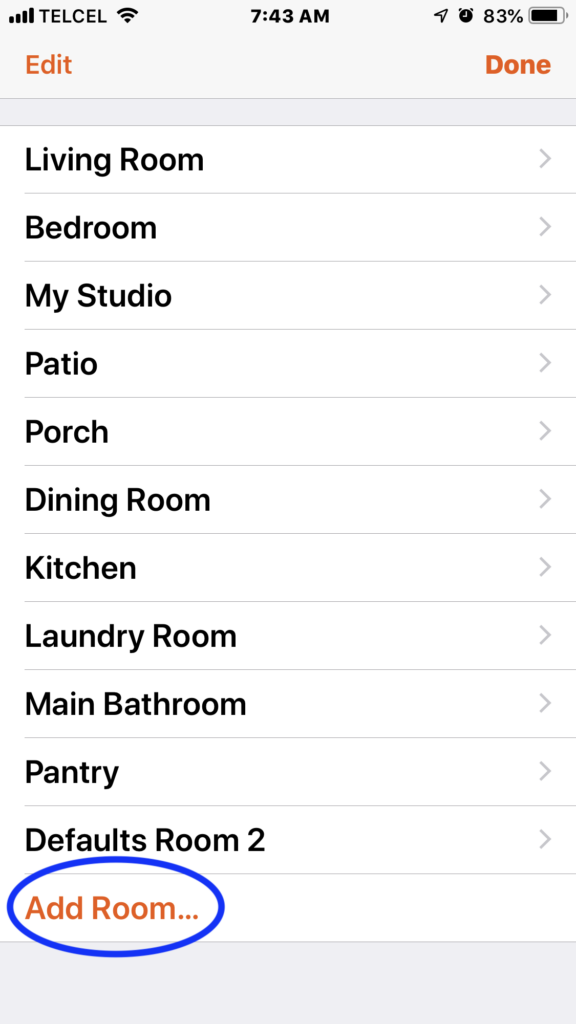
We can create a new custom room by tapping our rooms list at the top left from any room in the rooms tab, sliding on down to the bottom of the list and tapping “Room Settings…”, and selecting “Add Room…” at the bottom of the list of rooms. 5-8
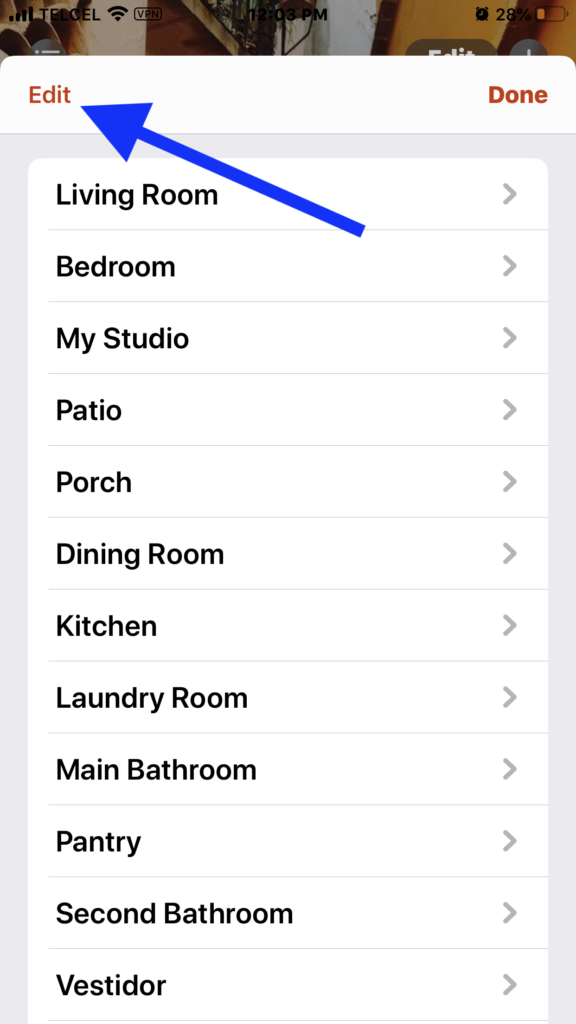
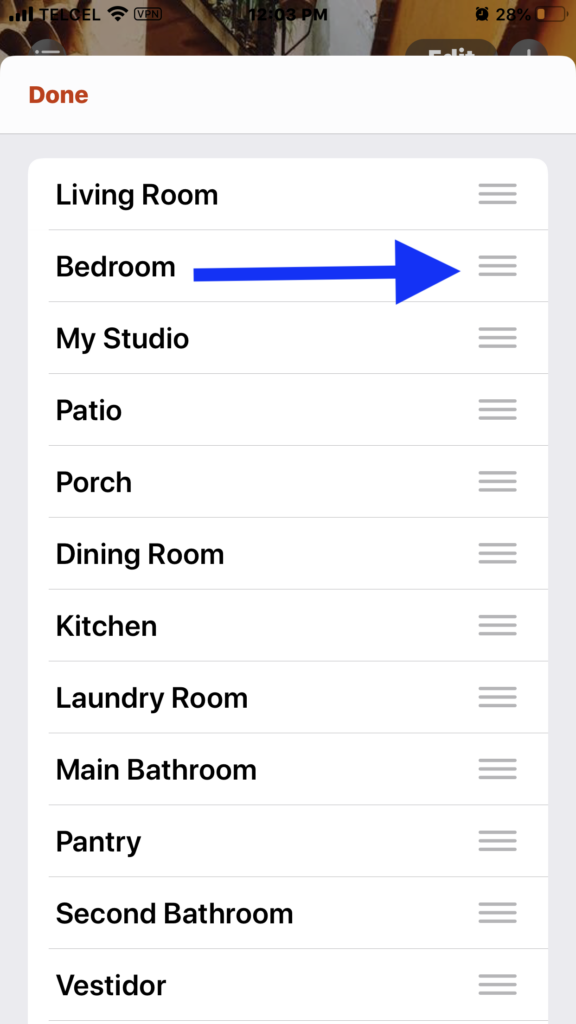
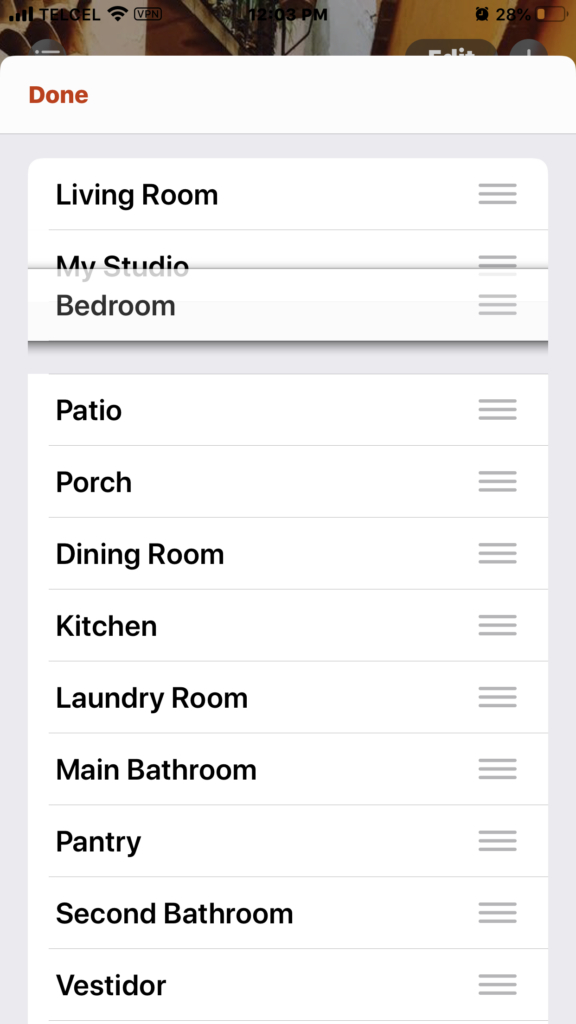
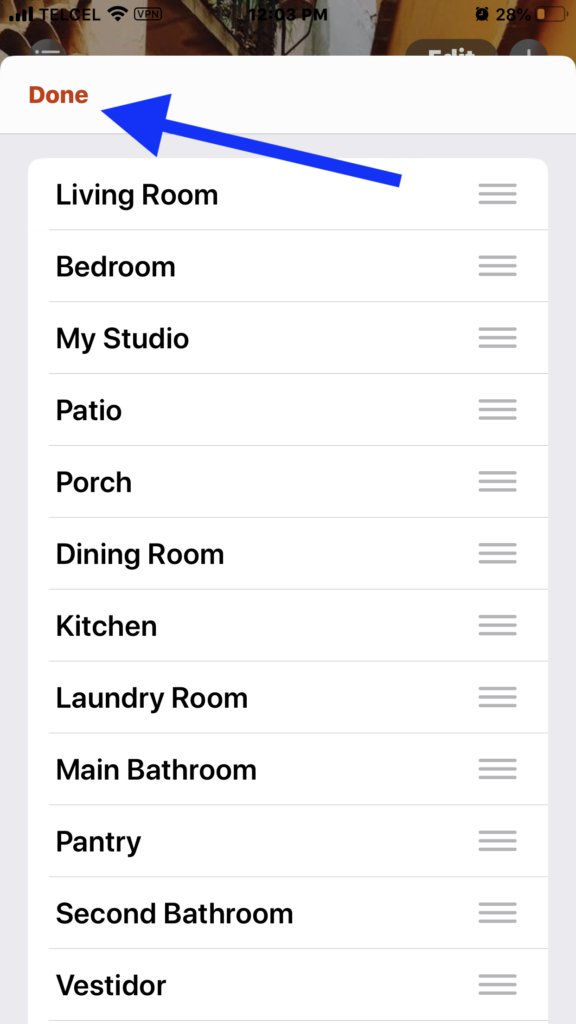
Once you have a few rooms, you may want to reorganize their order and you can do so from the “Room Settings…”, tapping “Edit” from the top left, we can then tap and hold the order icon to the right of the room, and drag it where we’d like. Once we’re content with the order, we tap “Done” at the top left.. 9-12
Final Thoughts
As you can see, a HomeKit home cannot exist without a HomeKit room since an accessory must be assigned to a room, but apart from this, how we name and use rooms is pretty flexible. I tend to keep it pretty simple and have the rooms in HomeKit reflect the rooms in my IRL home with exception of a large open area that is divided into two areas: a living area and a dining area. I also use “closet” rooms to more easily organize some lights and sensors I have in those closets. To organize your accessories a little better, you could also create “virtual rooms” for accessories that are in a physical room and control HomeKit accessories in that room, but that don’t have interactive controls in the Home app such as buttons, switches, or sensors. We can also group rooms into zones and in this post we show you how to do so and how to use them.
What unique ways do you have for using rooms in HomeKit? The comment section awaits and you can always interact with us on Facebook, Twitter, and Instagram @myhomekithome.
We use income-earning affiliate links.
We may receive a small commission on purchases made using links on this page at no extra cost to you.