Contact sensors are a great way to not only be notified of as to the open and closed states of doors, windows, and anything else that closes, but with HomeKit, we can also create automations that trigger actions or scenes. In this post we’ll look at a really simple way of turning on and off a light when a door opens or closes.
For today’s automation walkthrough, you’ll need:
- HomeKit-enabled contact sensor (I’m using the Eve Door & Window)
- HomeKit-enabled light (I’m using a Phillips Hue bulb)
- Apple’s Home app or another HomeKit app capable of creating sensor-based automations (I’m using the Eve for HomeKit app)
- Home hub – Since automations require either an always-on and connected iPad, Apple TV 4th gen. or later, or a HomePod, you’ll need one of these (I have all of these as Home hubs, but this is overkill. 1 will suffice as long as it’s in range of the sensor)
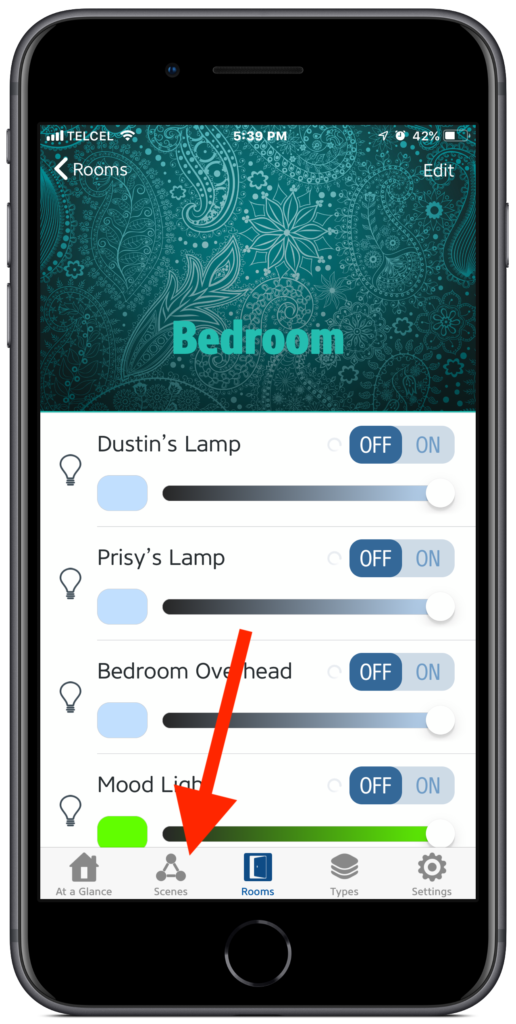
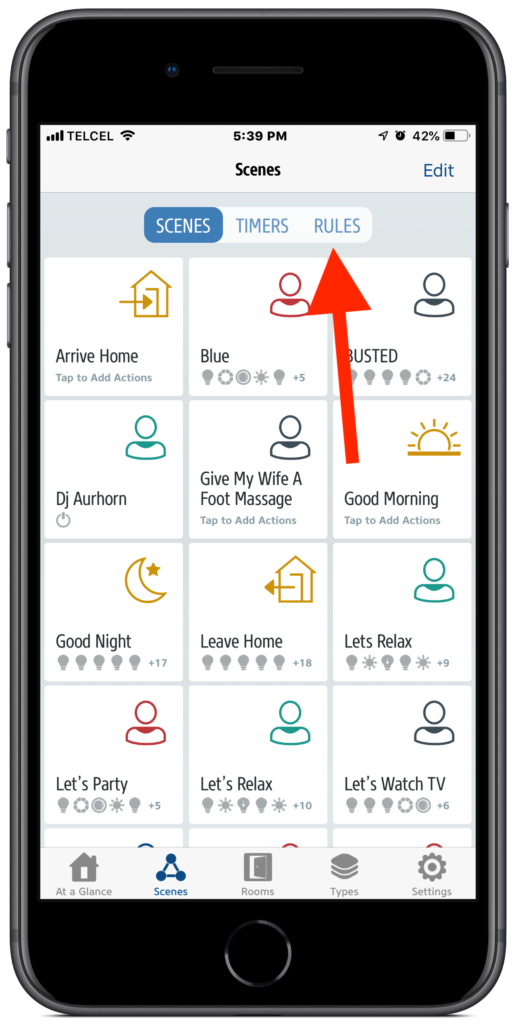
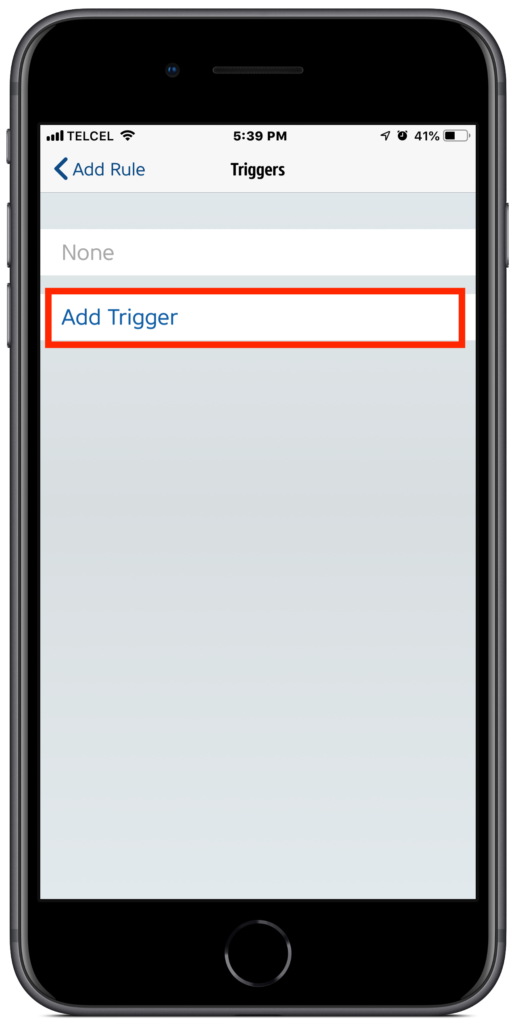
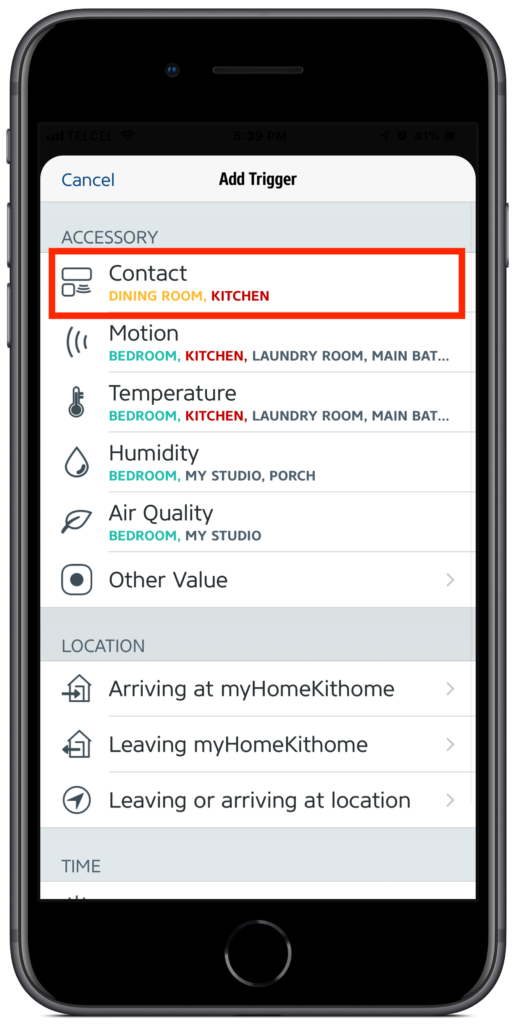
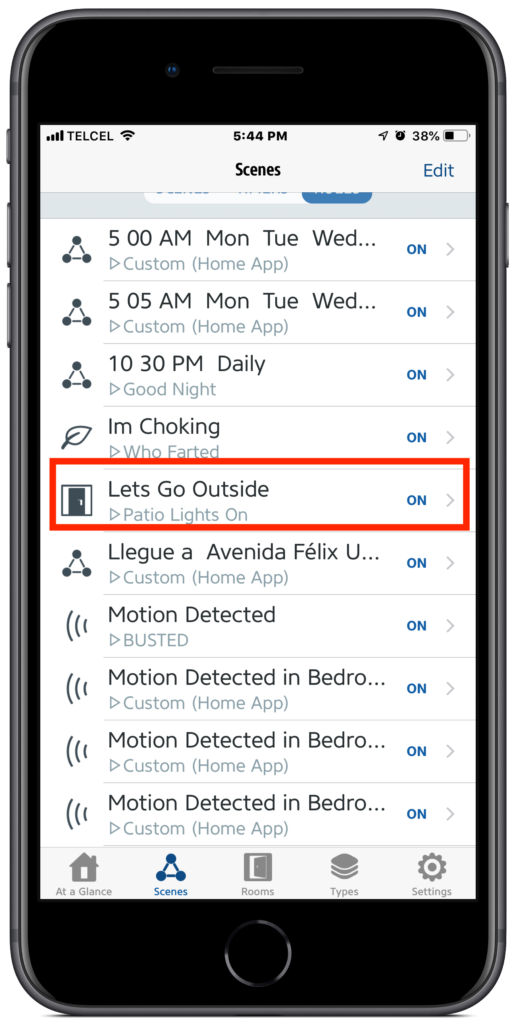
1. Upon launching the Eve for HomeKit app, we land on the “At a Glance” tab, but we want the “Scenes” tab. We’ll select the “Rules” option at the top and scroll down through all of our automations until we see “Add Rule”. After Eve’s brief explanation on their particular nomenclature for automations, we add our “Trigger”, which can be found by “Accessory” type, in this case “Contact” or you can track it down by room under “Location”.
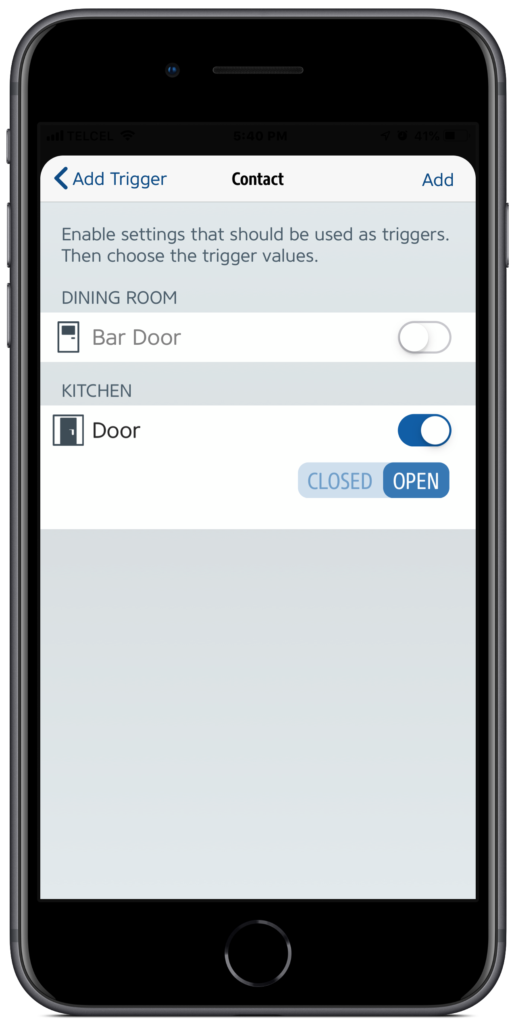
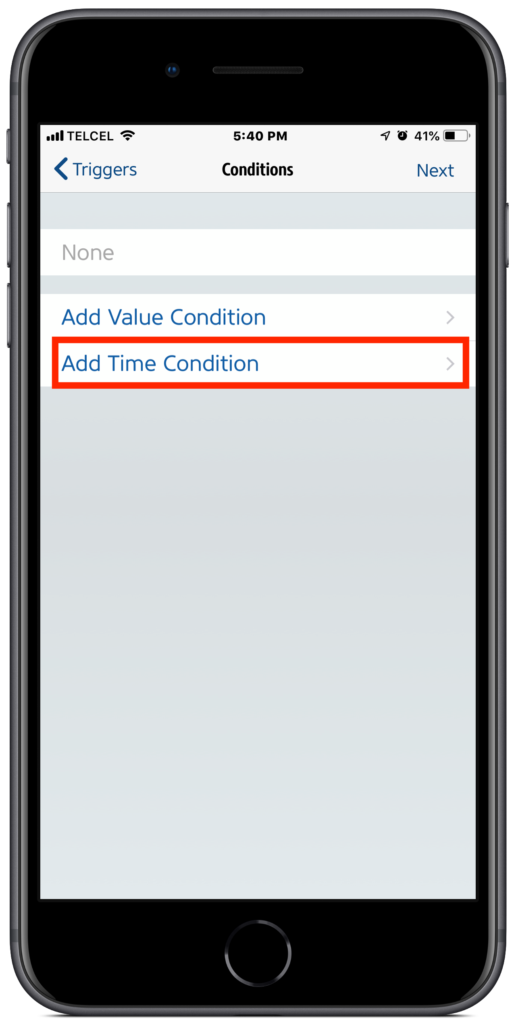
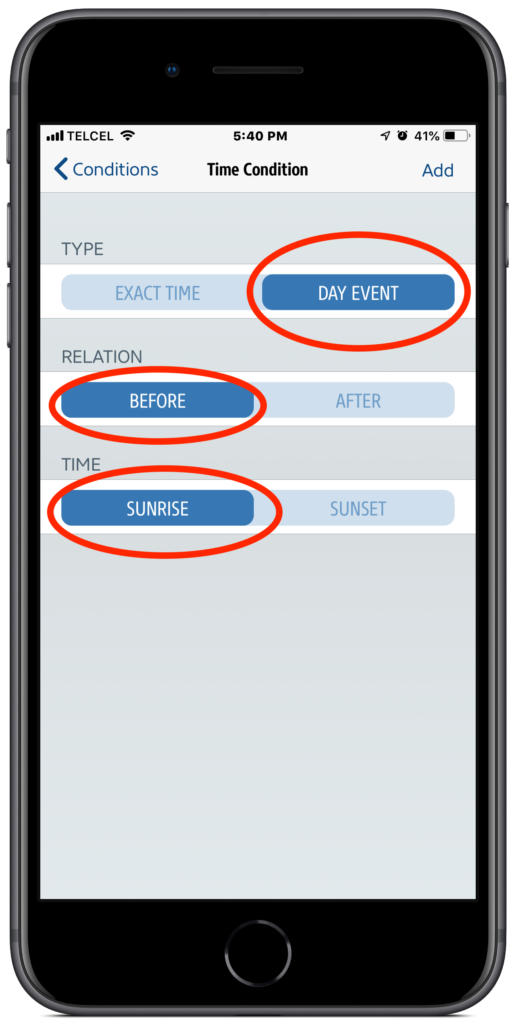
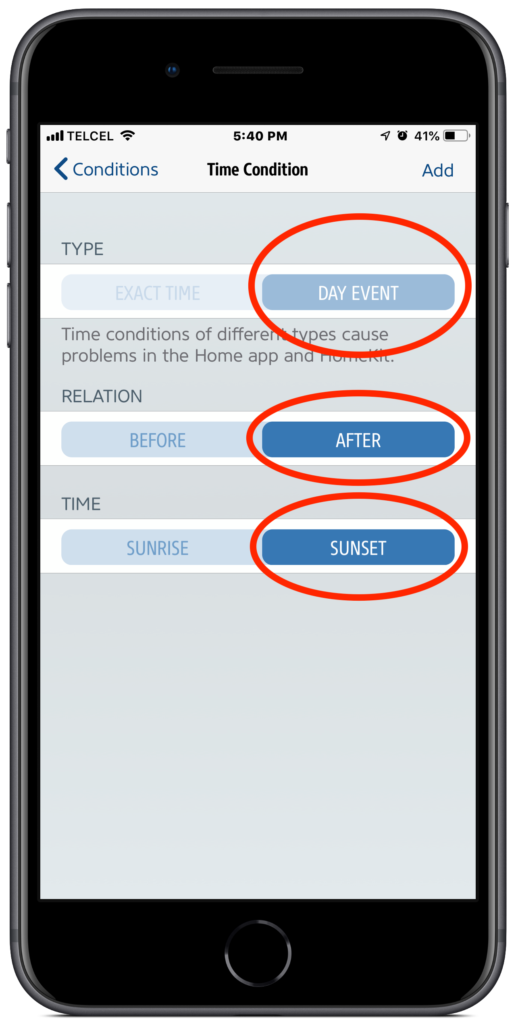
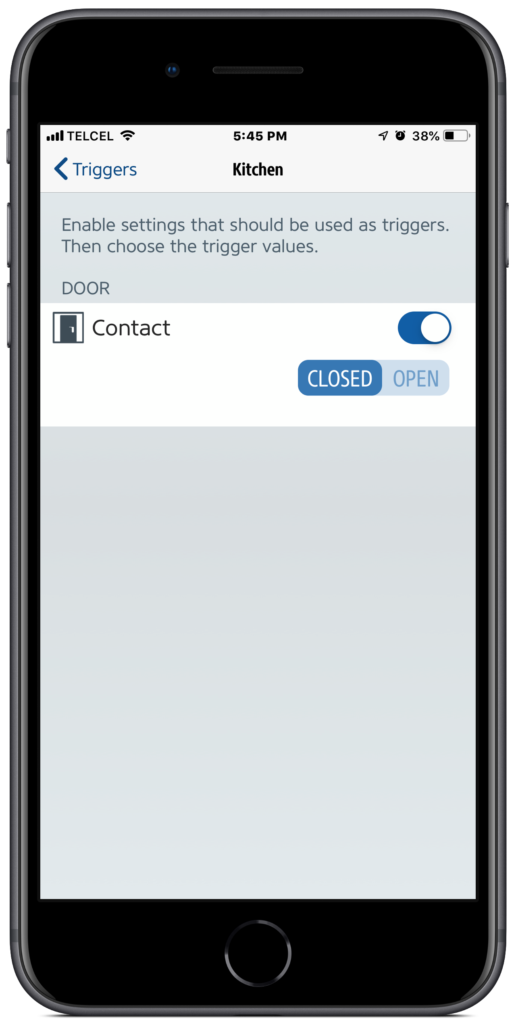
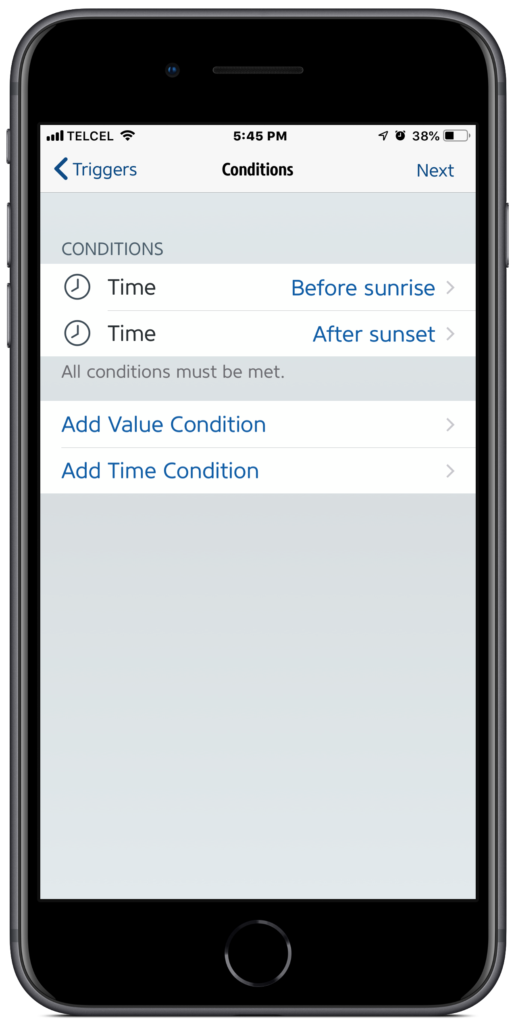
2. Once we’ve found the correct sensor that we want to use, in our case it’s the “Door” in the “Kitchen”, we’ll give it a tap and to select it and we’ll choose “Open” for its state. Tapping “Add” at the top right brings us to our “Conditions” screen where we’ll add two “Time Conditions”. Since I’m wanting to only have this light come on at night to avoid wasting electricity, we’ll select “Day Event” for our “Type” and then “Before” for our “Relation”, and “Sunrise” for our “Time”. This time condition will act as the end of the automation time window and the second time condition, with the “Relation” of “After” and “Time” of “Sunset” will serve as the start. It’s never a bad idea to check your work before you start blaming HomeKit for your automations not working properly. There’ll be plenty of time for that later.
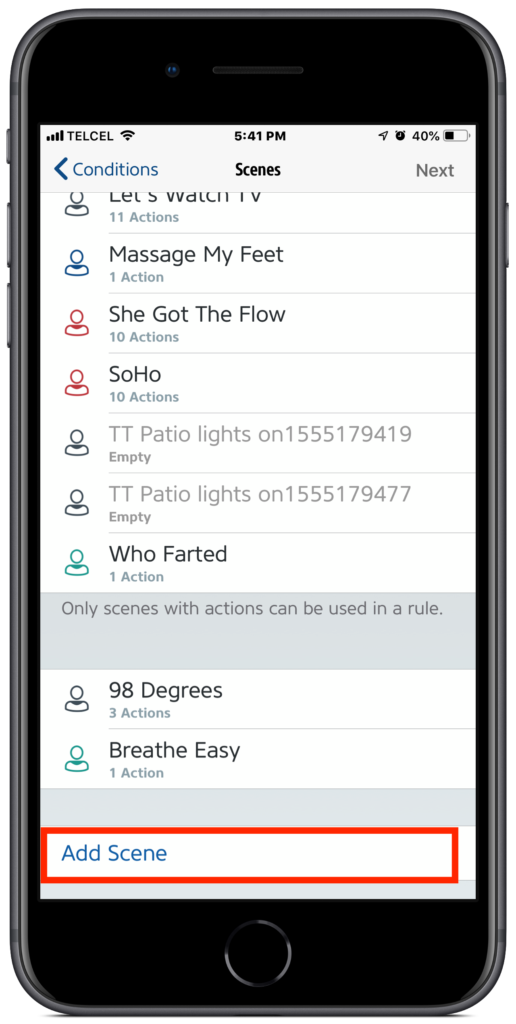
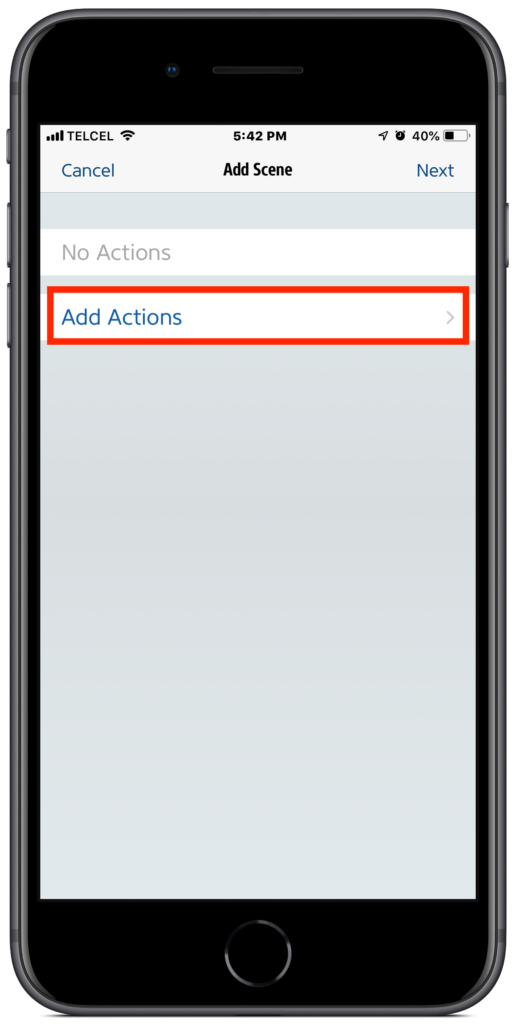
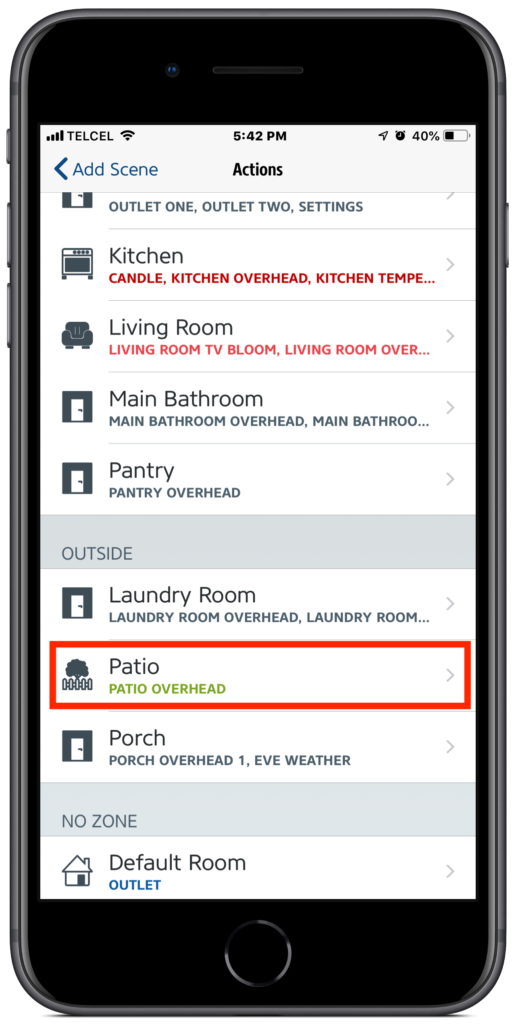
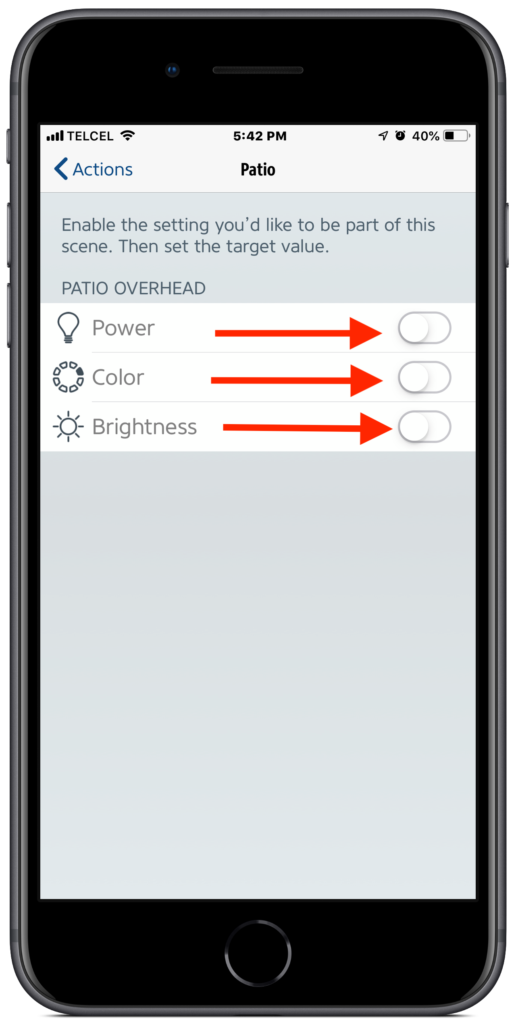
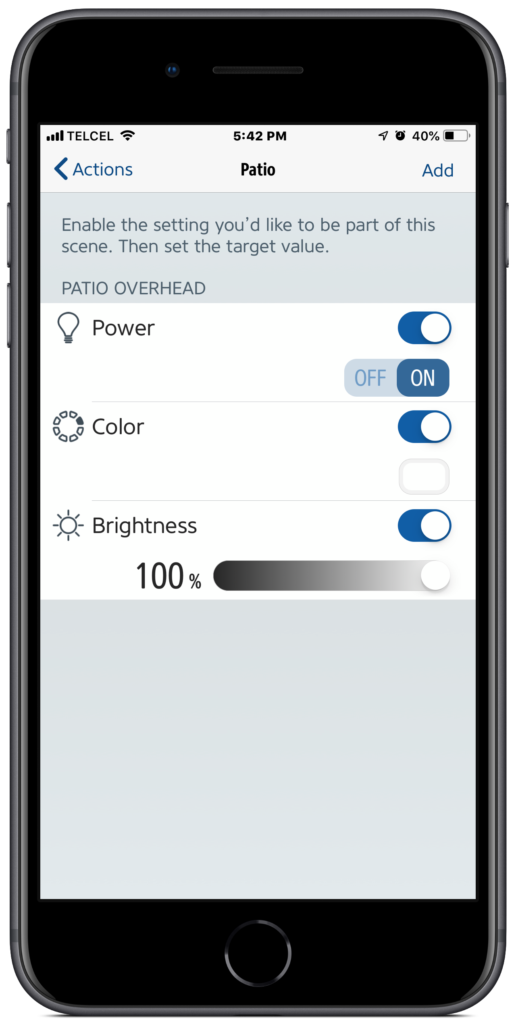
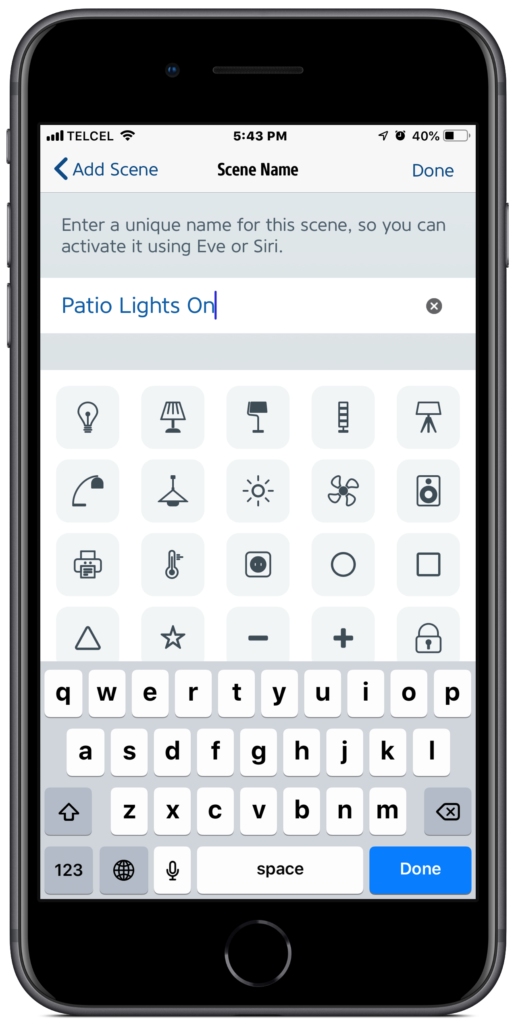
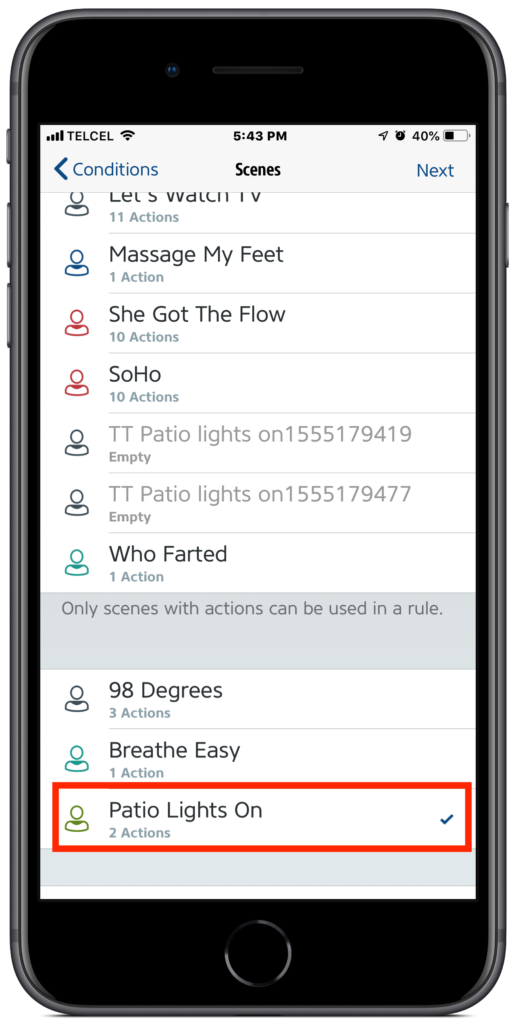
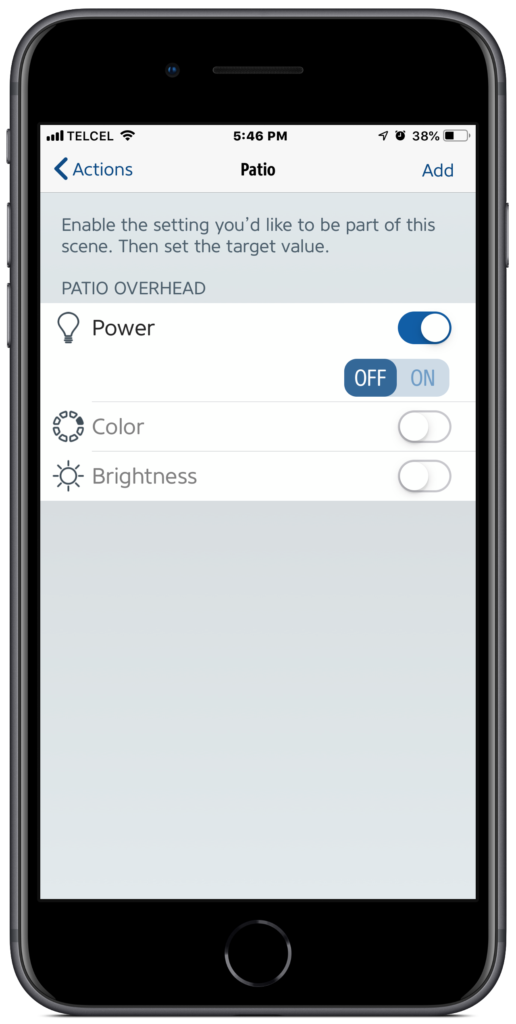
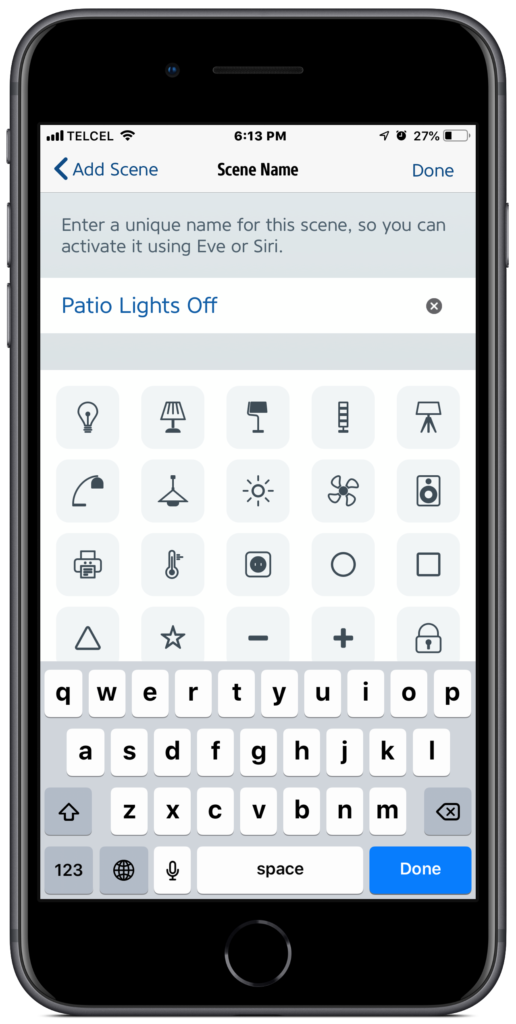
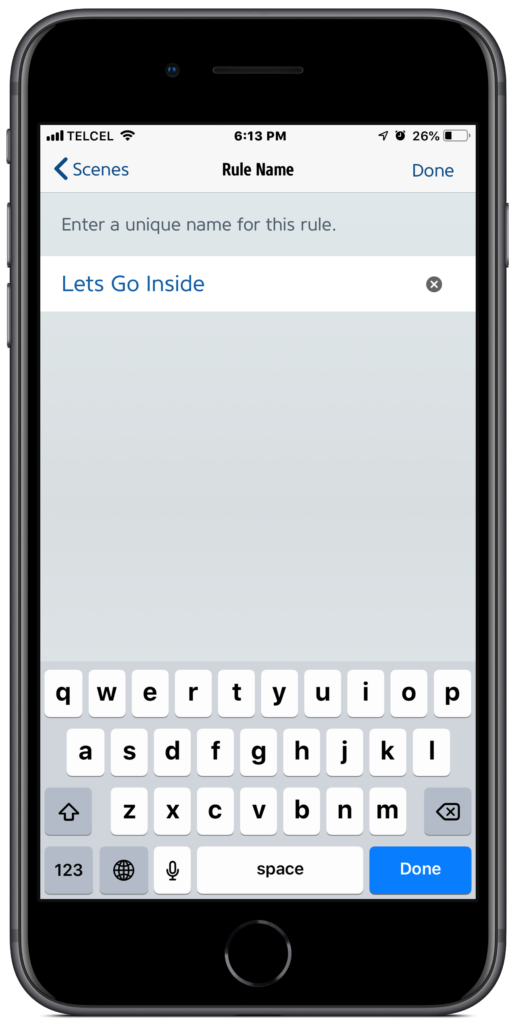
3. It’s time to take action! Unlike Apple’s Home app, n the Eve for HomeKit app, we can’t simply use a single accessory as an action, we need to create a scene. If you’ve already created a scene then you are one step ahead and you can move along, but for posterity’s sake, we’ll take you through the steps. Scroll down to the bottom of the list of scenes and tap “Add Scene”, then “Add Action”. The accessories are organized by “Rooms” in “Zones”. Since I want my “Patio” lights to switch on when the door opens, I’m going to select this accessory in the “Patio” room. Something to keep in mind with the Eve for HomeKit app is that it isn’t enough just to select and accessory and go on about your business, we need to select the accessory and make sure that it’s power state is correct along with any other configurations. Once this has been taken care of, we’ll tap “Add” at the top right. Now we’ll name the scene. You might want to choose something that’s easy to remember as this is also a name that Siri can recognize if you want on-the-fly control of the scene or if by some unfortunate set of events your automation fails to trigger. After ensuring the correct scene is selected, it’s time to name the rule. This won’t transfer to Apple’s Home app but again, it’s useful to name it something you’ll at least recognize if you need to troubleshoot down the line.
4. Tapping “Done” will finalize your automation, but you’re not quite done yet unless you never want the accessory to turn off. If you do, we’ll need to perform the same steps as above modifying the “Trigger” from “Open” to “Closed”. You’ll probably want to keep the same “Time Conditions”, though. You’ll want to adjust the “Action” setting it to “Off” as its power state, as well as appropriately naming the “Scene” and the “Rule”. You can now open and close your door to your hearts content knowing that you’ll have plenty of light!
Final Thoughts
So that’s how you do that! I wouldn’t exactly call it flashy or even impressive, but it is functional, practical, and adds that element of home automation magic that just makes mundane, everyday tasks a little bit more fun. Of course, this is just one example, and a basic one at that, of how we can use HomeKit and contact sensors for home automation and you are really only limited by your imagination (I suppose the types of things you have that open and close).
Do you use contact sensors for security or for fun? What unique ways have you found to use contact sensors? The comment monster below is hungry for your words. Our social media is abuzz with all sorts of HomeKit happenings @myhomekithome.
Links & Resources
We use income-earning affiliate links.
We may receive a small commission on purchases made using links on this page at no extra cost to you.
