This is the first in a series that we’ll be doing over the coming weeks and months that is all about my favorite part of HomeKit and home automation in general and that is, well, automations. This video explores what we can do in HomeKit when people arrive to a location. The truly smart thing about a smart home is automation. Yelling at Siri to turn on a fan or open the garage door while perhaps cathartic, isn’t always appropriate in a civilized world, at least as far as 2019 standards are concerned. Though Siri is a loyal companion, wouldn’t it be preferable to just have things happen in the background without your express, conscious input? This article marks the first in a series of guides intended to explore the different automations that are possible in HomeKit, their customizations, and some specific use-cases. We’ll begin with an overview of each of the 5 main types of automations as presented in Apple’s Home app starting with automations based on when people arrive.
This is the first in a series that we’ll be doing over the coming weeks and months that is all about my favorite part of HomeKit and home automation in general and that is, well, automations. This video explores what we can do in HomeKit when people arrive to a location.
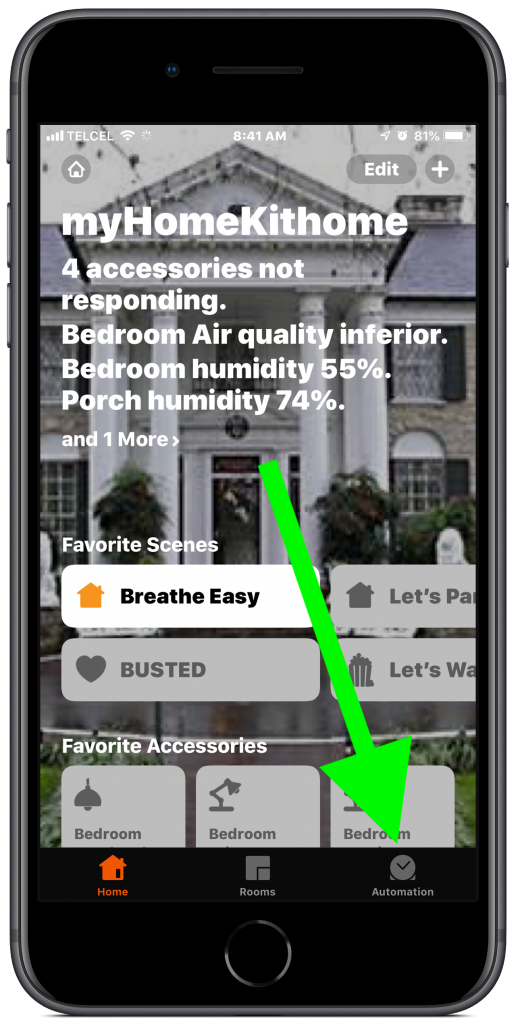
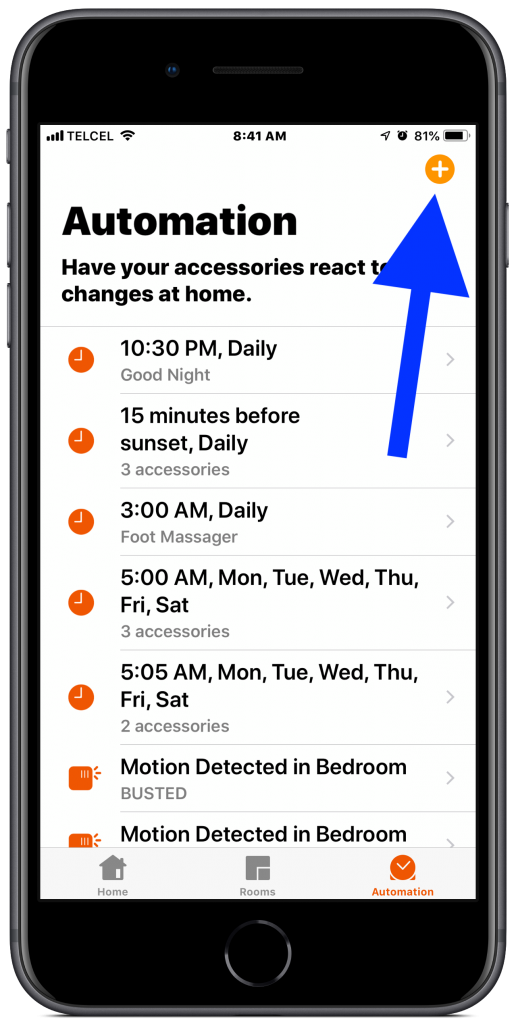
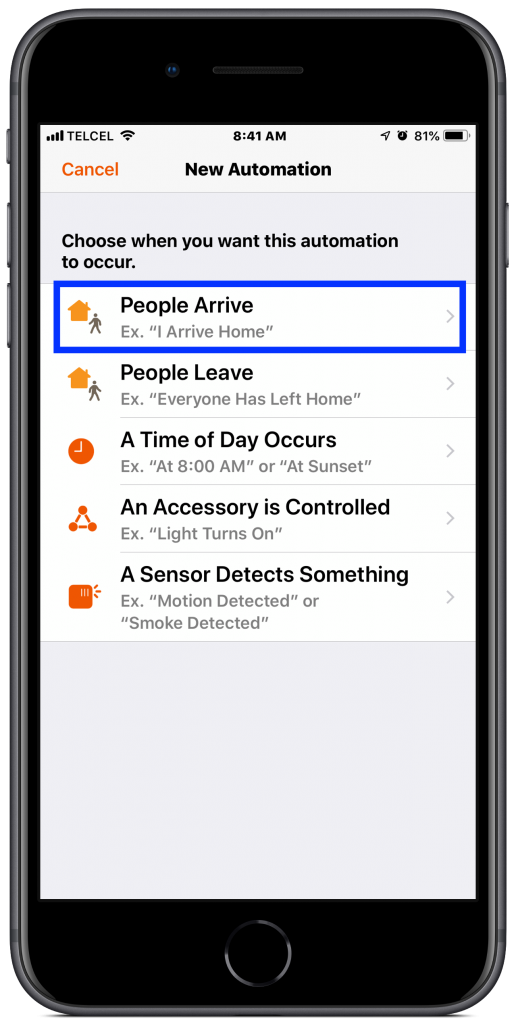
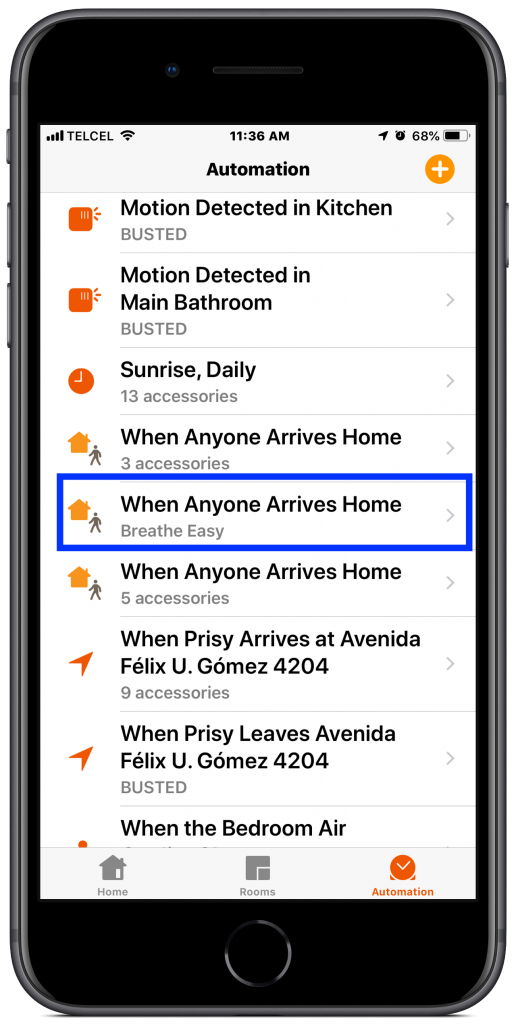
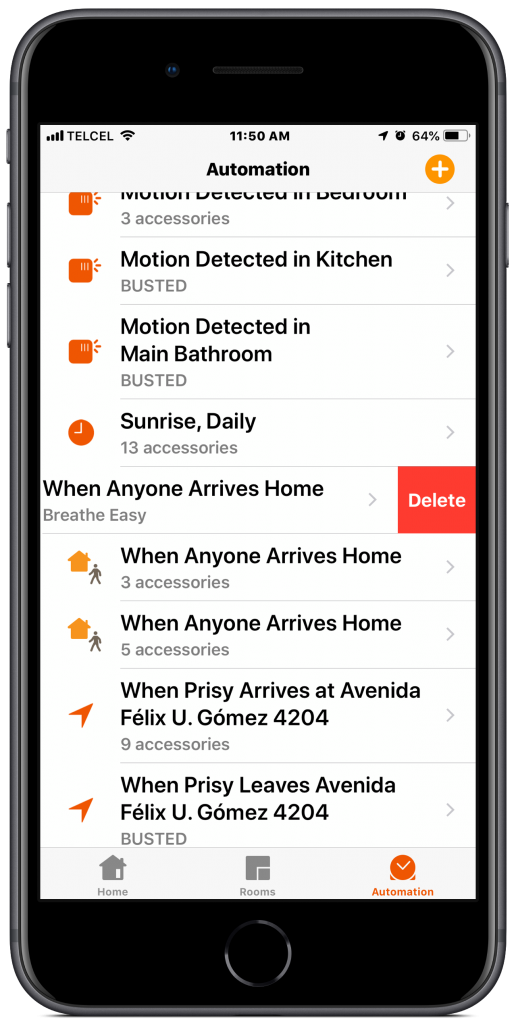
1. After tapping on the “Automations” tab on the bottom right, we’re brought to our list of existing automations which is where we can edit them if need be once we’ve created them. Tapping the plus (+) button at the top right brings us to a page with 5 different options and today we’ll focus on the first, “People Arrive”. This automation will allow us to trigger scenes or accessory actions based on people arriving to locations. The person will need to have Location Services enabled, as well as have allowed Home to use their location. These two permissions can be found in the device’s Settings.
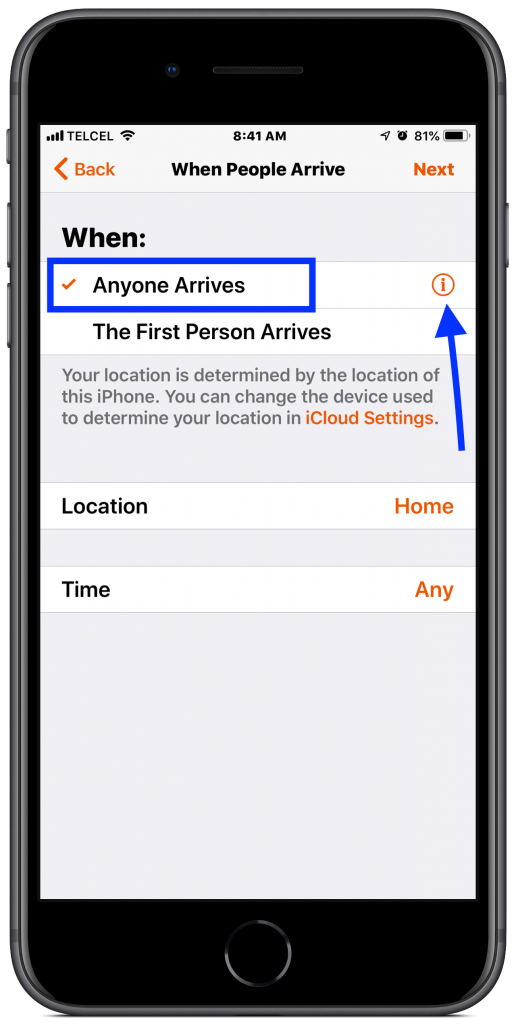
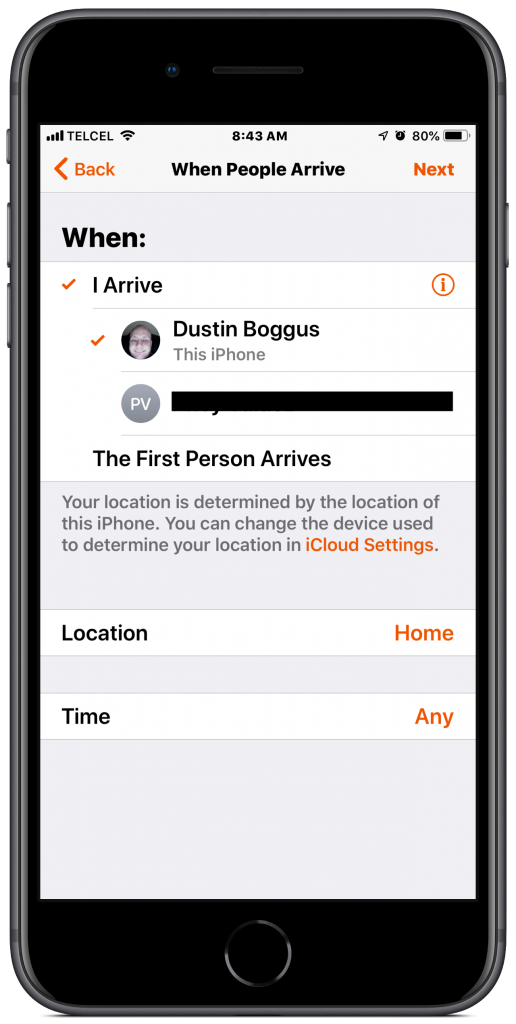
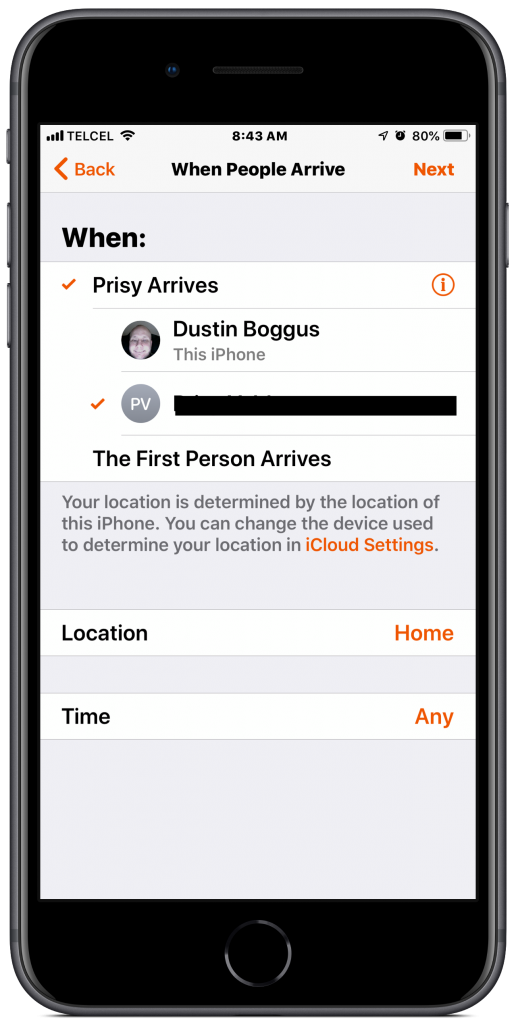
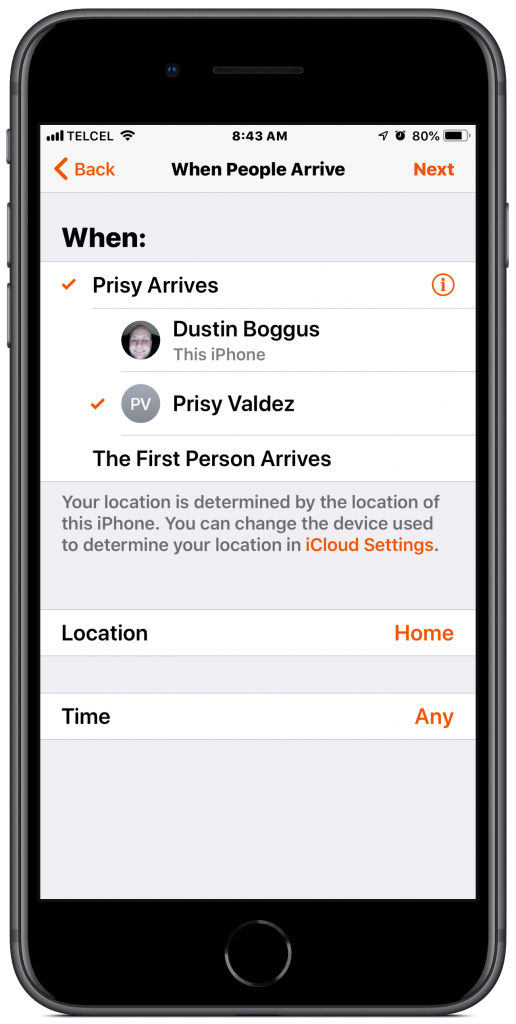
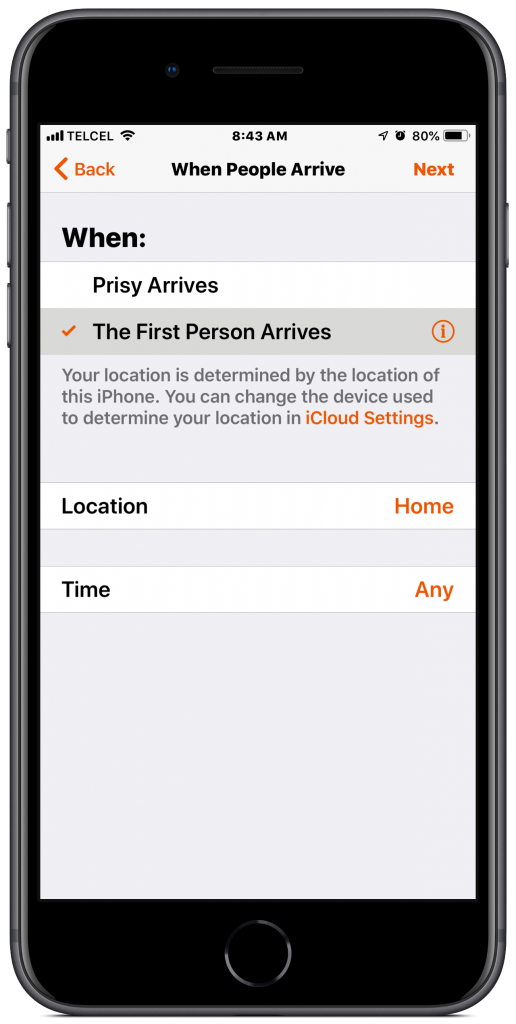
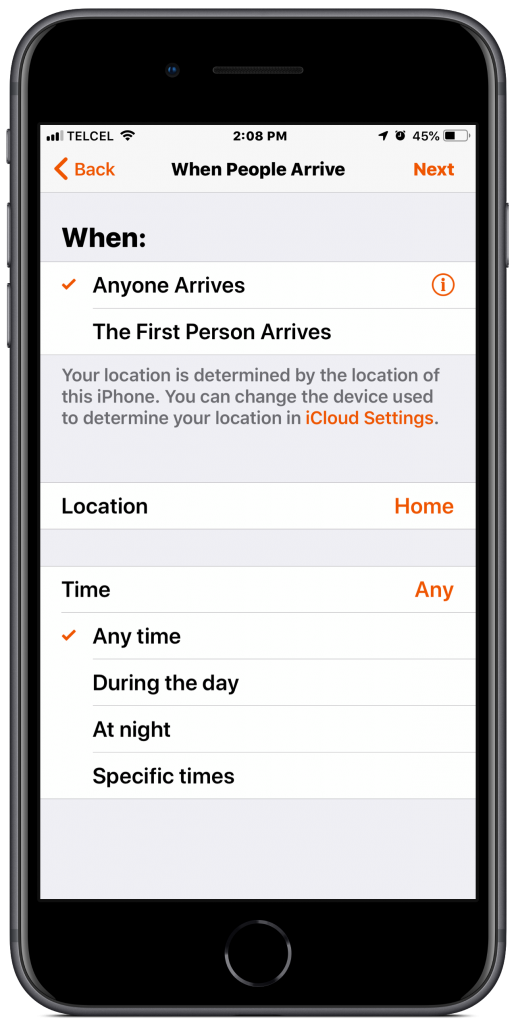
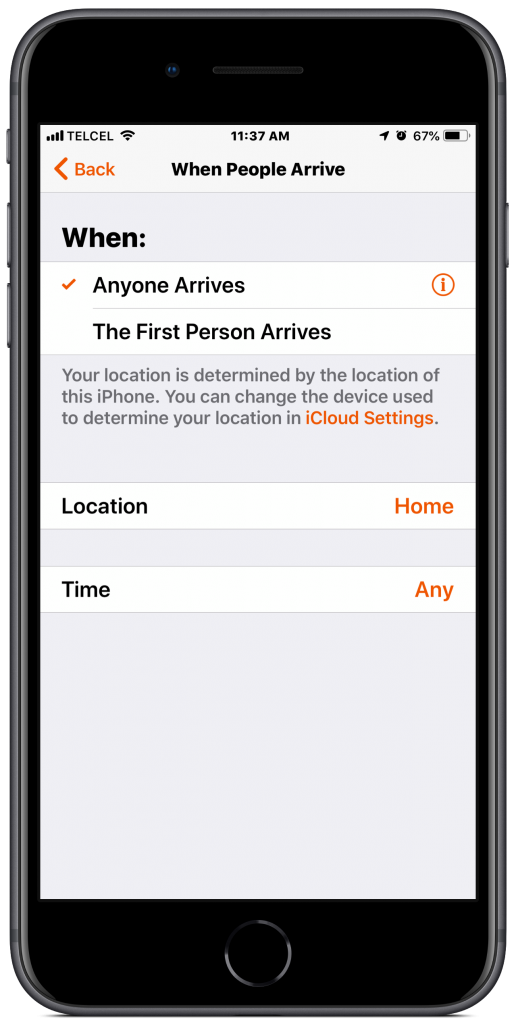
2. By default, when “anyone arrives” is selected, but we can adjust this according to the individuals that have been invited to the home. We also have the option of choosing when the first person arrives at home meaning that the automation will not run if someone is already home. This can be particularly handy for lighting.
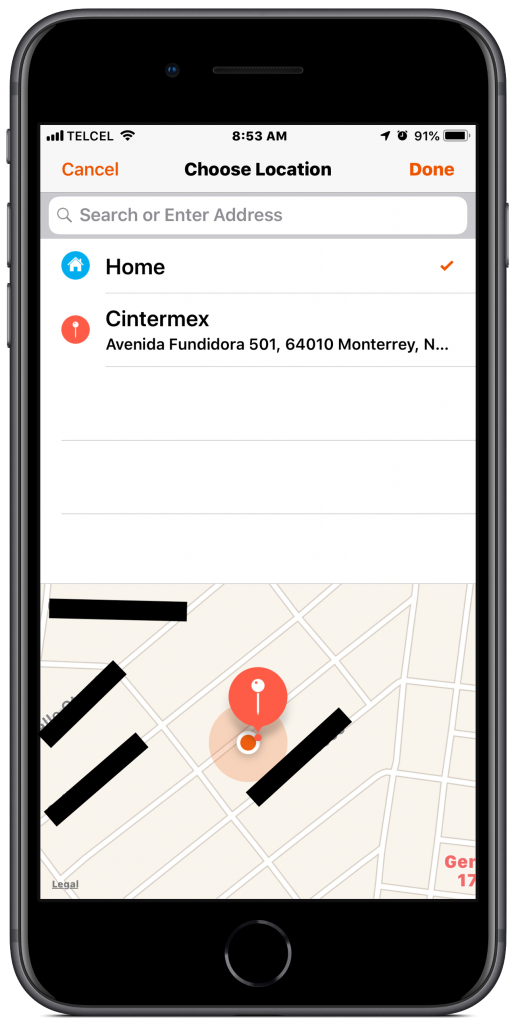
3. After a long day, arriving home to an open garage, a well lit entryway, a comfortable temperature, and a hot cup of tea is a wonderful comfort easily accomplished once we set our location to “Home”.
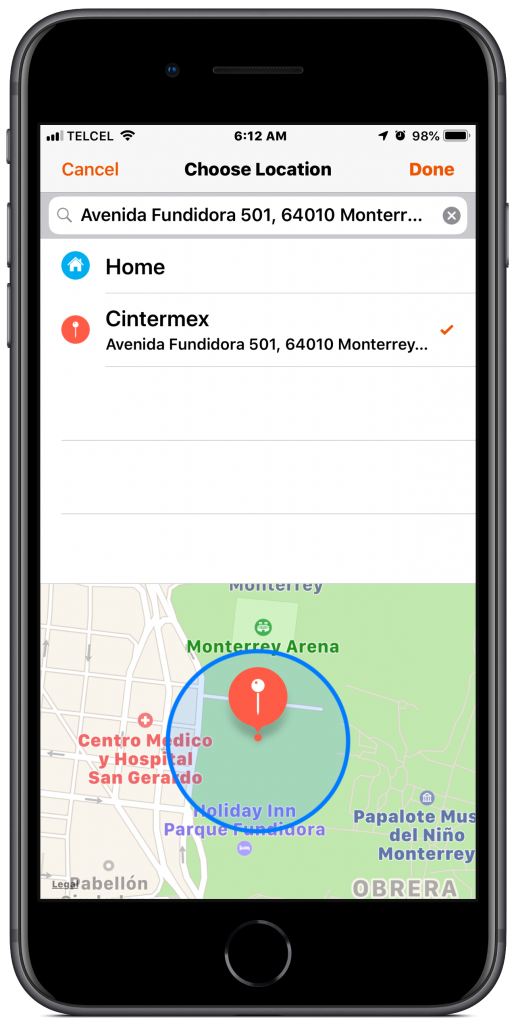
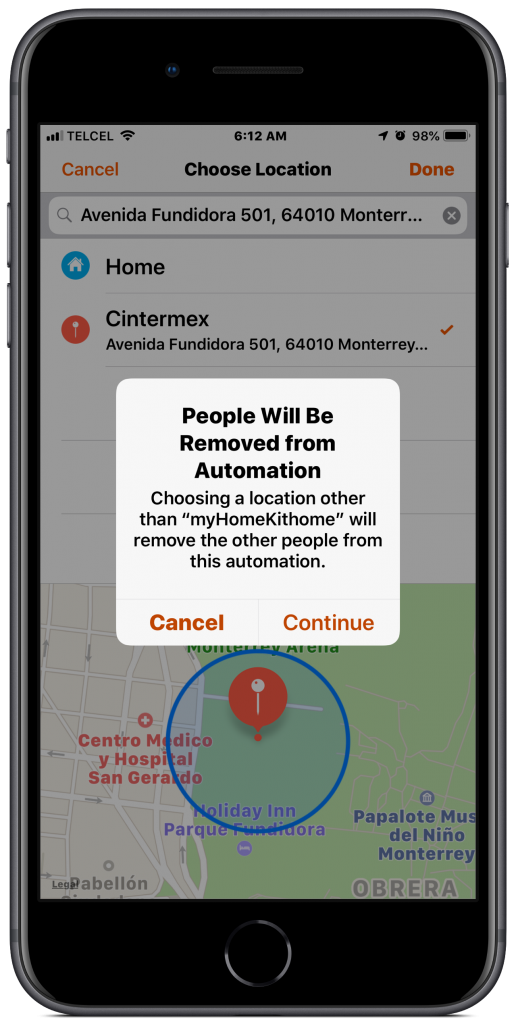
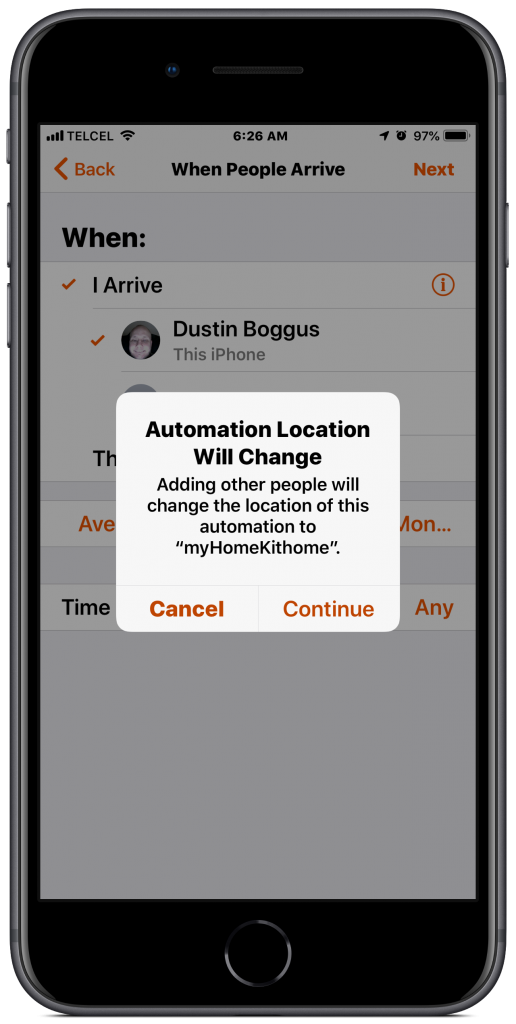
However, this can be even more powerful. We have the ability to change the arrival location which triggers actions in the home. For example, I like to know that my wife made it to work safely each morning. So when she arrives there, all of the color lights in the house go green. One thing to definitely keep in mind and I fought for many hours to discover this fact, and it took several calls to Apple support, but for security reasons if the location is other than “Home”, you must set up the automation from the individual’s phone who will be arriving at the location e.g. I had to set up the automation above from my wife’s phone. I suppose it’s Apple trying to ensure that people are giving their permission to be stalked. If you don’t do this, the Home app simply removes the person from the automation or changes the location to “Home”.
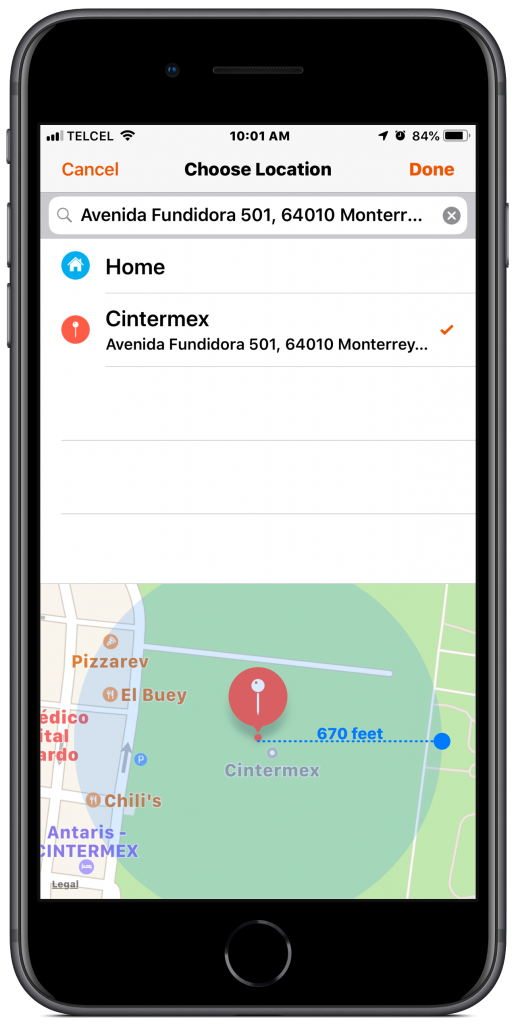
I have no idea why this is and should definitely be addressed in iOS 13, but although we can adjust the geofence radius for locations other than the home, we cannot do it for the home which, for me, is counterintuitive as the home is the most likely location where you might want to adjust the geofence range. You can work around this by using a nearby address, but it’s still something that should be fixed. To adjust the geofence radius for locations other than the home, simply tap on the location’s pin on the map and drag the small blue dot away from or toward the pin.
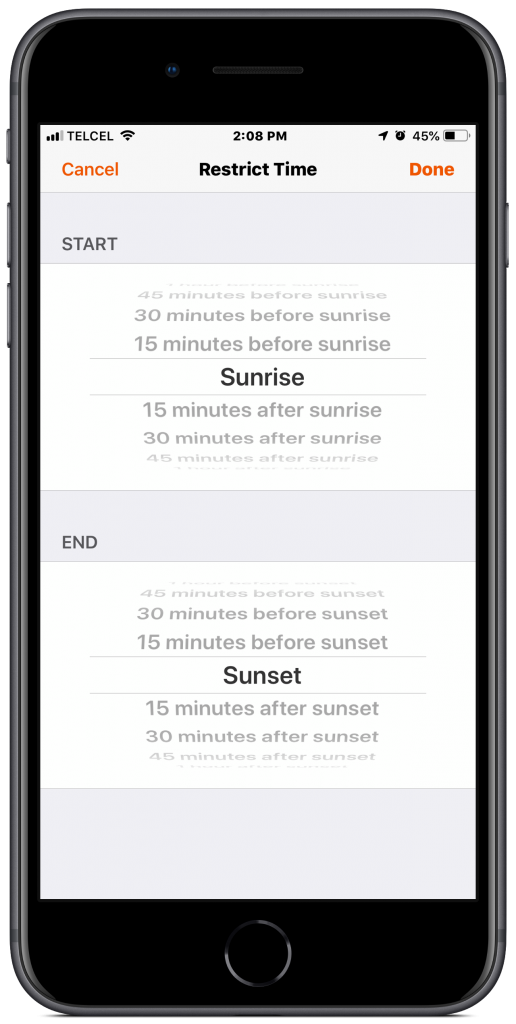
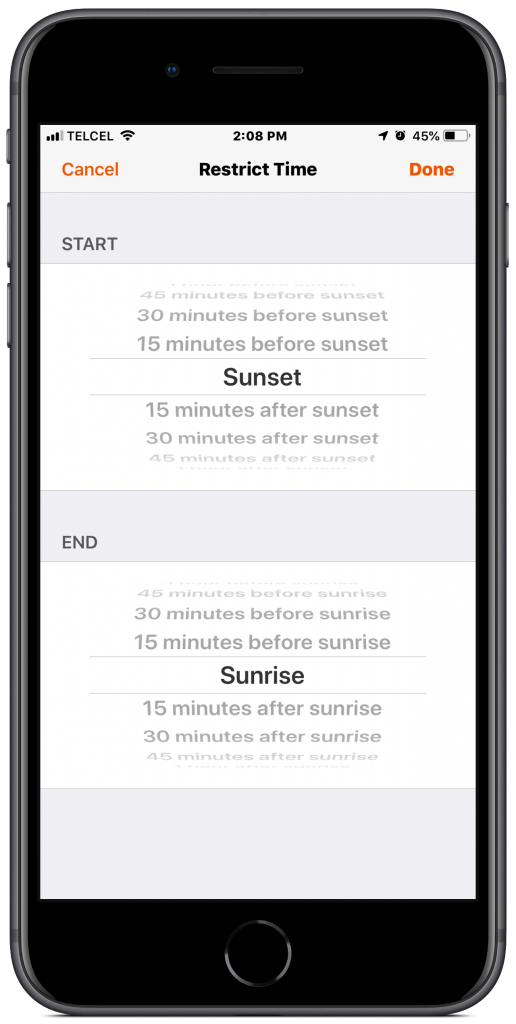
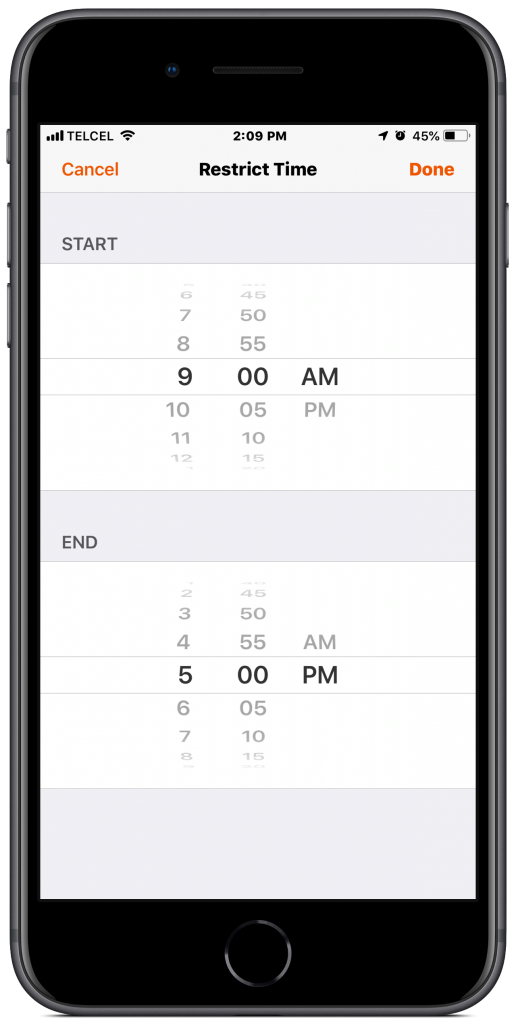
4. We can also add a “Time” condition to our people arriving automation. If you want the automation to trigger regardless of the time, leave “Any” selected. We can also limit the automation to “during the day” or “ at night” with the added benefit of having the automation begin or end up to one hour before or after sunrise and sunset in 15 minute increments. We can also select a “specific time” window for the automation. In the automation I described earlier, for example, I’m not so concerned about tracking my wife’s comings and goings throughout the day so I set a window from between 8:30 AM and 10:30. I left the gap before the beginning and ending of the window wider than I expect so that I account for traffic issues or potentially detect if I need to take action.
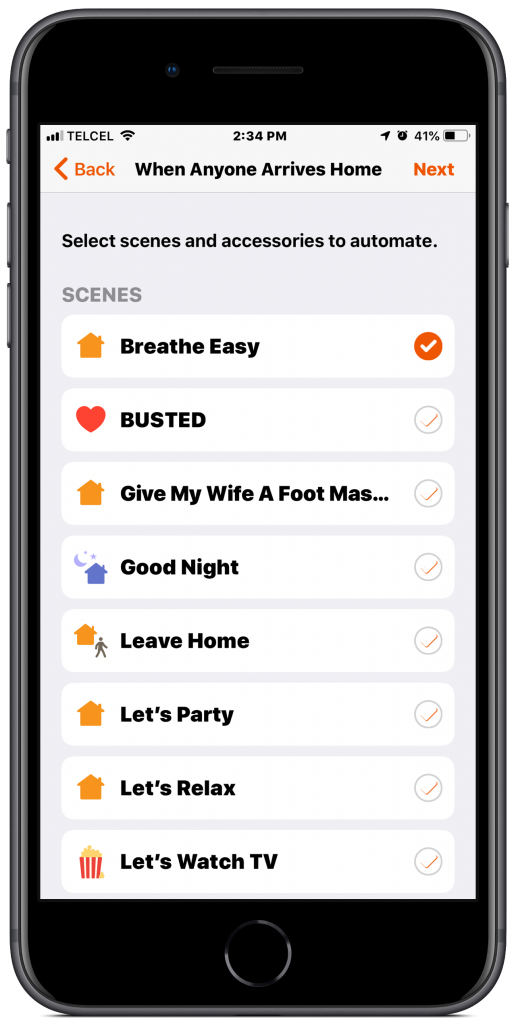
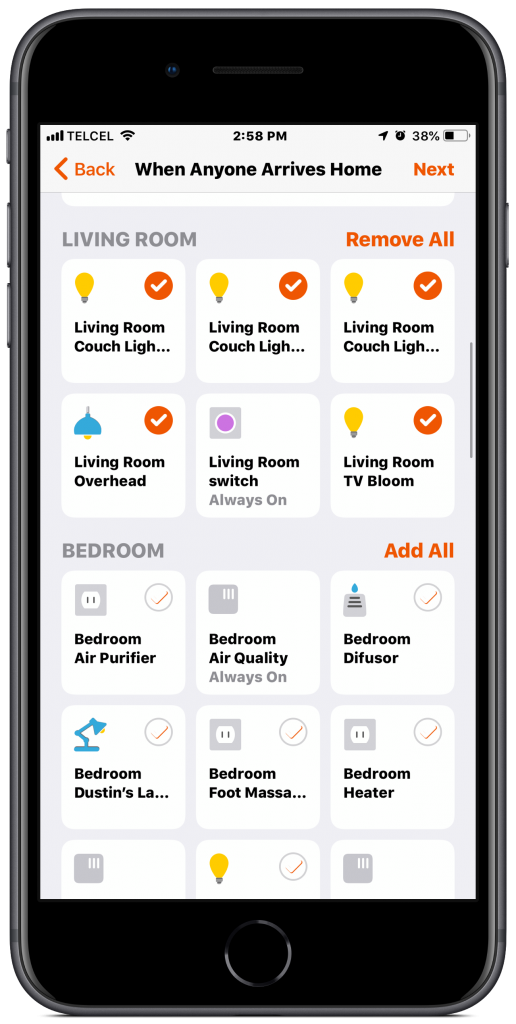
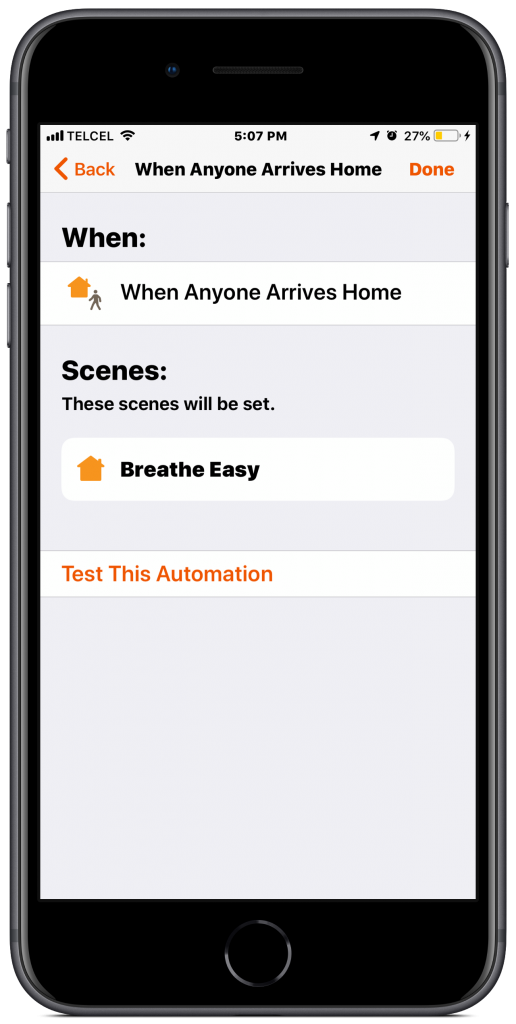
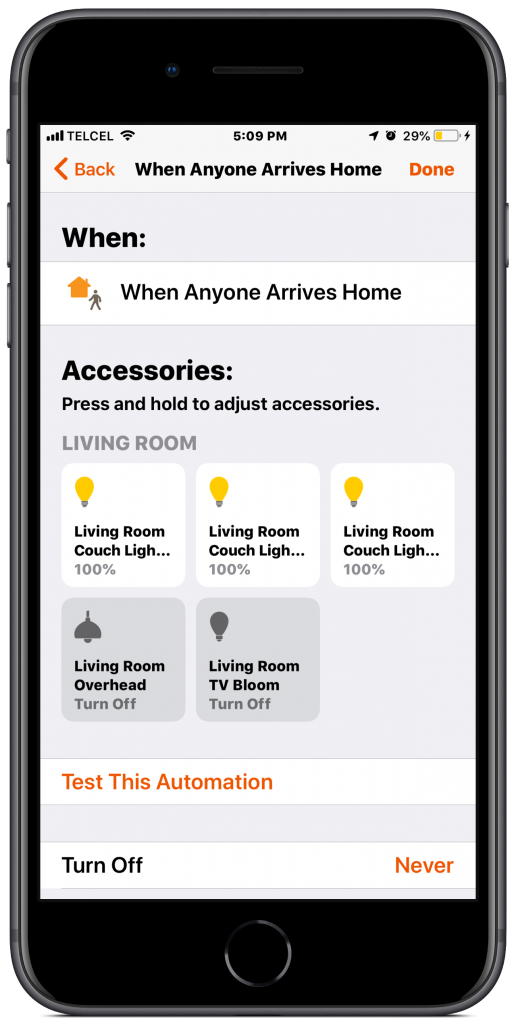
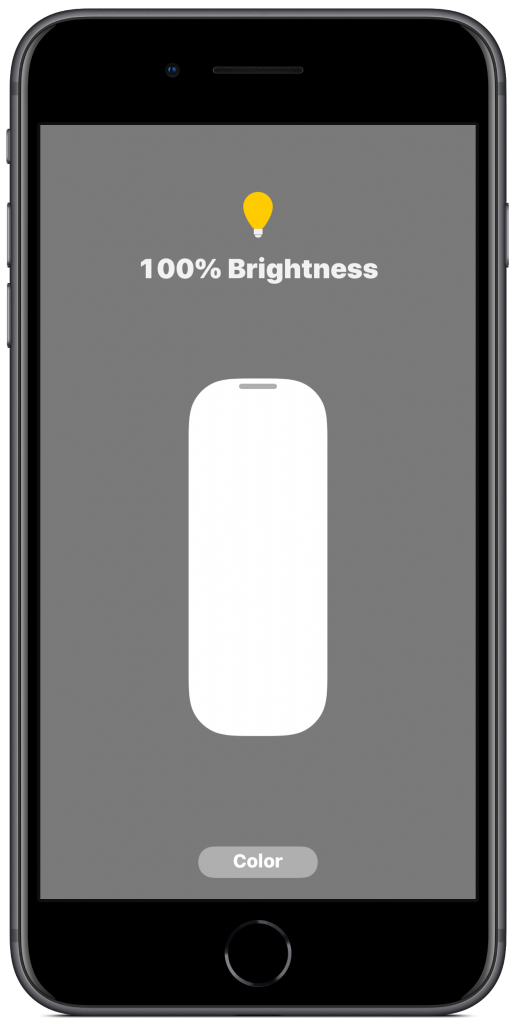
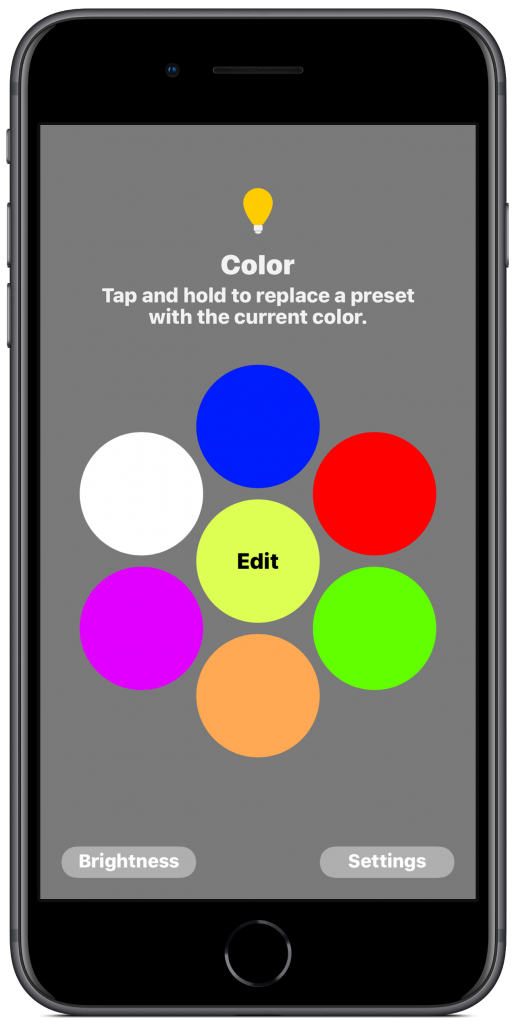
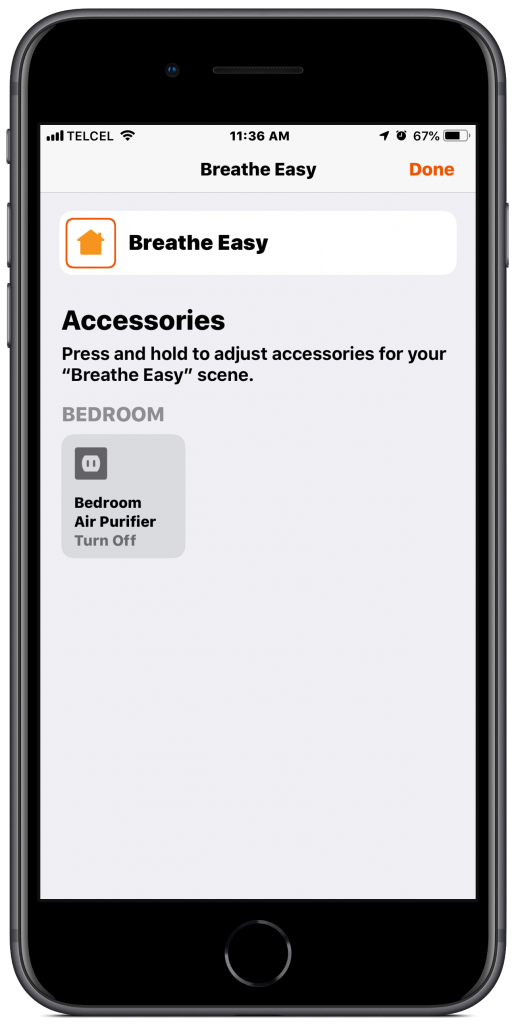
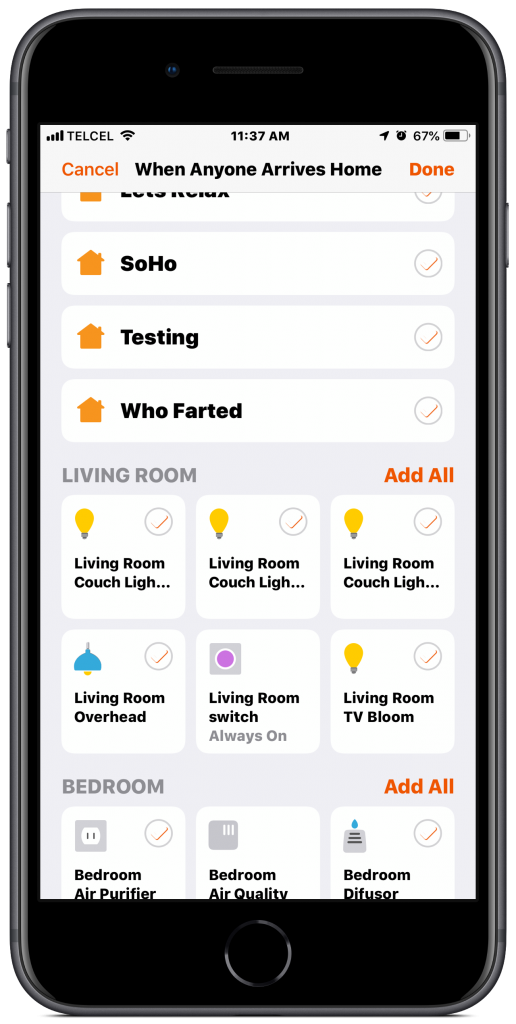
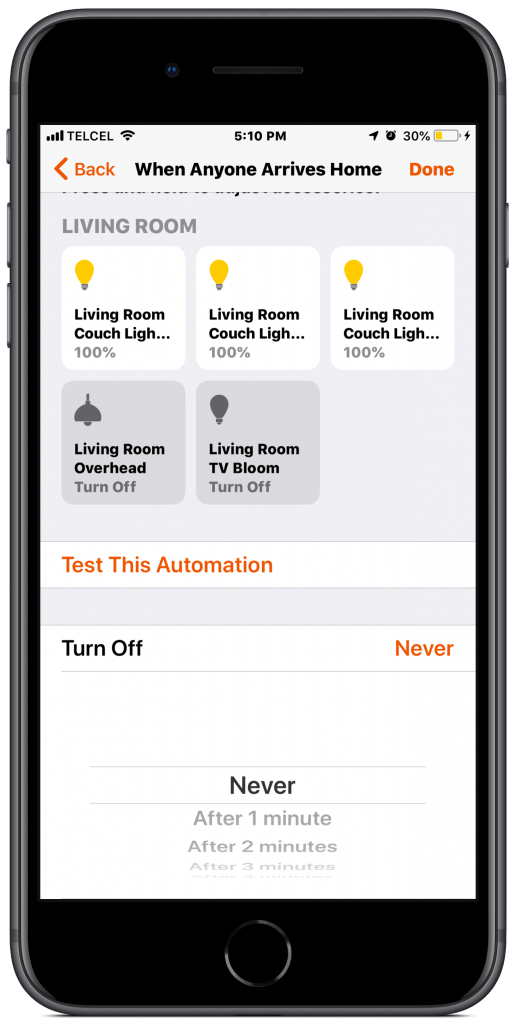
5. Now that we’ve taken care of the “Who?”, “Why?”, and “When?” For our automation, we’ll look at “What?” Will happen based on our conditions. If you already have a scene you want to use, go ahead and select it. If you don’t know about scenes, check out this post. Otherwise, you can pick and choose which accessories you want to trigger for the automation. Remember that if an accessory could be on and you don’t want it to be for the automation, include it here, but make sure the power state is set to off by tapping the accessory’s icon. We have all of the same granular controls that we always do for our accessories in automations so customize to your heart’s content. It’s always a good idea to “Test the Automation” just to make sure that everything does what you want it to do and once you are satisfied, tapping “Done” will set the automation into motion… after being uploaded to the cloud.
If you prefer to select accessories as opposed to going the scene route, you can also select when you would like the accessories in the automation to “turn off”. You have the option of 1, 2, 3, 4, 5, 10, and 15-minute delays as well as 15-minute increments after that up to an hour after the automation has been set. The “turn off” option is not available if you choose a scene as scenes technically cannot be turned off, but that’s a rant for another day.
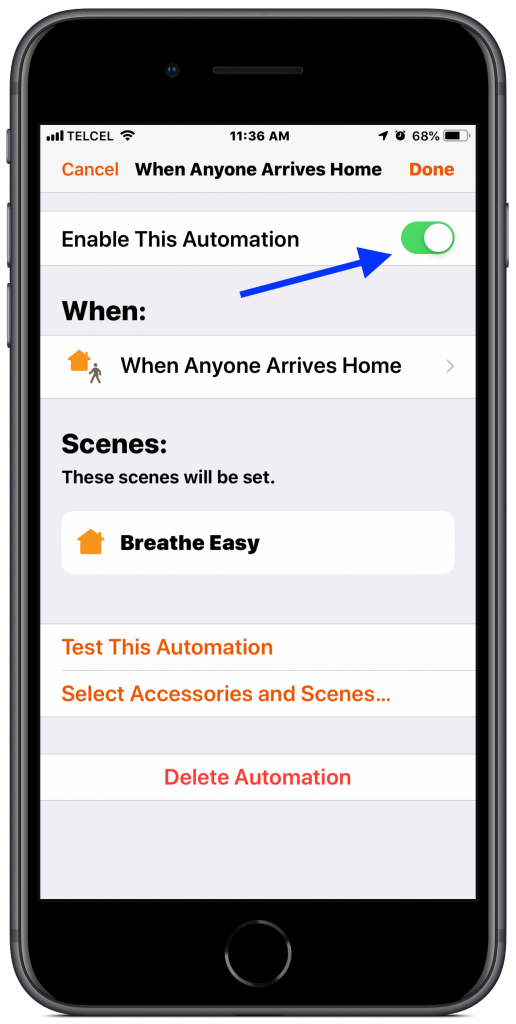
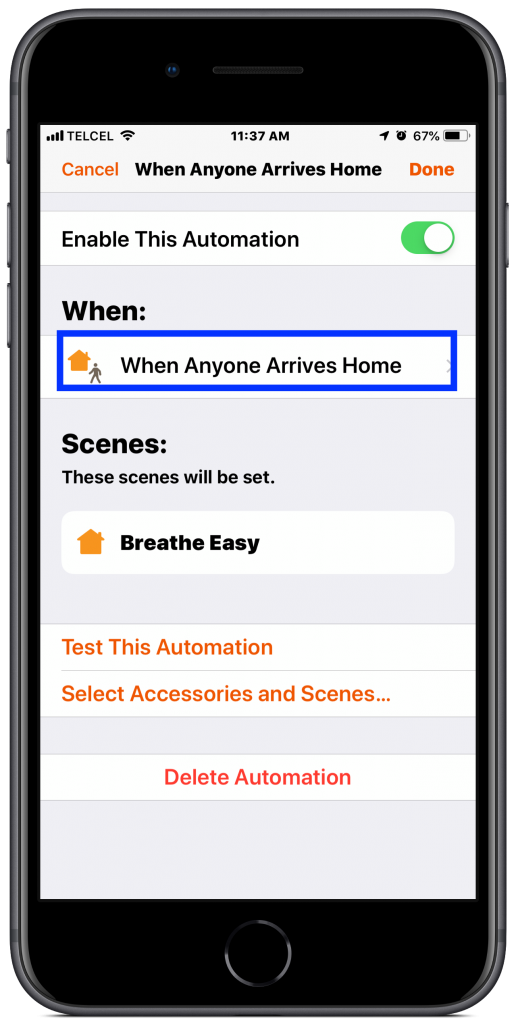
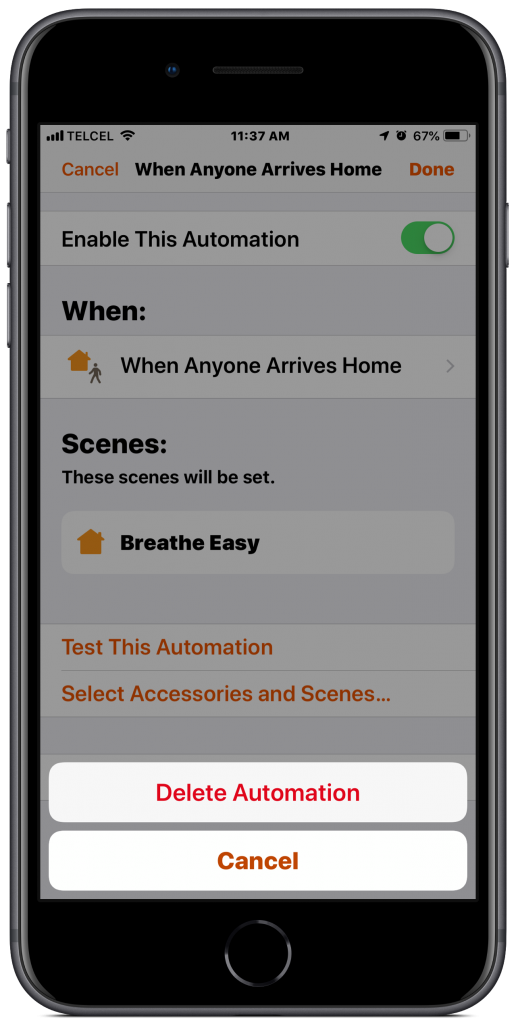
6. After testing the automation and tapping “Done”, our newly created automation now appears in the “Automations” tab and tapping on it, we can tweak it if we want. There may come a time when you want to pause the automation for some reason and here we can toggle it on and off. We can also adjust of the “When” info as we went through above by tapping the automation’s icon. Interestingly, if you chose a scene and tap on it’s “Settings”, you can adjust the actions of the accessories in that scene, but you’re not able to add or remove accessories from the scene. You’ll have to go to either the “Home” or “Rooms” tab to do this. Additionally, we have the ability to adjust which accessories or scenes are included in the automation. Finally, if you want to get rid of the automation altogether, “Delete Automation” is the button for you. Alternatively, you can swipe left on the automation from your list of automations to remove it for those times when you absolutely, positively must delete an automation as quickly as possible.
Final Thoughts
After a long day at work, it’s nice to come home and relax and these automations can definitely make the experience more enjoyable. You can set temperatures, lighting, boil water, draw the shades, and more all without lifting a finger or even saying a word. It’s magic. There are also very practical uses other than the creature comforts of warming up your foot massager and turning on your popcorn machine. Having the lights already be on and the door unlocked when you’re coming home with arms full of groceries is just plain helpful. It’s also pretty useful to be able to set automations for locations other than the home for places that you regularly visit like school, work, or the gym.I would like to see Apple apply the same geofence radius adjustments to the home as it does with alternate locations, though. Also, I would like the option of turning on push notifications when an automation has been triggered.
What automations have you scheduled when arriving home? Do you have any that use locations other than your home? Share your ideas in the comments. Don’t forget to follow us on all the social media @myhomekithome.
We use income-earning affiliate links.
We may receive a small commission on purchases made using links on this page at no extra cost to you.
